MILEAGE:
121.271 km or 75354 mi
Date: October 2021
After this high mileage, some serious signs of wear were found during the obligate maintenance work. It looks like the 690ty-high performance engine is slowly reaching the end of its lifetime. 🤔
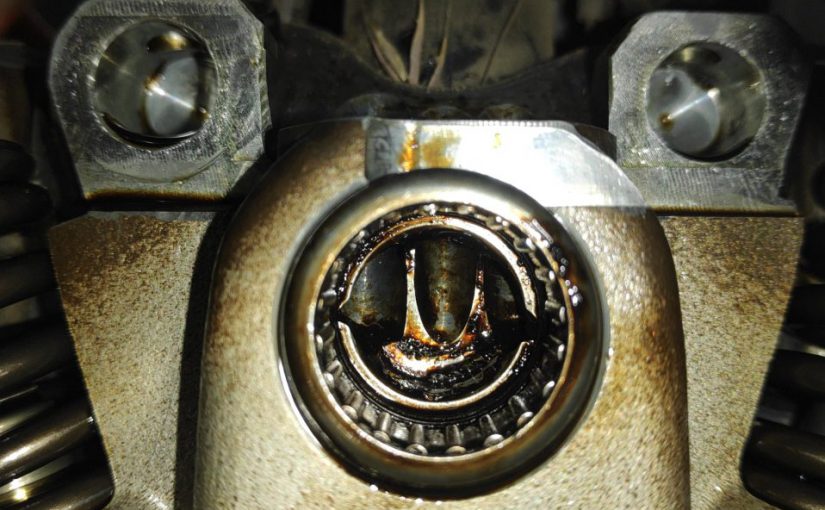
I began this maintenance with the easiest part: The oil change. What I…
found made me worry about the engine health. It looked like there was some serious wear. The fine shapes on the magnet are surely coming from abusing the engine along the Trans Euro Trail this summer, whilst temperatures have overcome 45 °C or +113 °F. The source of these shapes is gearbox related. But what made me really worry was this …
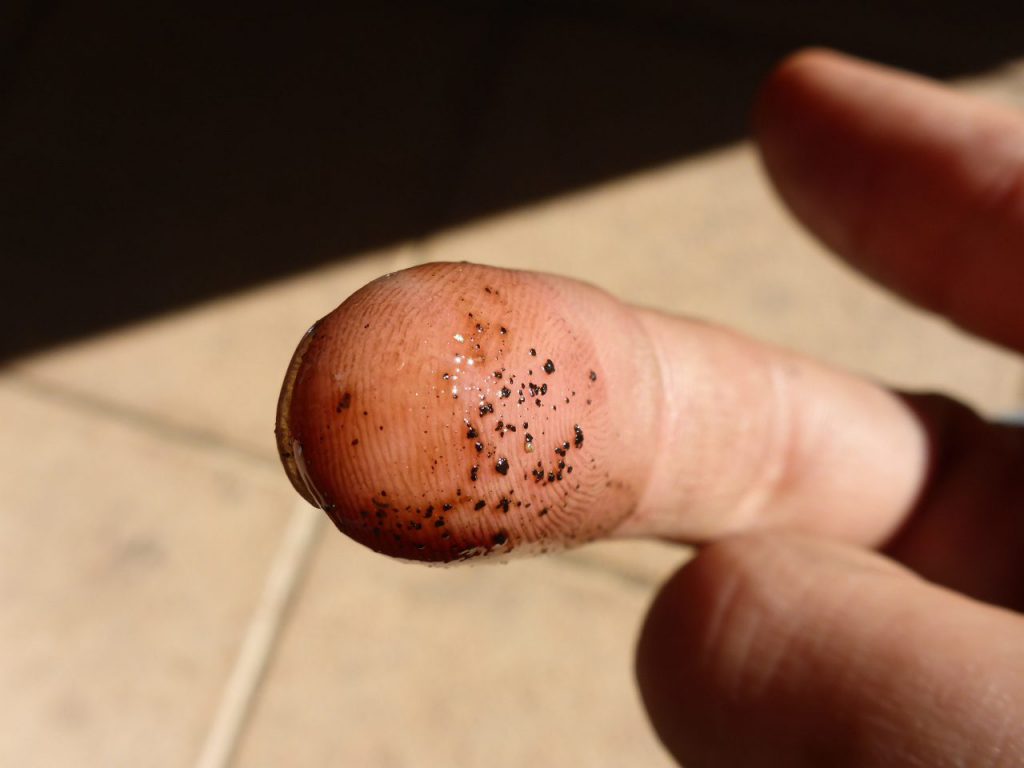
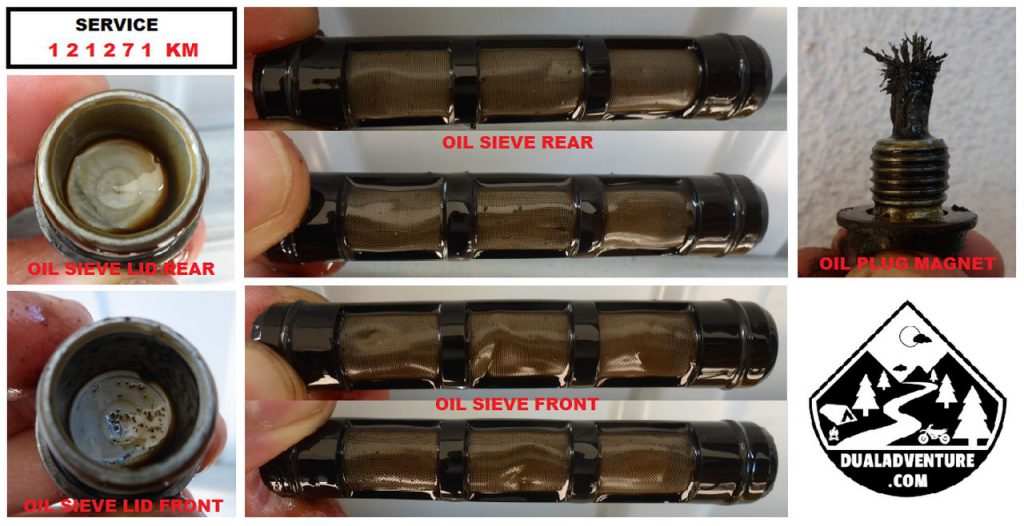
black stuff in the front sieve / front sieve lid. It looks like this stuff is coming out of the crankshaft area, which can mean two things: Oil overheated at the piston bottom, changed to ash and fell off (unlikely), or a bearing is producing heat and is turning the oil into ash. When put into open fire, this dark grains only glow up. They don’t smell like plastic. I’m still not sure where this stuff is coming from. It’s very unlikely that this stuff comes from somewhere out of the gearbox area, because the oil stream is all filtered in this part of the engine. A tiny hole from the crank shaft ventilation would be the only but very unlikely entering-possibility. But I think as long the engine didn’t smoke blue when fired up in cold state, the bearings in this area are holding up.
Another thing what I recognized is that the engine noise generally went louder the last 15.000km or 9.000mi. About 5000km or 3000mi back I got awareness of a new ticking noise coming from the head area, most of the time when the engine was very hot, hearable between 3700-4200 rpm whilst using engine break. For additional science, I stuck a …
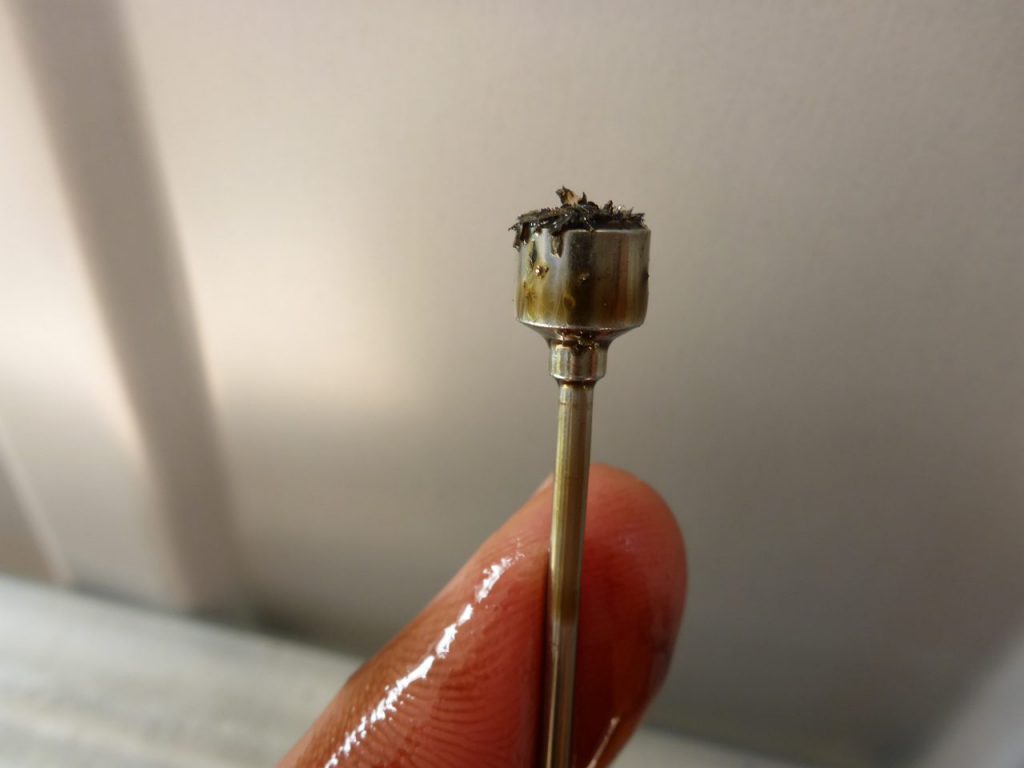
magnet right into the backside sieve hole and this metal grains came out. Yup, the transmission suffered a lot the last 10.000km or 6.200 mi. But as long as it works, I won’t touch anything there. 🤔
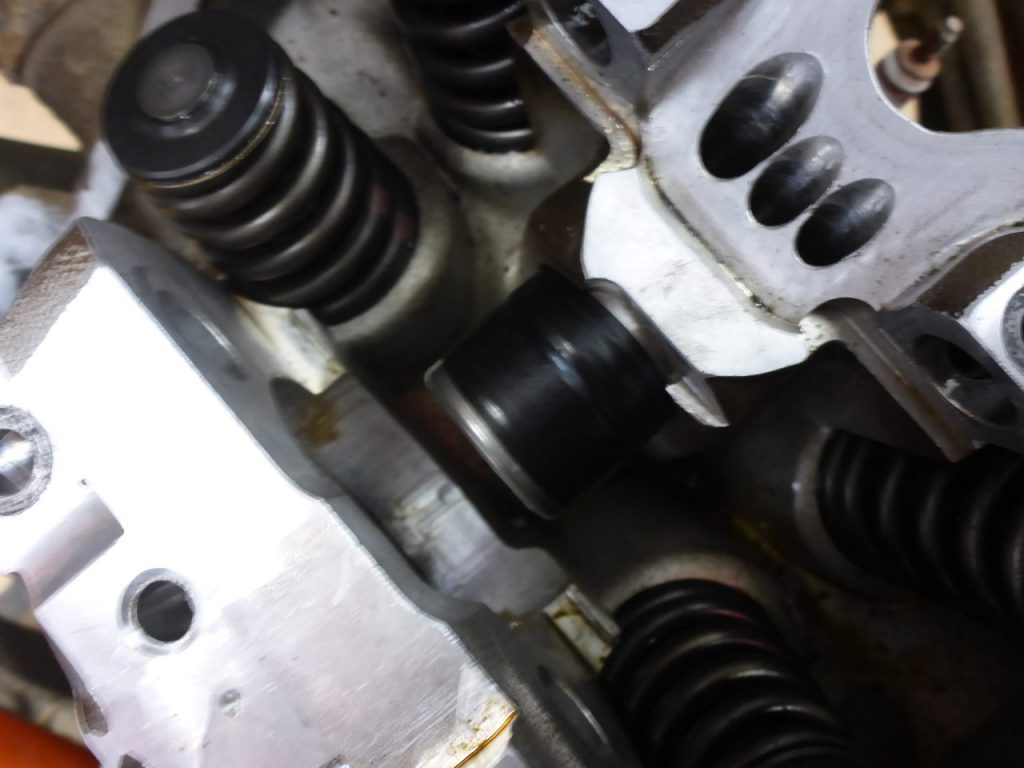
Next step was to look after the source of the ticking noise. Therefore …
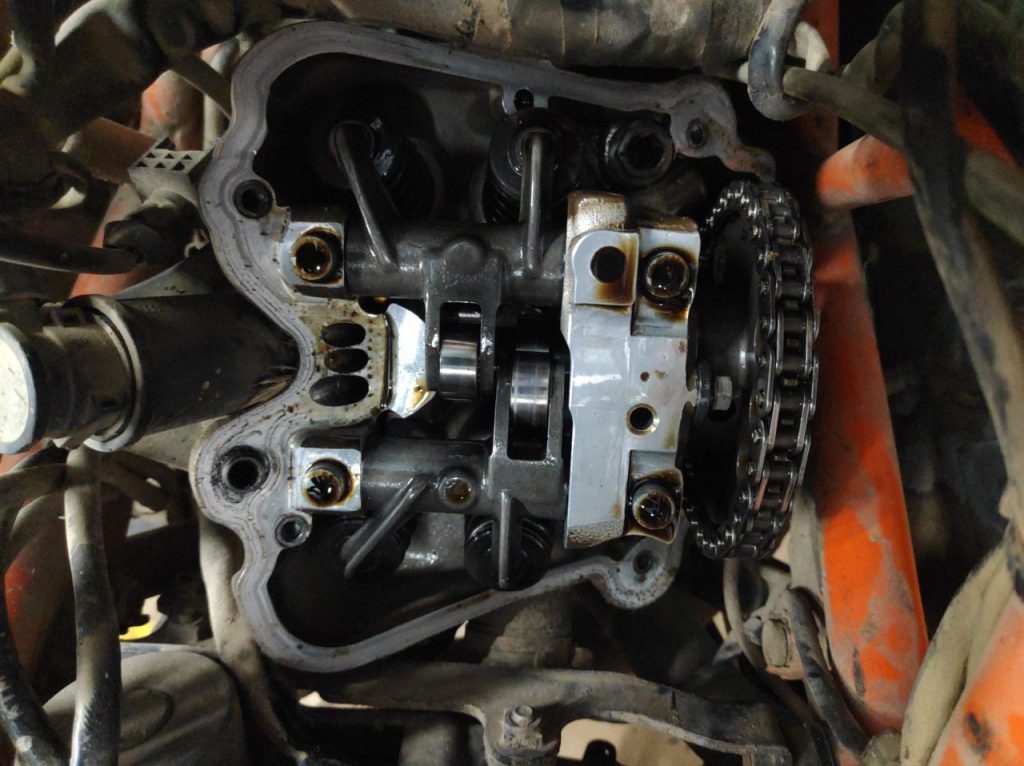
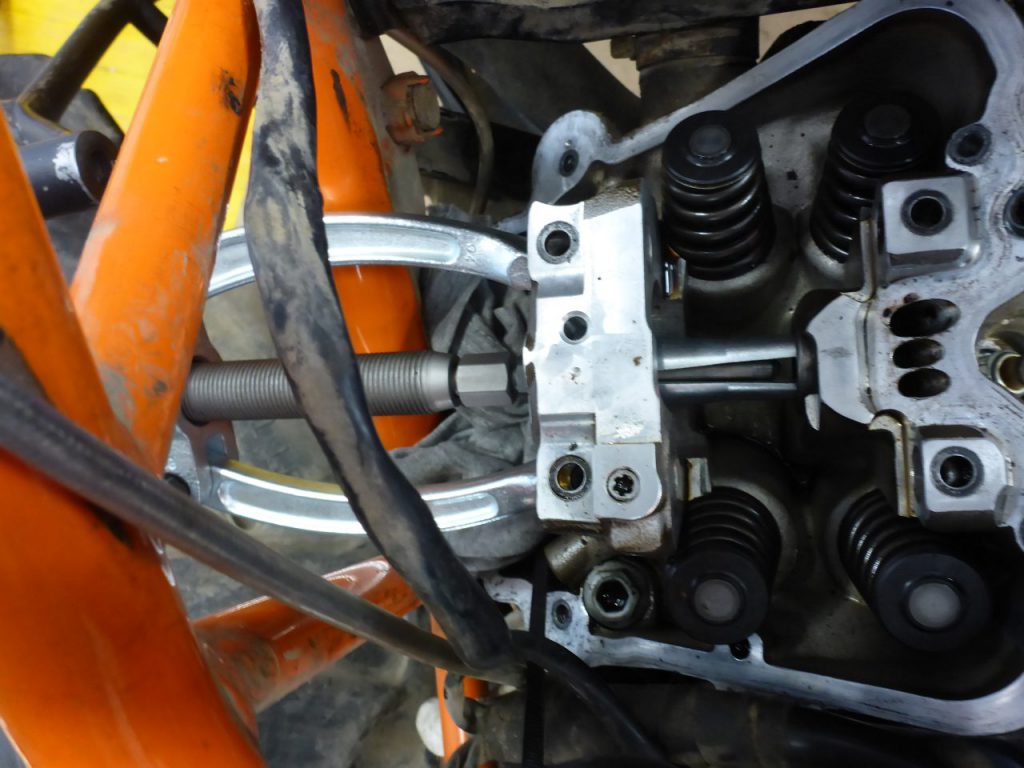
I removed the valve cover and had an inspecting eye …
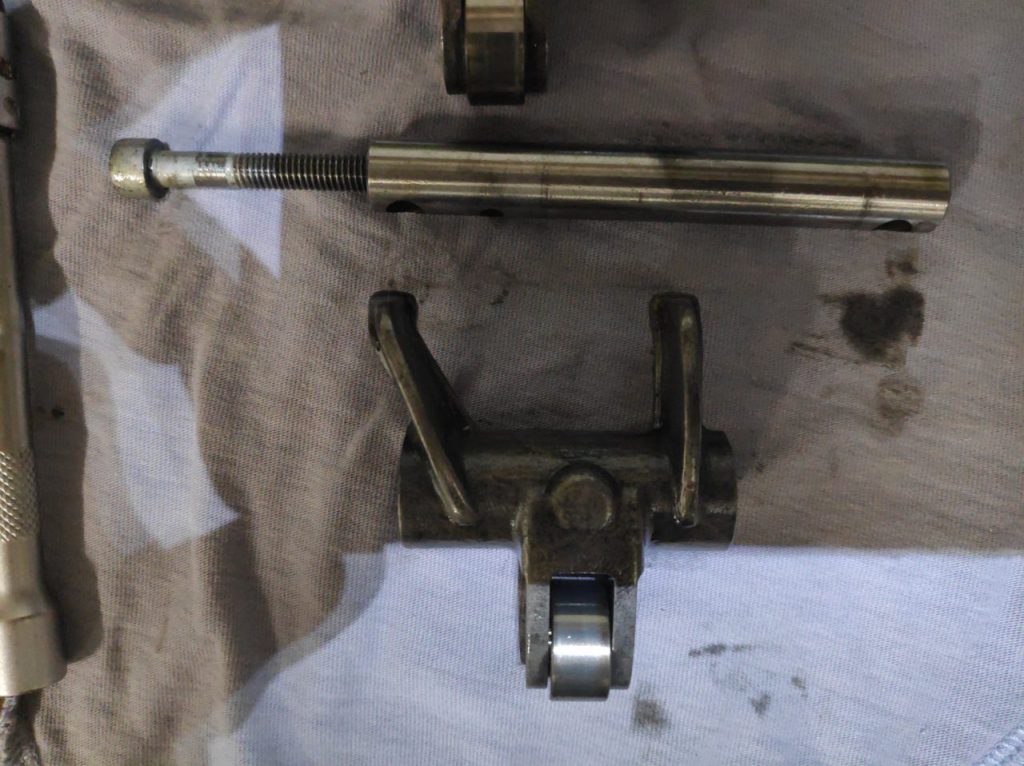
on the rocker arms and …
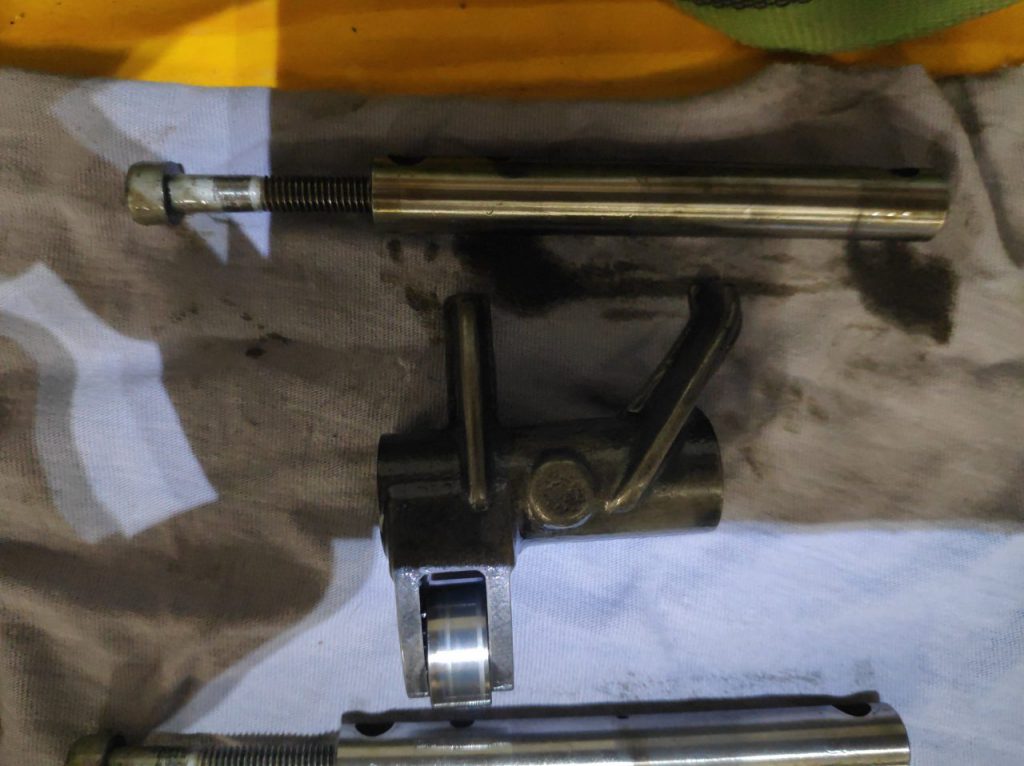
the rocker arm axles. All parts looked fine for being in duty since their last change about 30.000 km or 18.500mi back. But then I had a closer look at the …
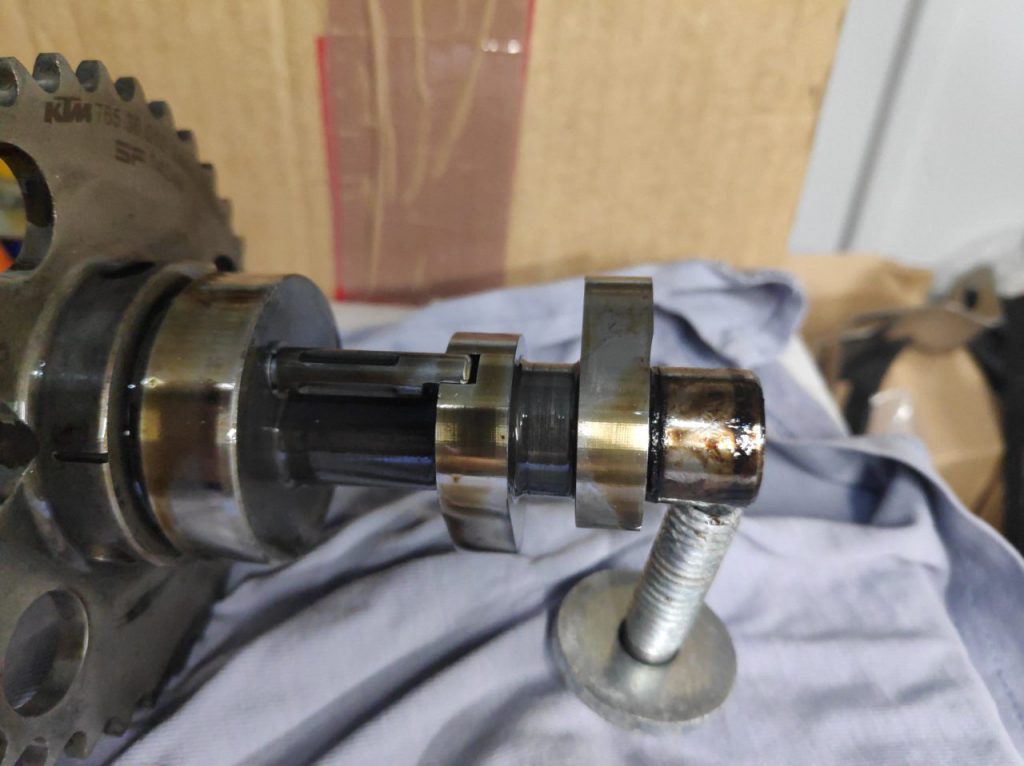
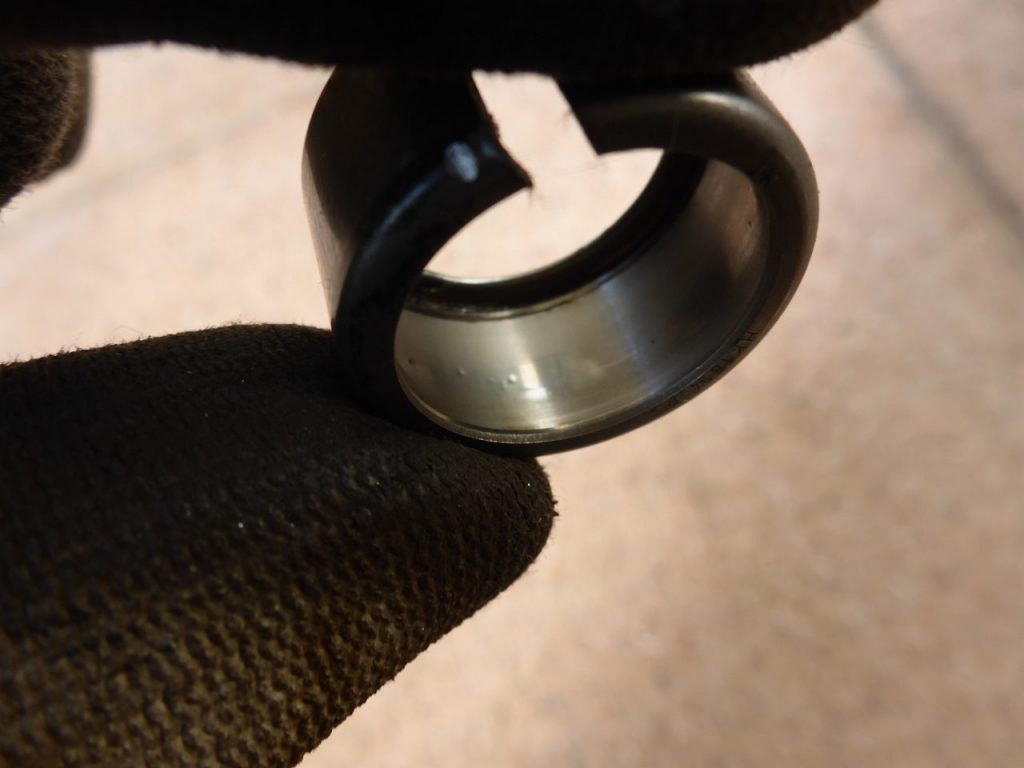
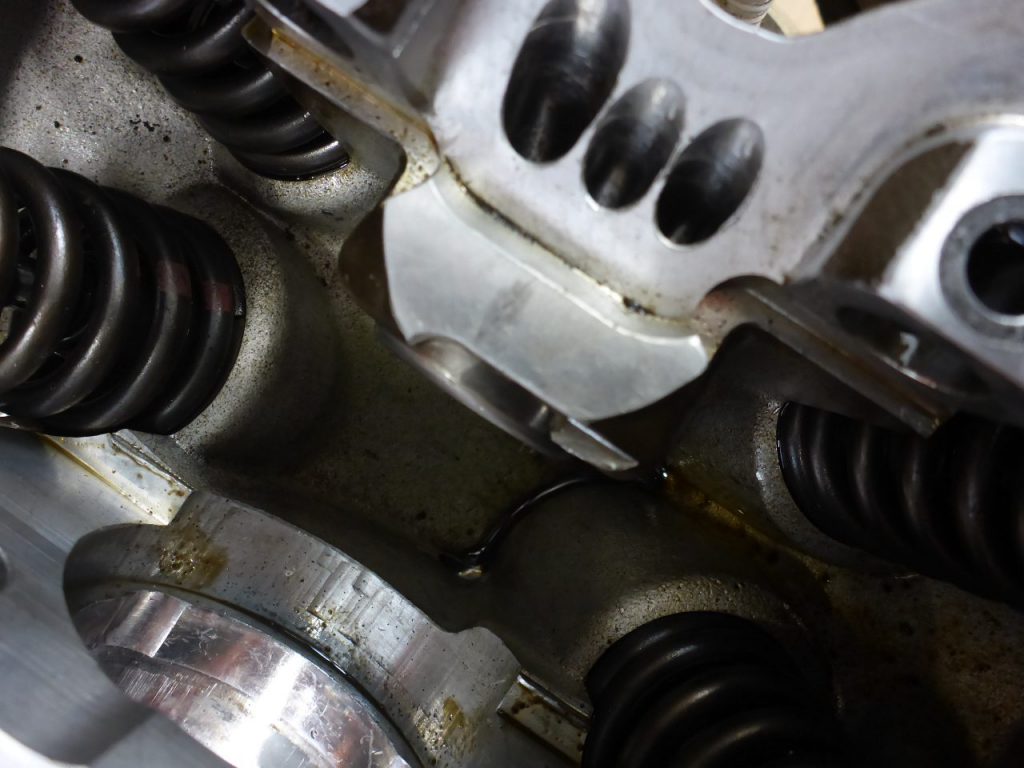
camshaft itself. It was obvious: The small camshaft bearing …
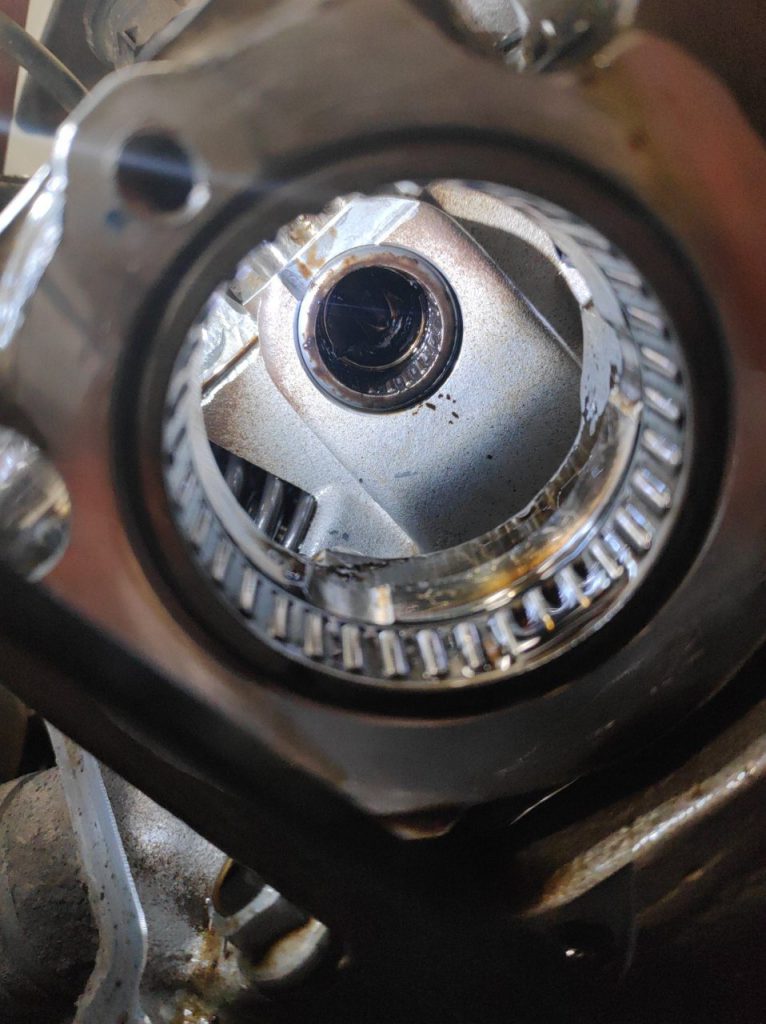
had suffered some damage and produced too much heat. There was burnt oil everywhere in the needle bearing …
and also on the camshafts running surface was some ash/dark oil visible. Luckily, the bearing was still running free, thence both parts didn’t damage each other. *phew* 😅
When turning the overheated bearing with the finger, the motion felt slightly crunching and uneven. So this bearing is trash. Luckily, I recognized this before it collapsed completely. I put the …
the open engine under some dust protection and waited for the ordered necessary tools, for continuing the work.
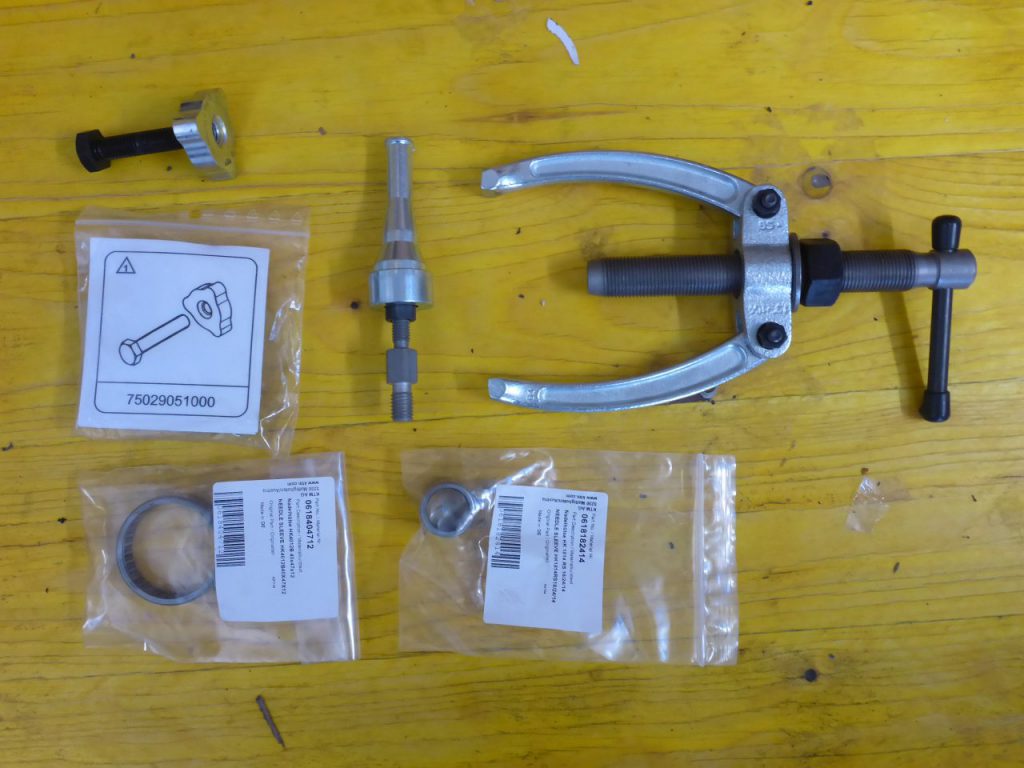
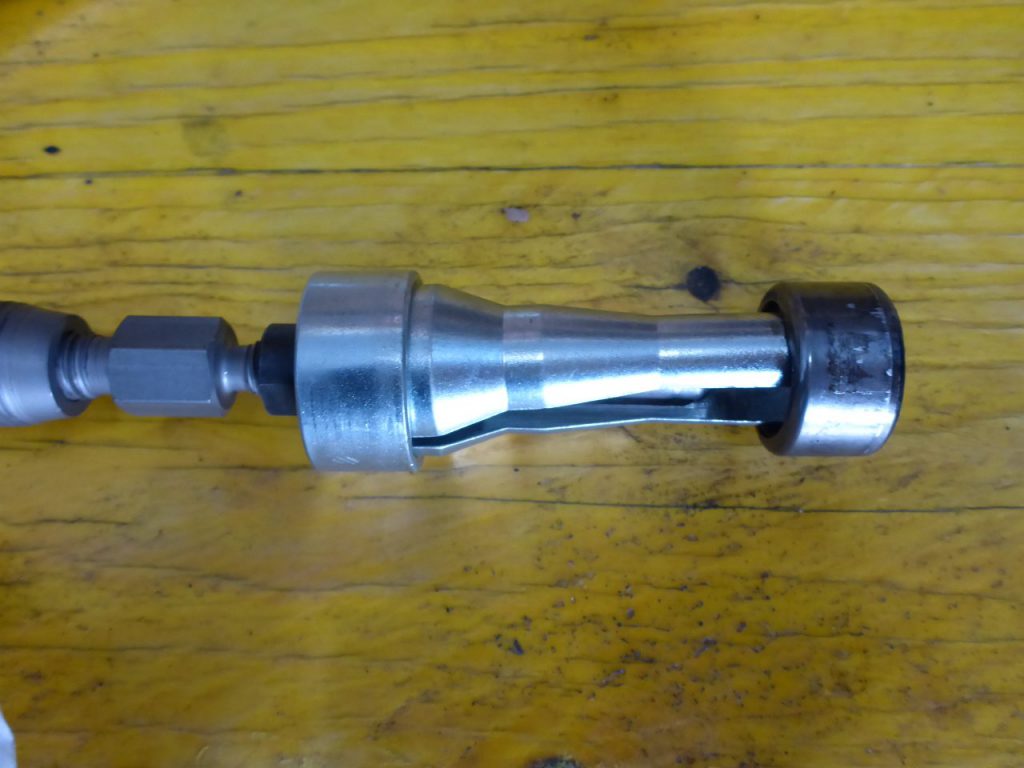
About two weeks later, the work continued. From left to right: Big-Cam-Bearing-Puller, Small-Cam-Needle-Bearing-Puller, Master-Puller and the two new camshaft bearings. The tools cost about 100 Euros. The new bearings are cheap genuine parts from KTM for about 6 Euros each.
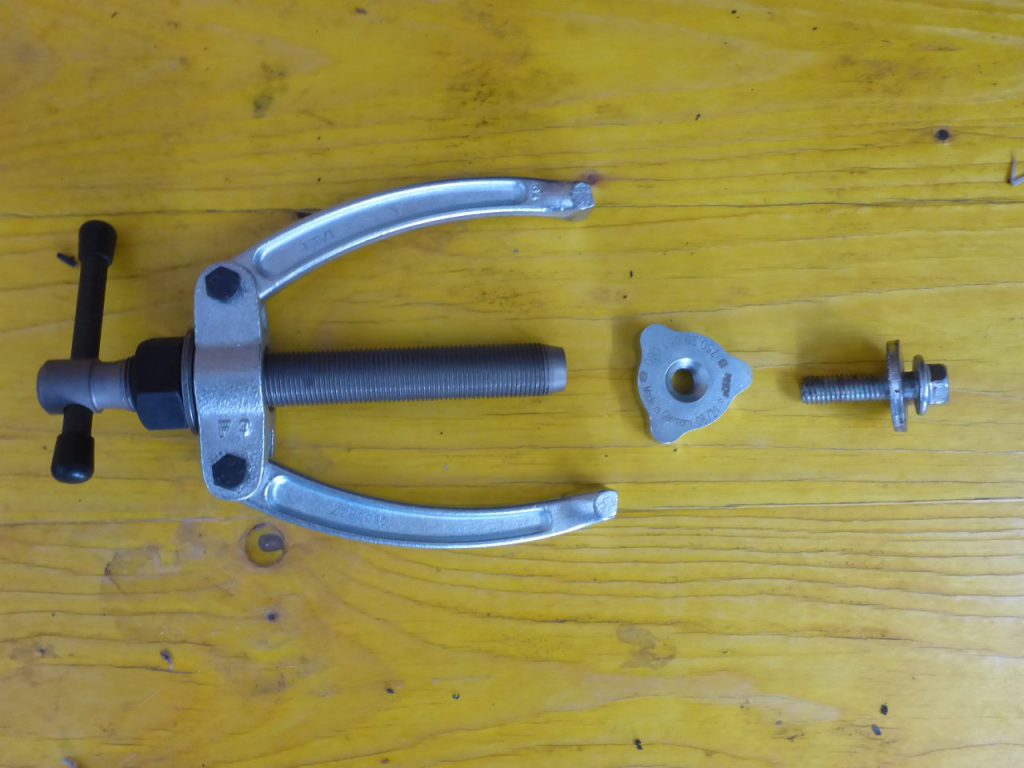
I started with the big bearing. Without this “triangle-pulling-plate” it would have …
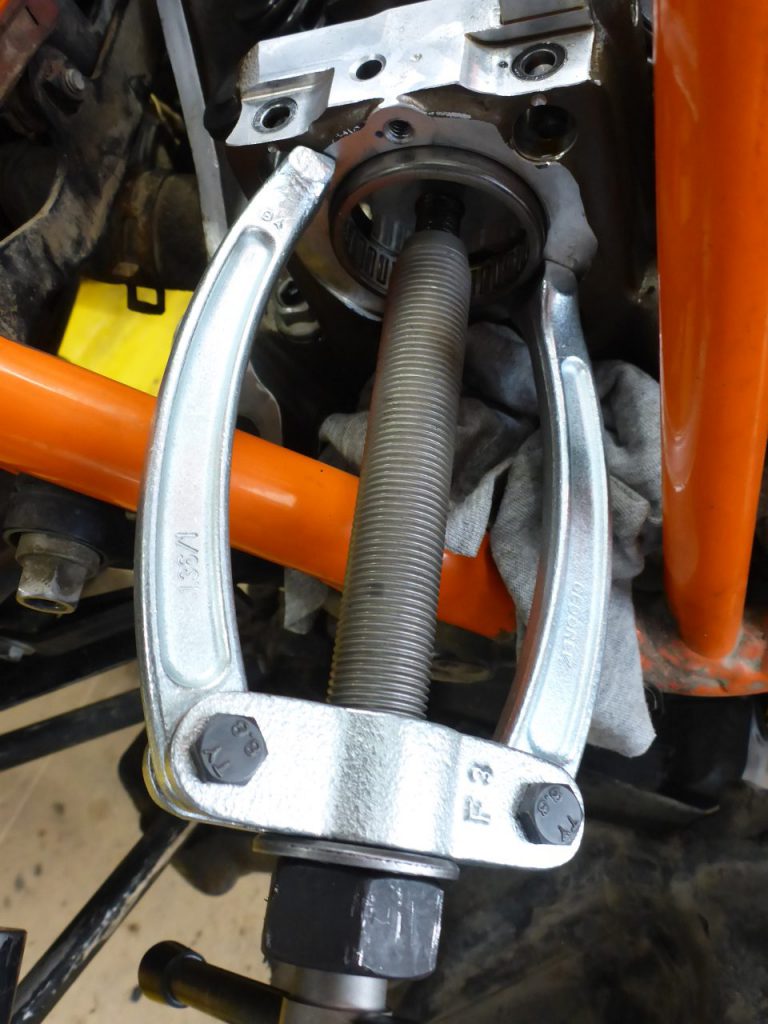
been a pain in the ass to get the big camshaft bearing out. Why? Because there is simply said not enough space for using a chisel or other tools to get pressure on the bearing from inside out. Cutting it wouldn’t also be an option due to shavings in the engine. Therefore: …

I really recommend buying this type of triangle plate and a puller for doing this work. The next step was pulling out …
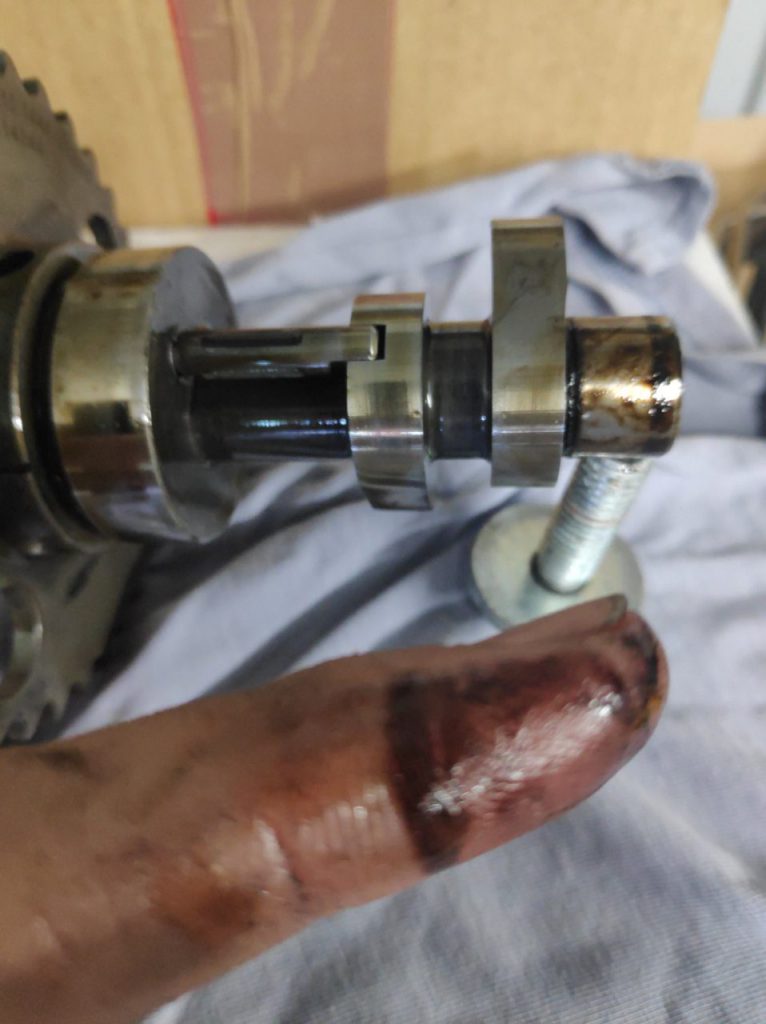
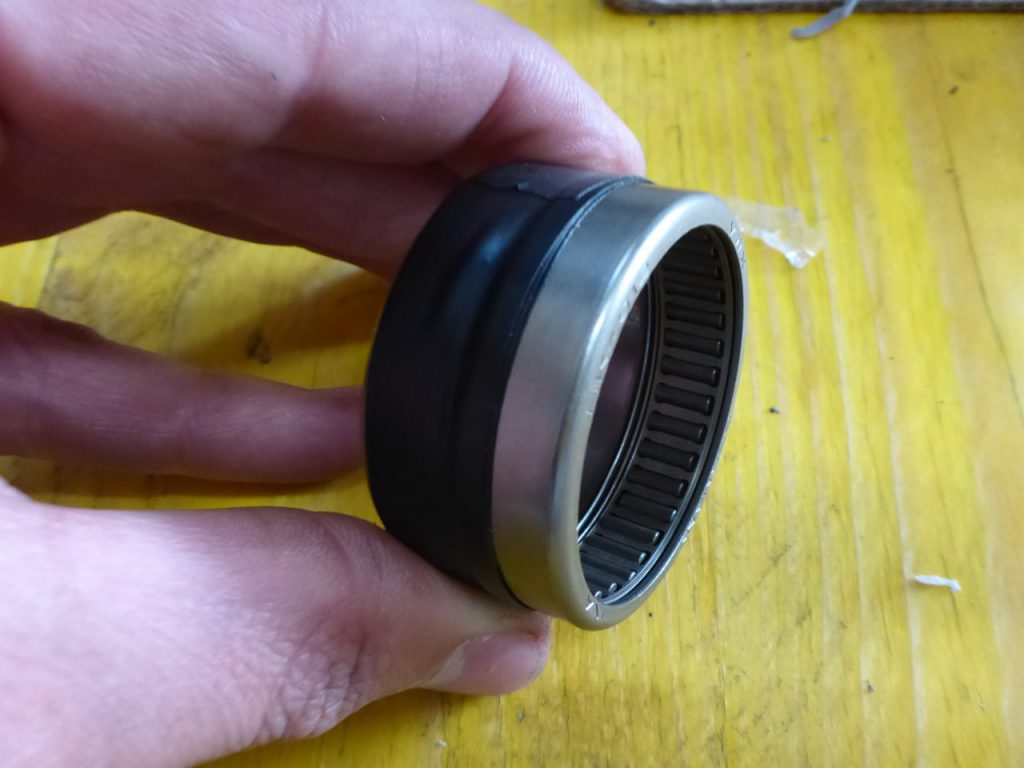
the defective small needle bearing from its blind hole. With a proper needle-bearing-puller …
this worked like a charm. For doing some science …
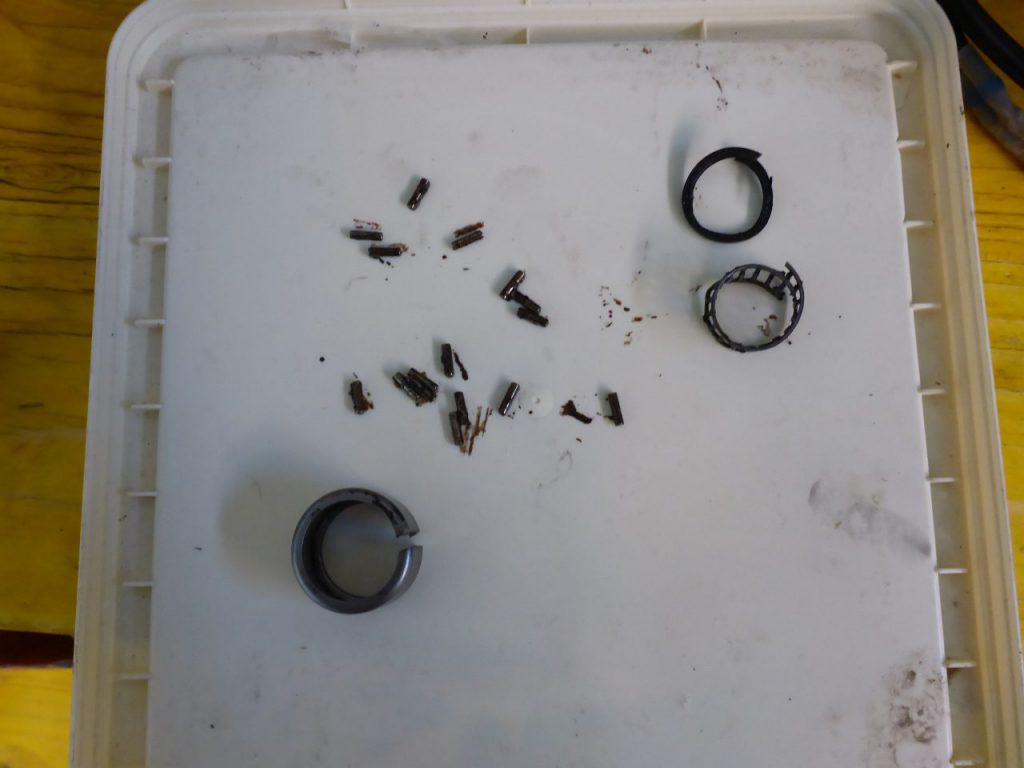
I used the grinder for cutting the shell of the small bearing. When cleaning of the old part was done, I found the defective …
areas. There were some small dents in the running surface of the bearing visible. In general, the whole bearings running area looked a bit worn out (mirroring/reflecting areas on the running surface).
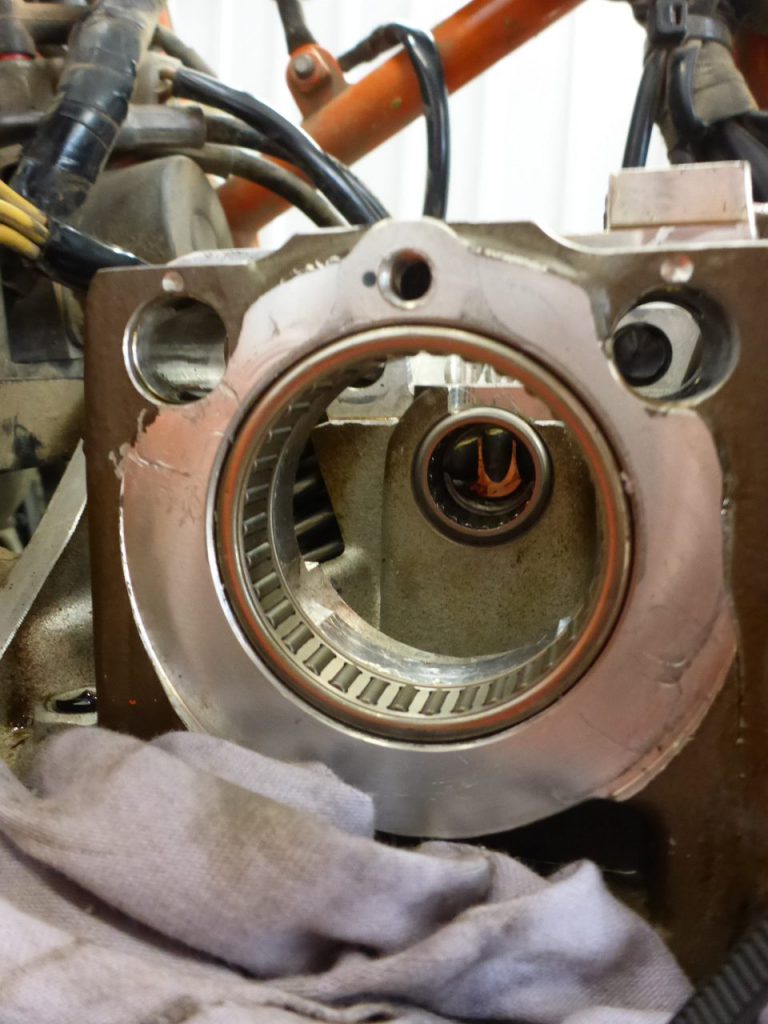
Now it was time to re-assemble the camshaft bearing area again. First, I borrowed …
the hairdryer from my better half and heated up the small bearing area. While the hairdryer was doing what a hairdryer always does, …

I taped the new bearing onto the old bearing shell and stuck a snug fitting socket into both bearings. On one hand side this is for arranging them in a row and on the other hand side for holding the needles of the new bearing in place whilst assembling it. When the bearing block was heated up …
I hammered the new small bearing with gently strokes into …
its final position. Surprisingly, this little bearing in its blind hole only gets its lubrication from oil which is floating down between the bearing block and the camshaft. I taped …
the big camshaft bearing the same way onto the old bearing. This way, a perfect fitting pressing tool was made, and it’s very easy to…
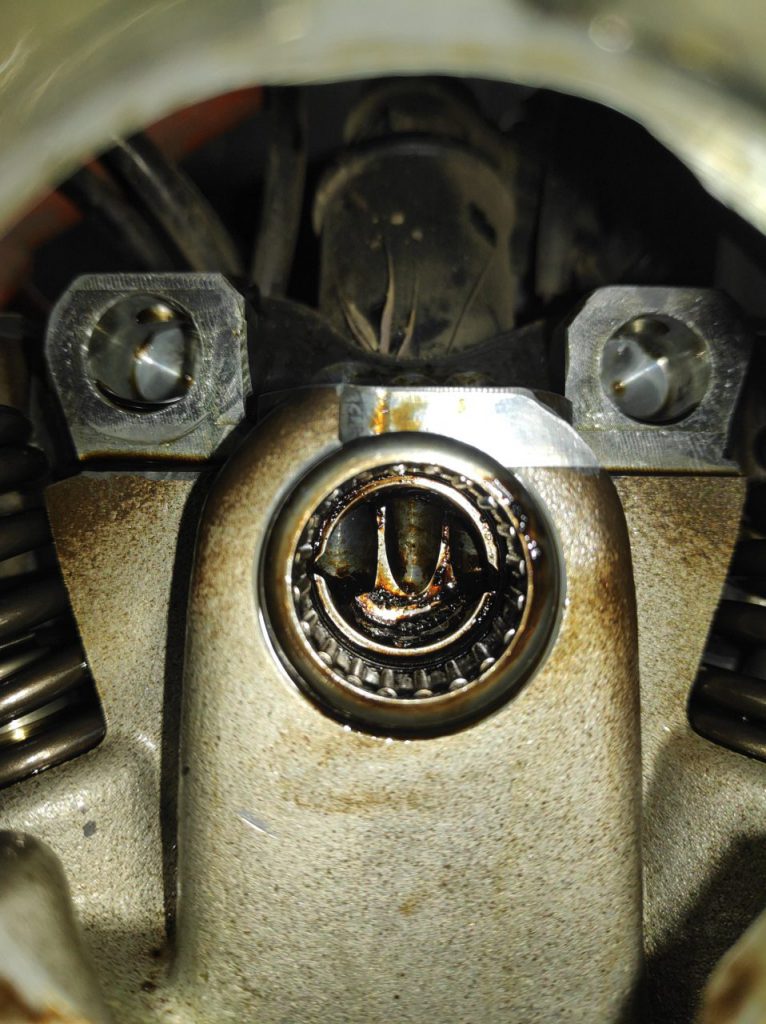
assemble the new bearing into its block. I also used the hammer and gently strokes to get the new bearing into its finals position. After inspecting the …
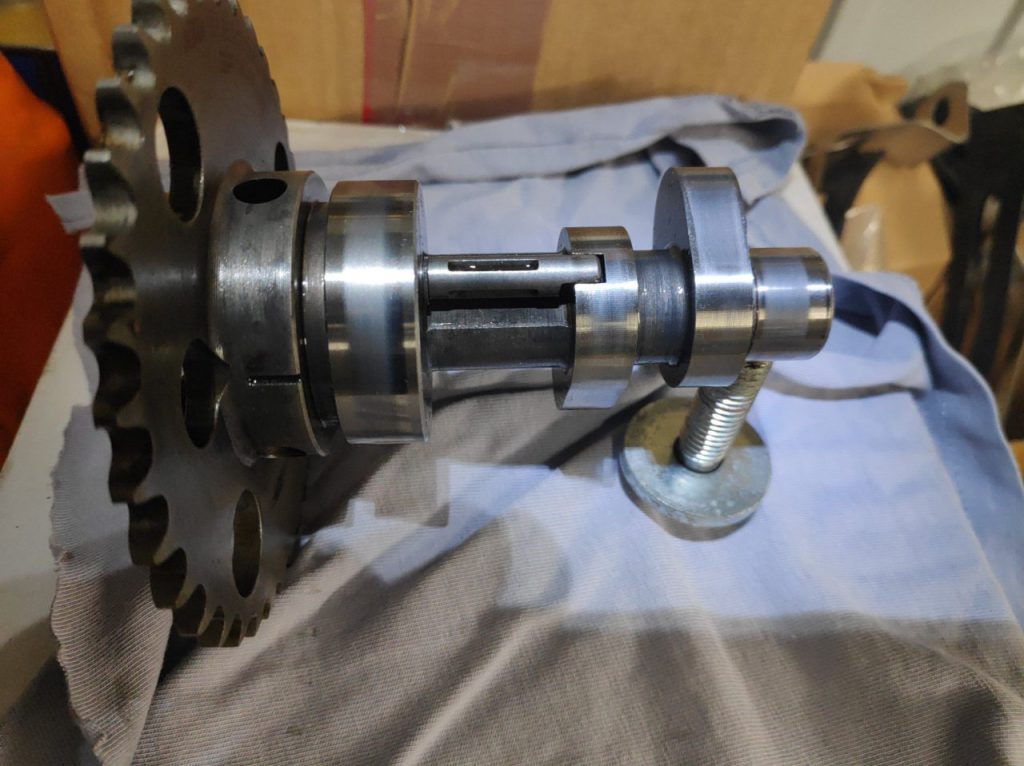
camshaft I decided to use it further. Besides some changes in color on all running surfaces of the bearing areas, there were no feelable or measurable damages. Afterwards, I assembled the other parts: valve train chain + chain tensioner + rocker arms and axles. I recognized now, that the valve clearance was again back in spec well.
Hint: —> During the last big service, I recognized that valve clearance grew about 0,02 or 0,03 mm. Back then, I thought temperatures differences between summer and winter was the reason for this difference. Because the specs still have been in the tolerance zone, I didn’t worry too much back then. Especially because the rocker arms had been in great conditions.
Now I learned that the bearings of the camshaft gained clearance, which had increased the valve play too. So if you are suffering gaining valve play and the rocker arms are ok, have a closer look at the bearings of the camshaft. May one of the bearing is short before its colaps!
Next I swapped …
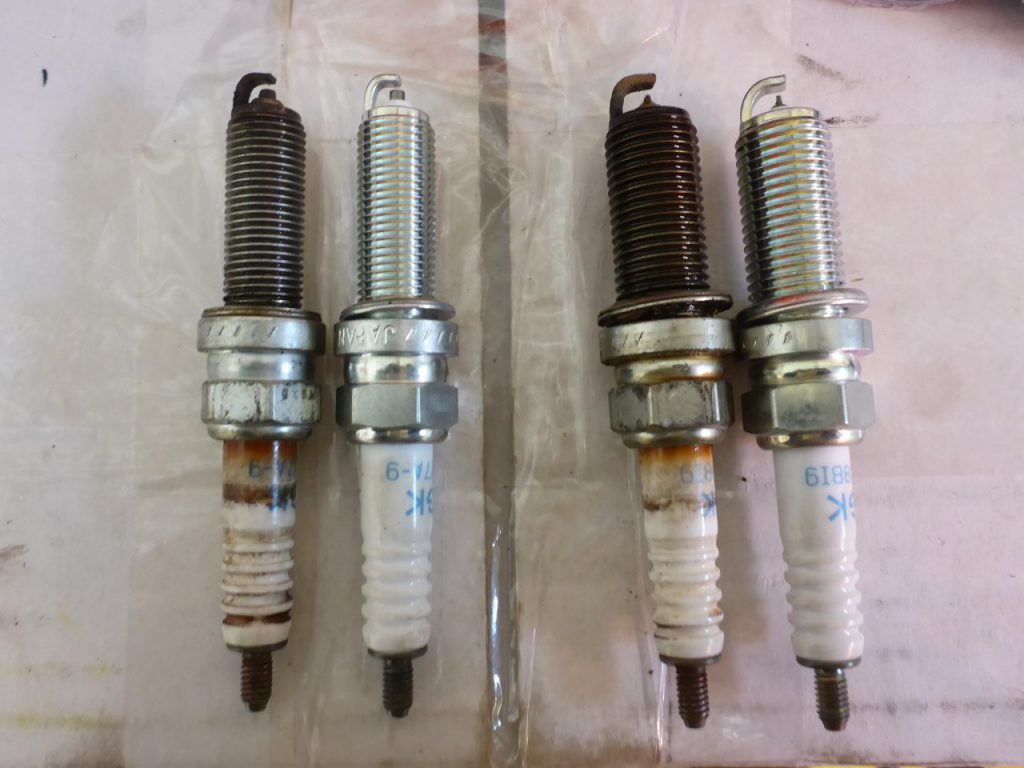
the spark plugs. The old ones did their job for more than 40.000km or 25.000mi, so it was time to change them. (Here you can save some money: Owning this LC4 I always doubled the spark plug maintenance interval, without having any troubles. Just take the time after 20.000km or 12.000mi for re-adjusting the electrode gap).

The old outer spark plug after +40.000km vs a brand new one.
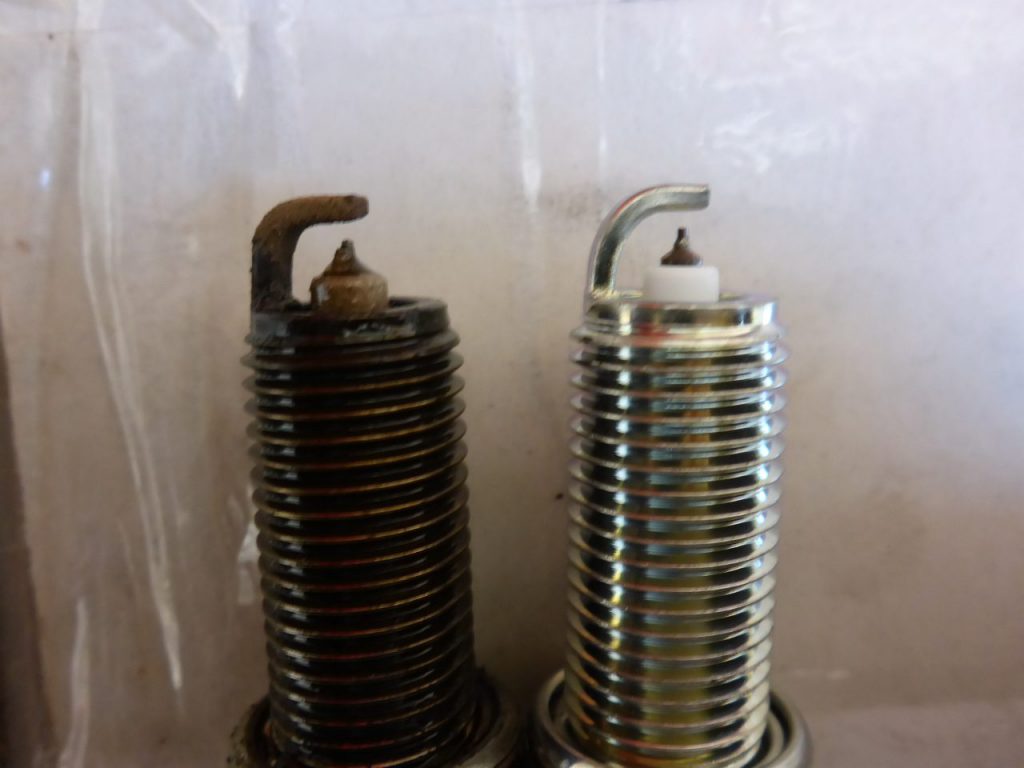
The old inner spark plug after +40.000km vs a brand new one.
I have already made two experience write-ups about this double mileage usage of spark plugs in the LC4 engine. For further information, have a closer look at –> THIS <– and –> THIS <– post.
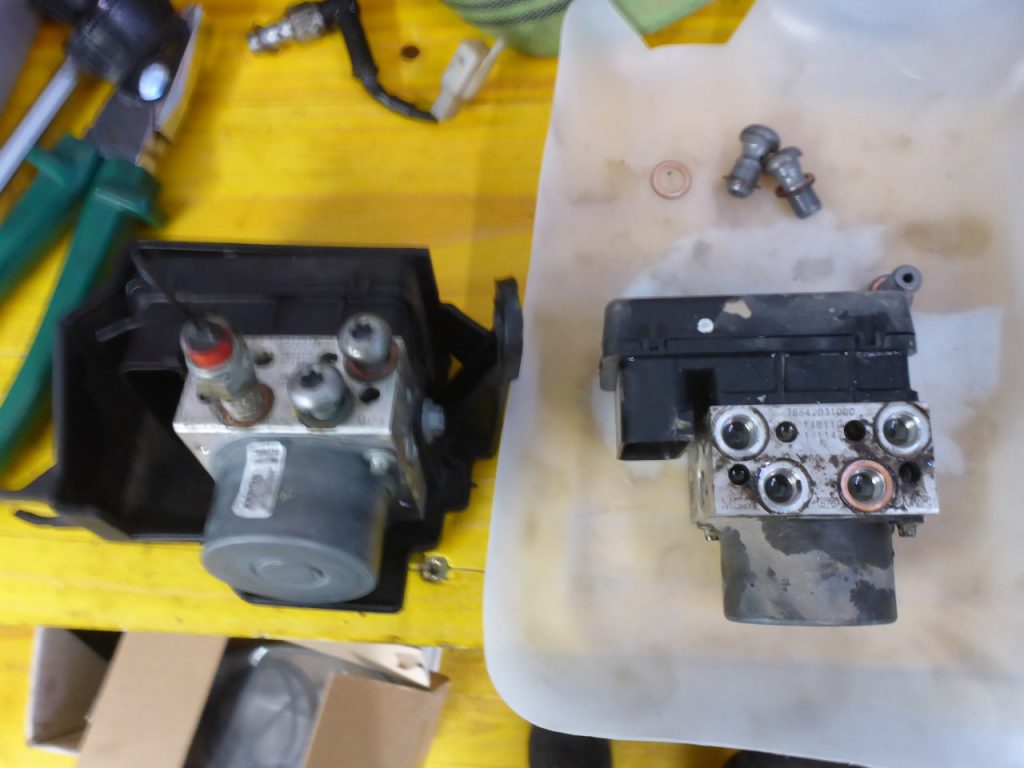
Another thing I had to fix was the ABS-Pump. Since many miles, a sporadic ABS-error in the dashboard appeared sometimes (about one error message along all 400-600 km). After doing plenty of trail and error tries (checking cables and sensors) I was able to isolate the problem at the pump. I bought a very cheap used part on a dubious website and swapped the old pump with the new one.
Another part which collapsed after more than 70.000mi or 115.000 km was …
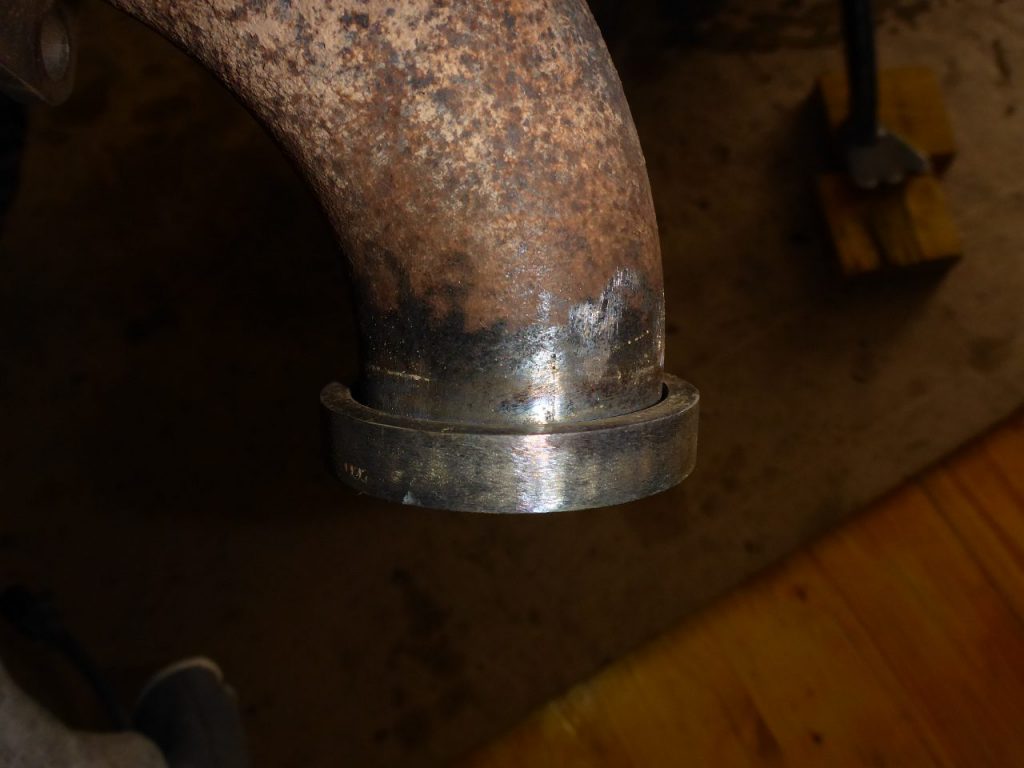
the welding seam between the flange ring and the manifold tube from my Remus titanium exhaust, right at the area where the manifold is mounted to the engine head. I cleaned the titanium parts and …
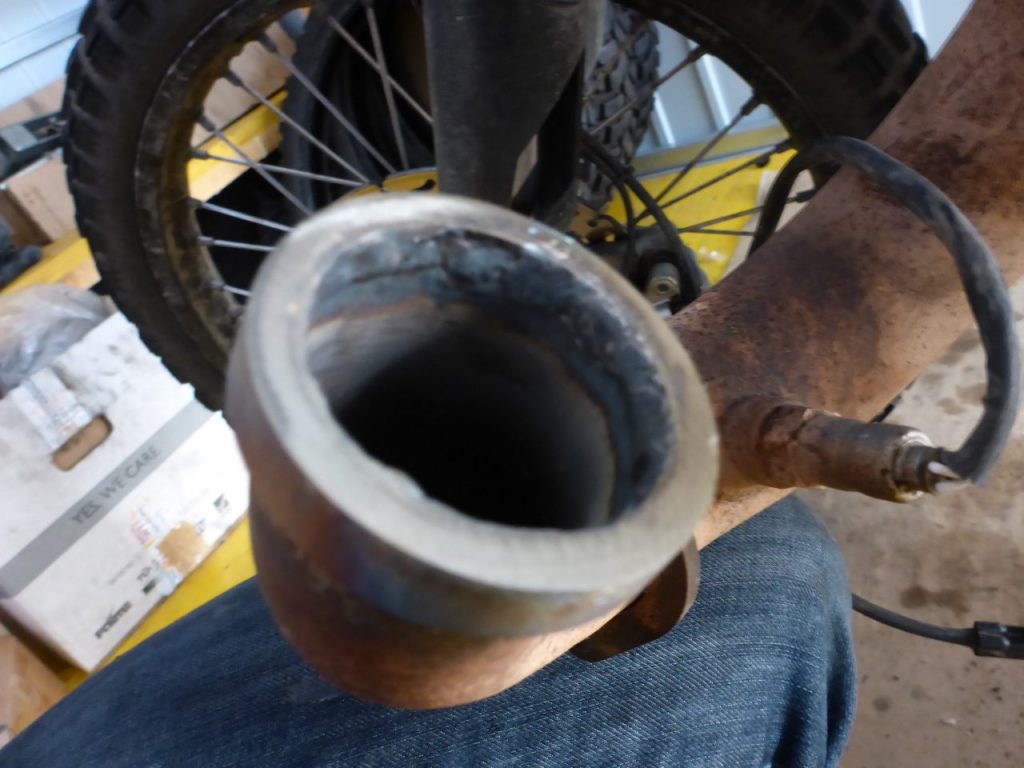
went off with them to a welder in the suburbs of Vienna. This guy was a pro and it was no big deal for him to weld the flange ring back on its place onto the manifolds inlet. Having the exhaust dismounted, I also made a look to the …
exhaust valves / their stems. Very little moisture on them. In my opinion not bad for such a mileage. Overall, nothing to worry about as long the oil consumption didn’t increase. Because the …
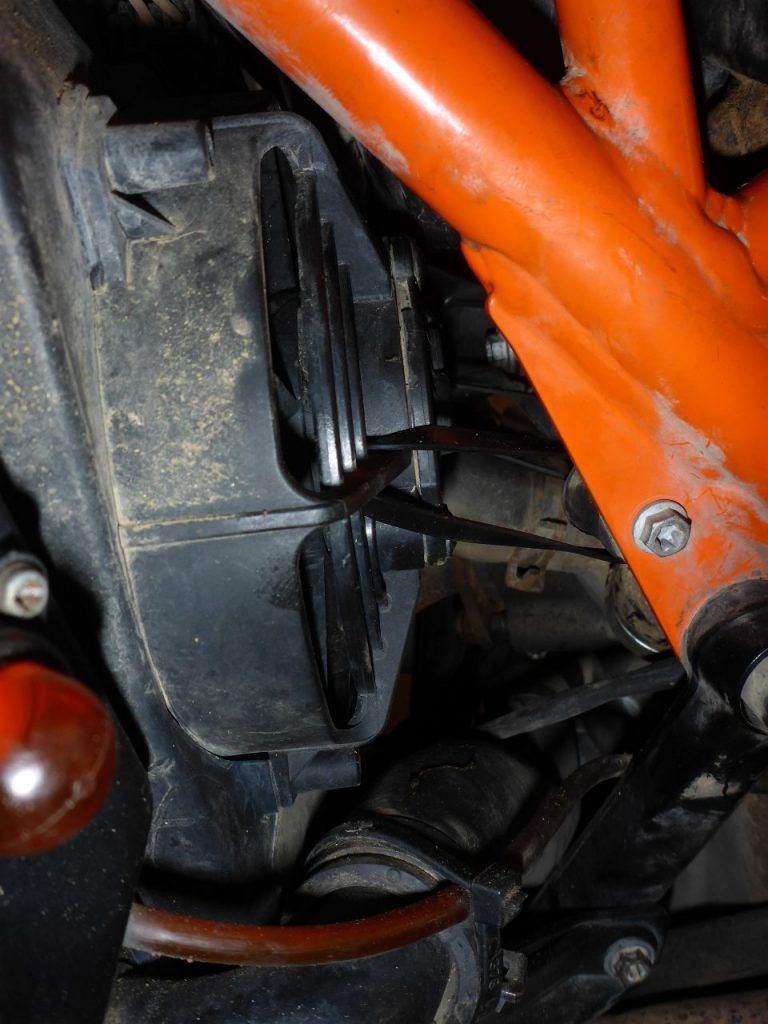
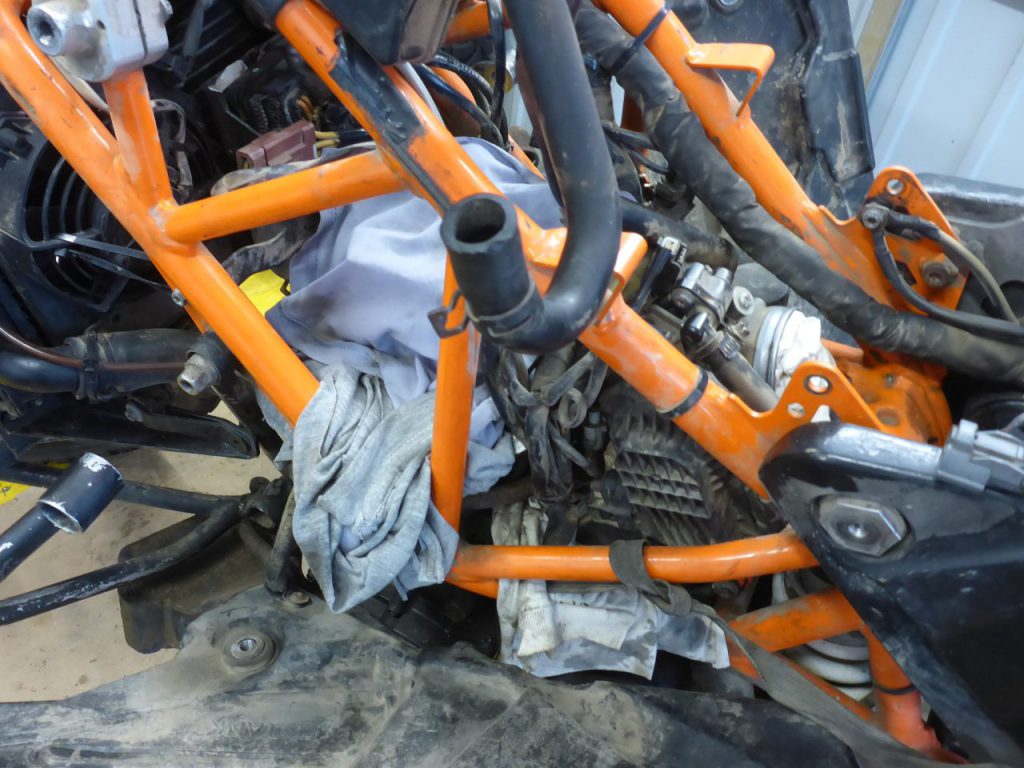
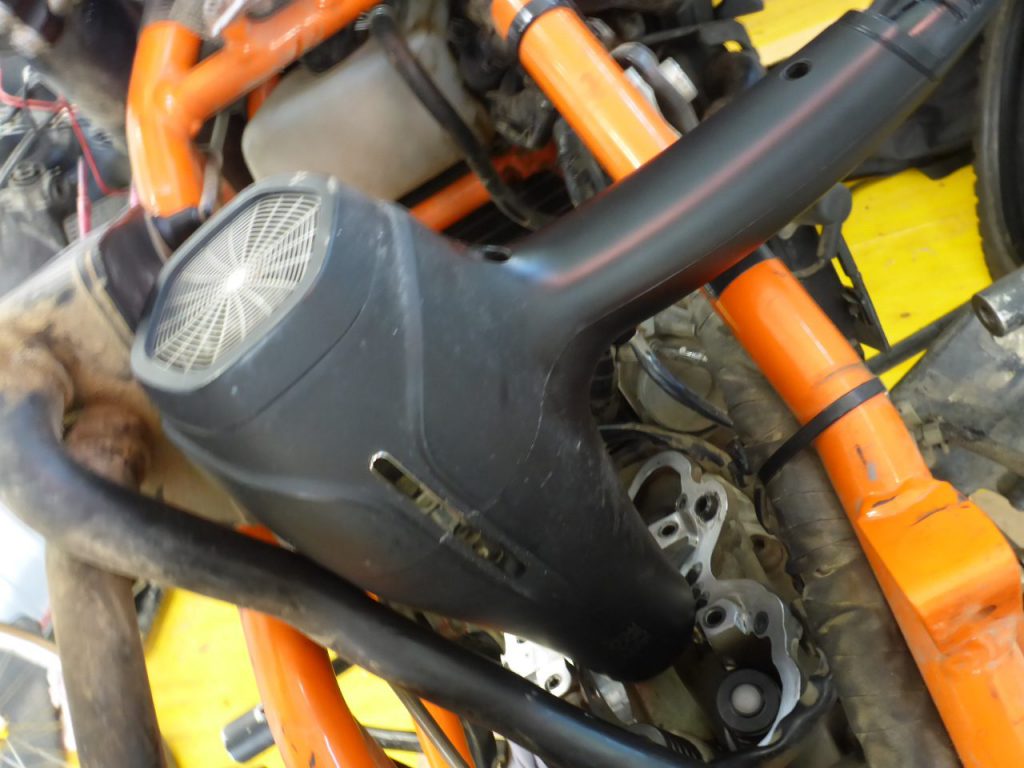
fan housing is a weak spot of the 690tys in general (the brackets gain clearance over the time and then the housing is slowly rattling/eating its way into the radiator and damage it till cooling fluid leaks), I mounted two cable ties between the ABS-Pump bracket and the ventilator housing. Then I tightened them. This way, the fan housing gets pulled back in the direction of the ABS-Pump bracket, and won’t be able to damage the soft radiator metal due to vibration. Another solution would be to put some elastic glue directly onto the radiator (Note: NOT the fan housing!), right at the points where the housing is sitting on the radiator. This will have the same effect. I also had to …
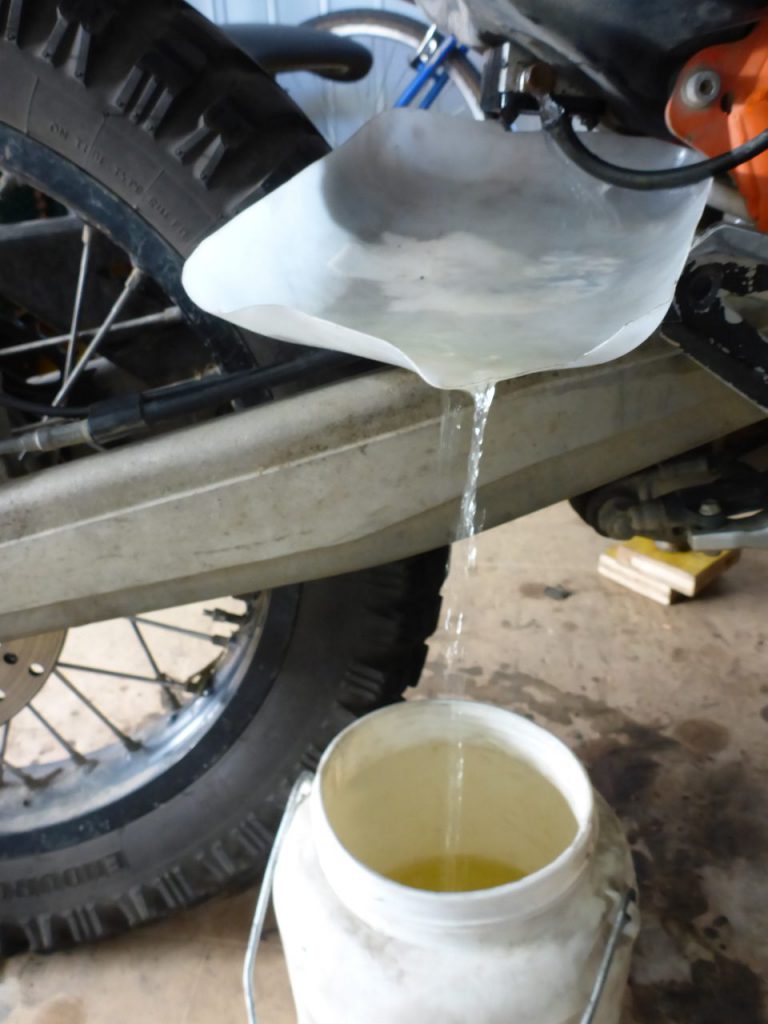
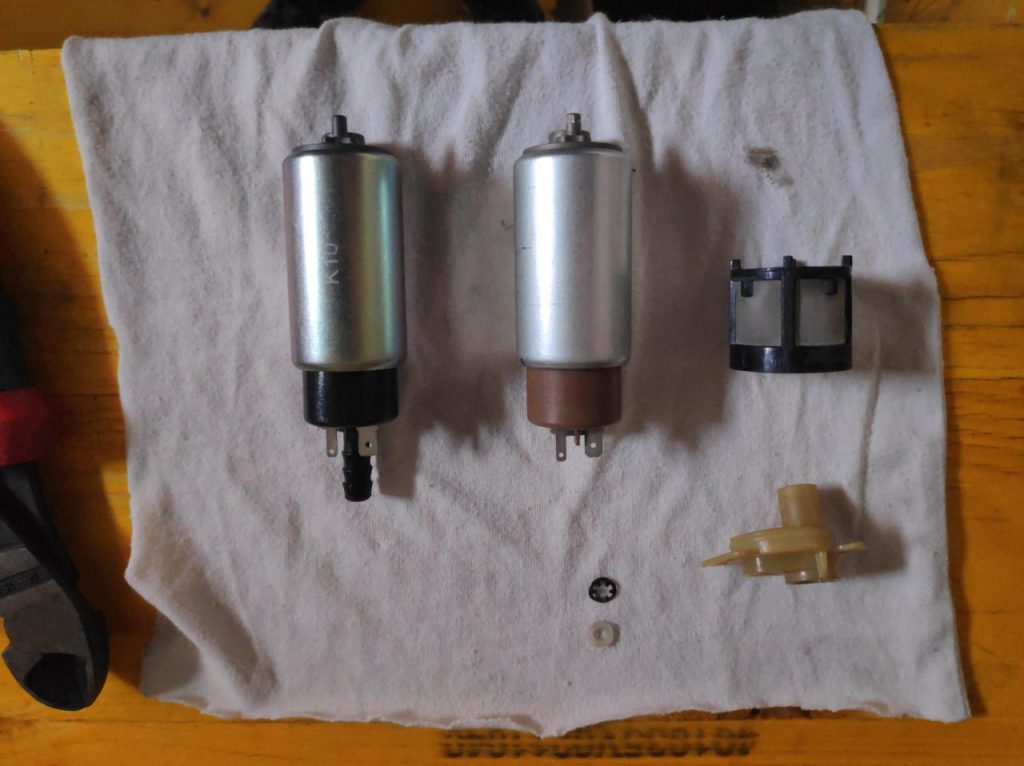
drain the fuel …
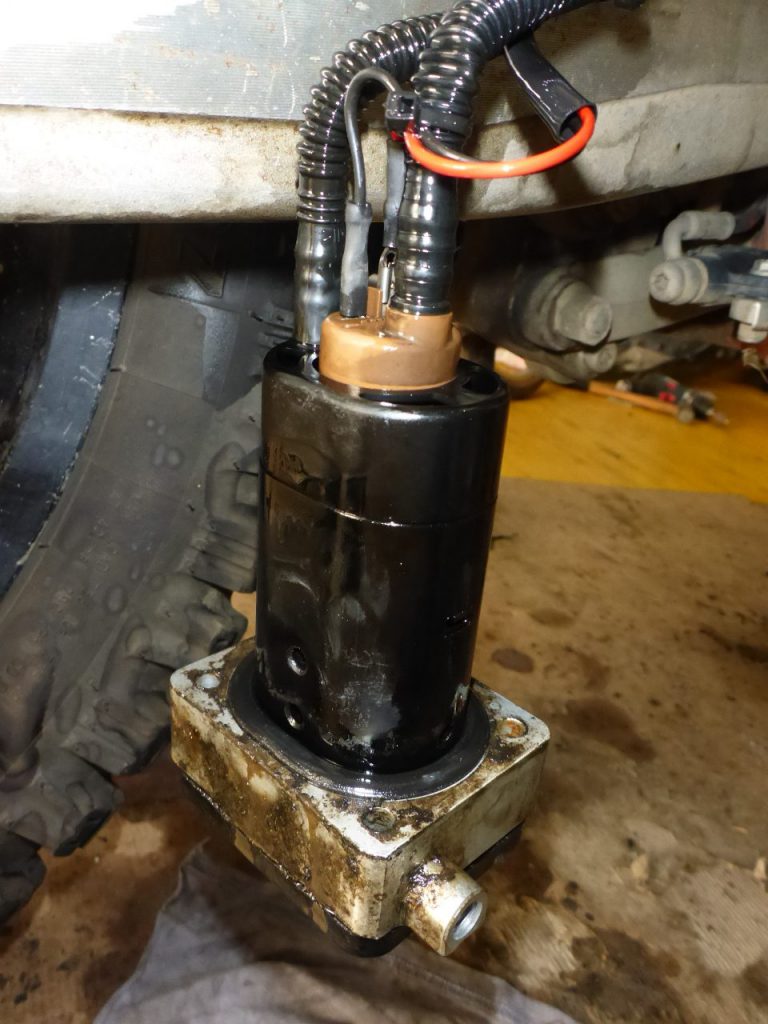
and pull the fuel pump out of the tank, for …
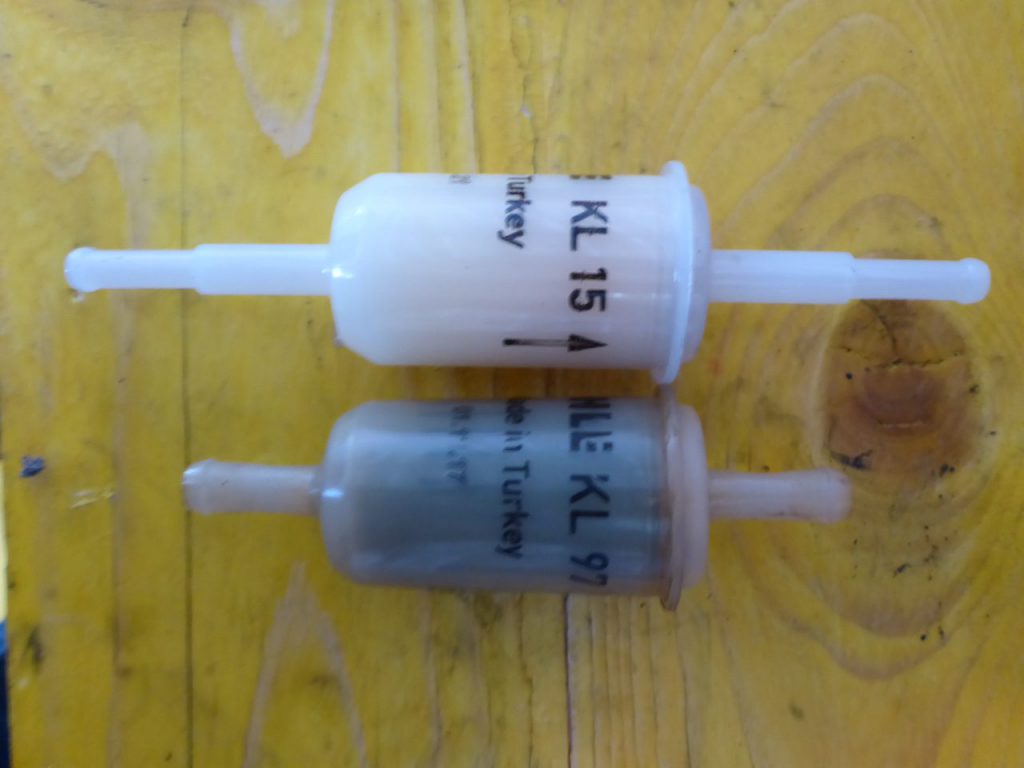
changeing the fuel filter. I replaced the expensive original “Male KL 97” (12 Euro) for a standard “Male KL 15” (3 Euro). Both filters are made in Turkey and have the same housing, only the tube connectors are a bit different, but the KL15 can be cut down for having the same length. The hole-diameter on both filter is the same after cutting it down. Just take two hose clamps on both sides for being sure that fuel pressure won’t blow off the tubes from the cut down filter, which will have no bulges on the tube-end like the expensive ones.
After the fuel filter, I also changed the wireless charging pad for my android navigation system, which suffered some malfunction. Also, the high beam light bulb was broken and a rear indicator bulb too. When everything was done, I made a 60 mi or 100 km test round with my black beauty. The ticking noise was gone, YESSS!!! —> BUT there was some kind of misfire when I used the engine break.
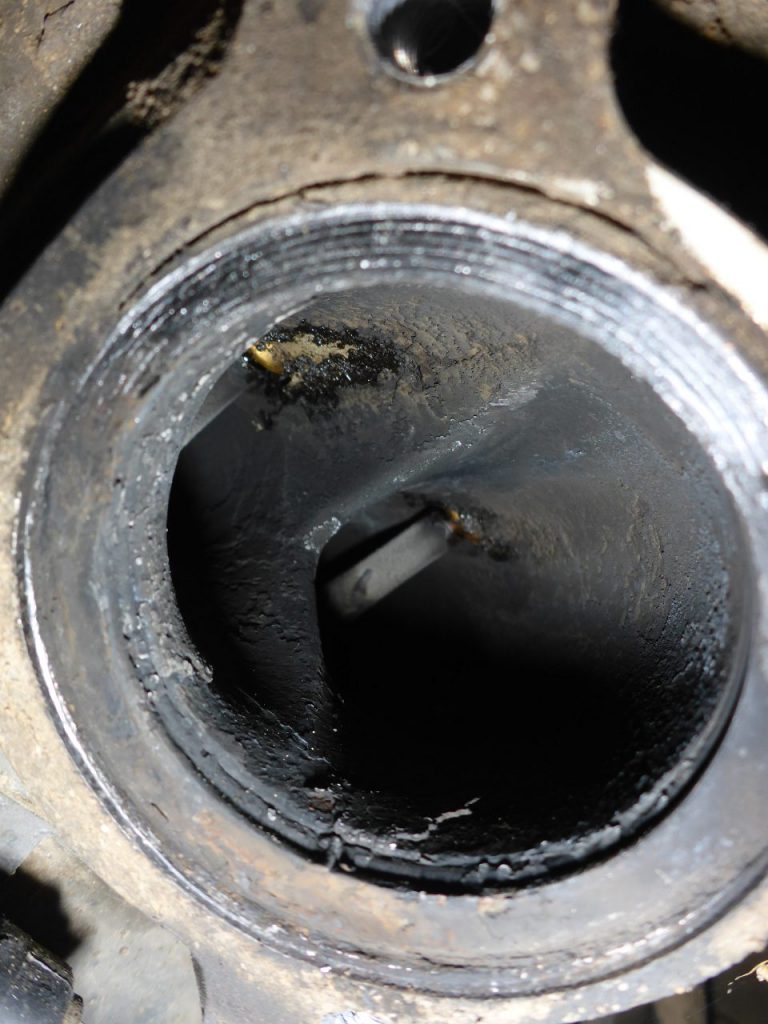
First, I thought I had put the steering chain the wrong way back into the engine (maybe assembled it with one displaced gear-teeth). But I was pretty sure that I was very focused while doing this work, so it can’t happen. My second thought was to have a look if the new spark plugs work well. I put the airbox out and had a look at the spark, which was fine on both plugs. Next thought was the fuel system. I put the injector out and, turned the injection on and …
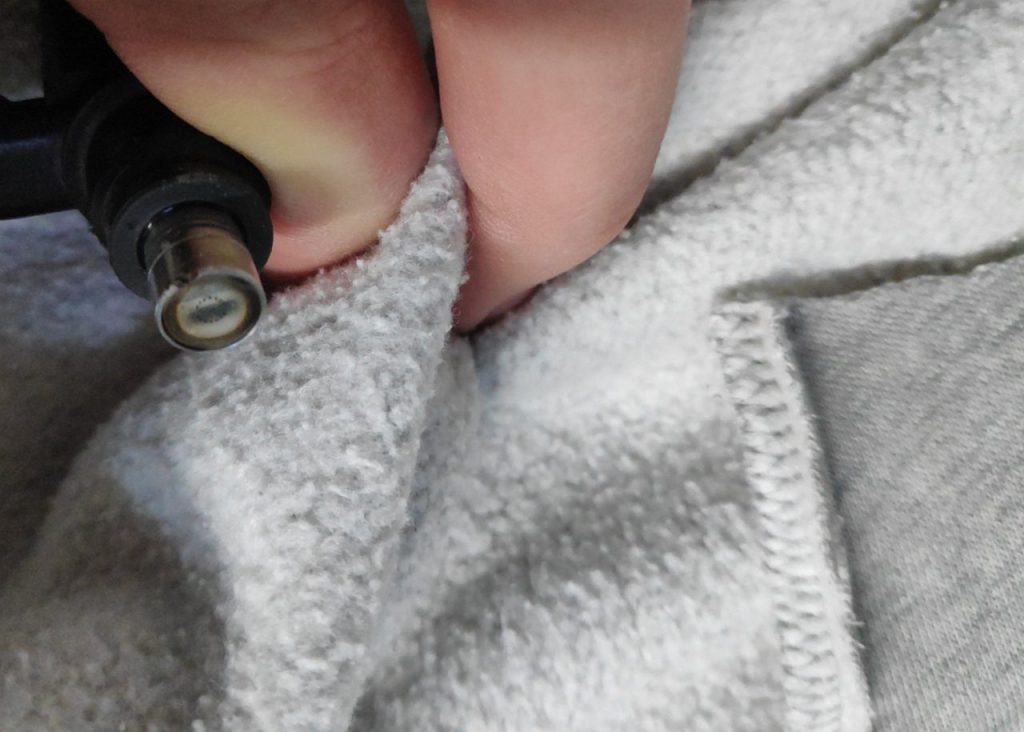
found out that it was leaking when fuel pressure was produced by the pump. Here on this picture you can guess the leaking drop of fuel. I first tried to spill the injector of my 690ty backwards. Maybe some dirt was clogging the fine mechanics. That didn’t help. My next idea was to measure the fuel pressure. Maybe the pump produced too much pressure, which the injector can’t handle. The pressure gauge showed me 2,9 bar. That’s odd, because that pressure is surely not enough. It should have at least 3,2 – 3,5 bar. Because I was …
carrying a spare fuel pump with me on my journeys since more than 70k mi or 120k km (for nothing) I decided to replace it now. This way I was able to find out that the new pump was delivering the needed 3,5 bars which showed me, too, that the fuel pressure regulator was working well. With the now higher pressure, also the injector valve was leaking obviously more, so I had to replace the injector too. I guess the injector was simply worn out after this high mileage, and the higher flow of the new fuel filter made it dripping. So, it was again time to order from the before mentioned dubious website. For …

25 Euro, a used injector from an identically constructed Husqvarna 701 was ordered. A week later, I assembled the bike and went off for another test ride. Now everything worked fine. My black beauty now seemed to have a bit more torque. Surely the 0,5 -0,6 bar higher fuel pressure and a nearly new injector valve (=no spill outs at the edge of the fine drill holes) is the reason for that win back in performance.
Now I`m looking forward curiously how far Чернотa will carry me til it collapses. :-/
My personal goal is reaching without a piston change 130.000km with it which equals 81.000 mi.
Link: Lifetime Maintenance List of my black beauty
Interested in my doings? Than feel free to join my social media channels for further updates! ➡