
This write-up is about adventurizing and modifying a Honda CRF 450 L (or also the CRF450RL) for making it a proper long range Dual Sport Motorcycle. Be warned: That’s going to get a long read …
After buying the CRF450L it was time for a rebuilt for my needs. Before starting with it, I put the bike – which i nick named “The Mule” on the scale:
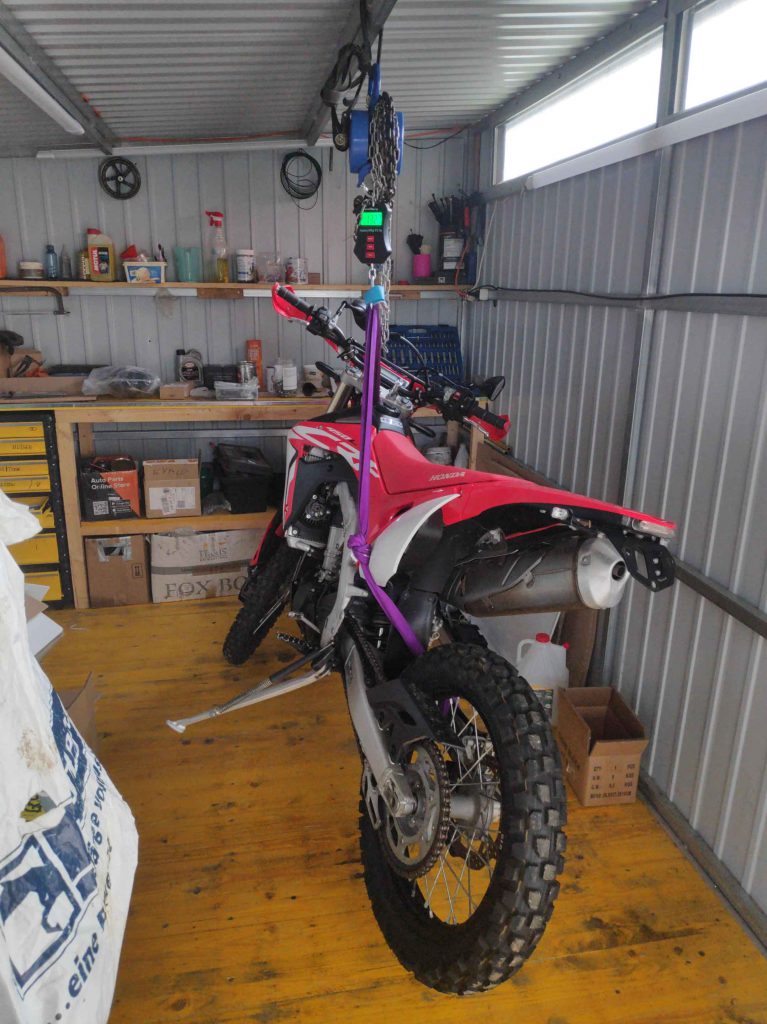
Hardly …
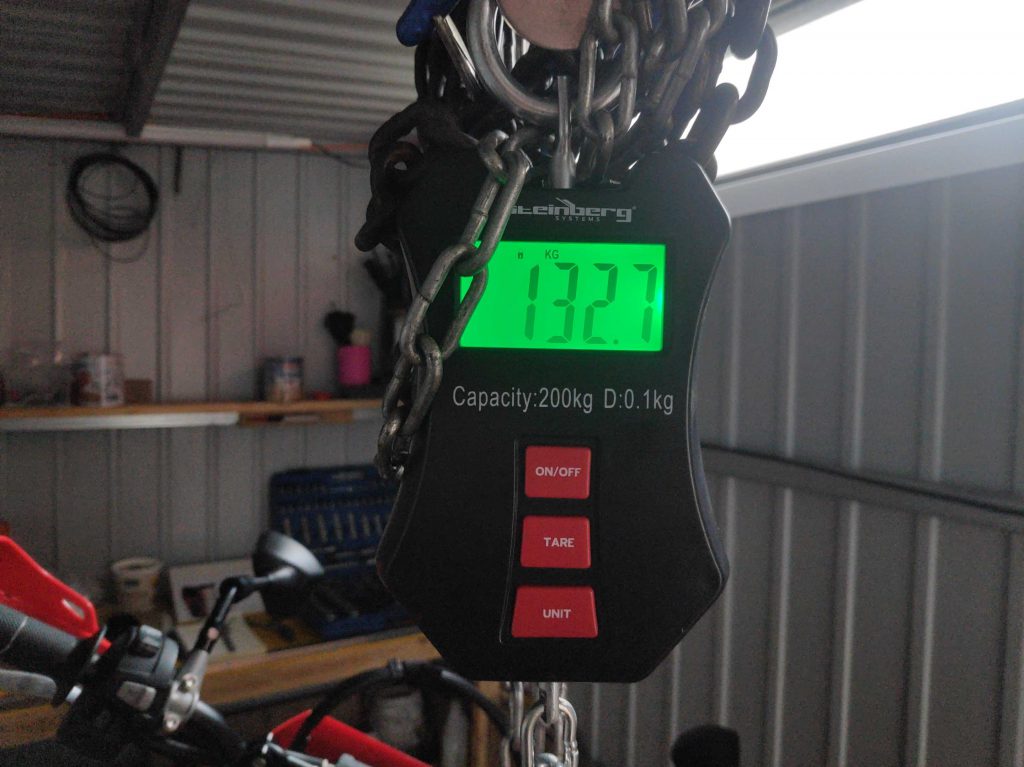
133 kg or 294 lbs equals about the standard weight which Honda declares for this bike fully fueled up. My goal after that rebuild, lies about 150 kg or 330 lbs.
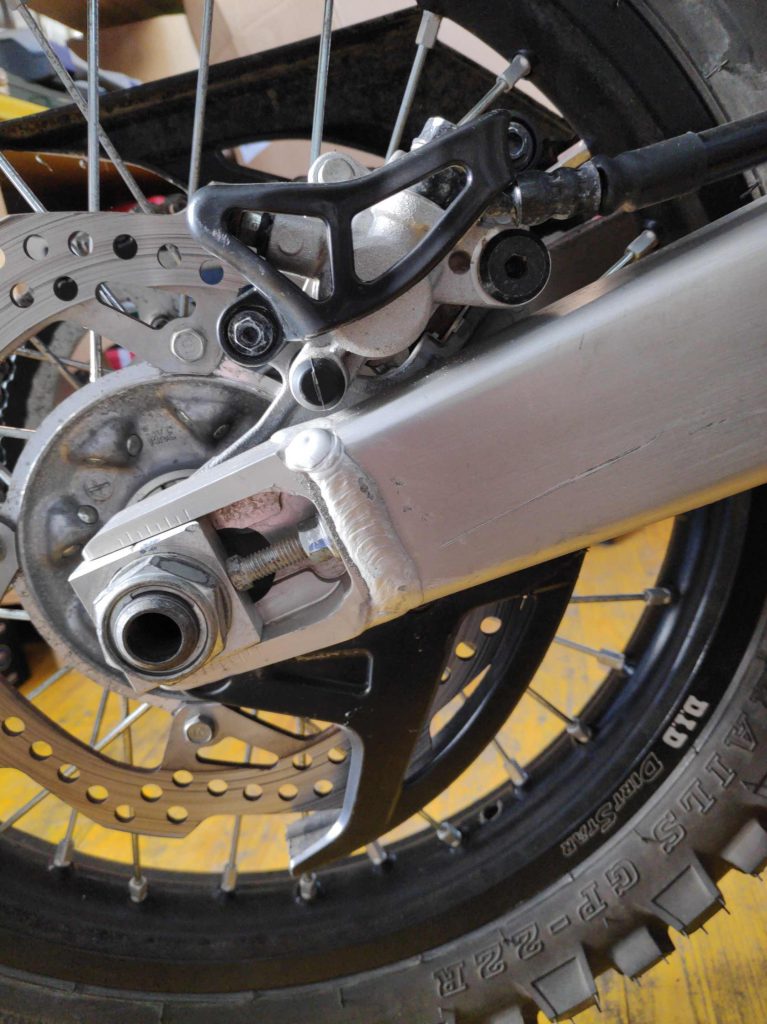
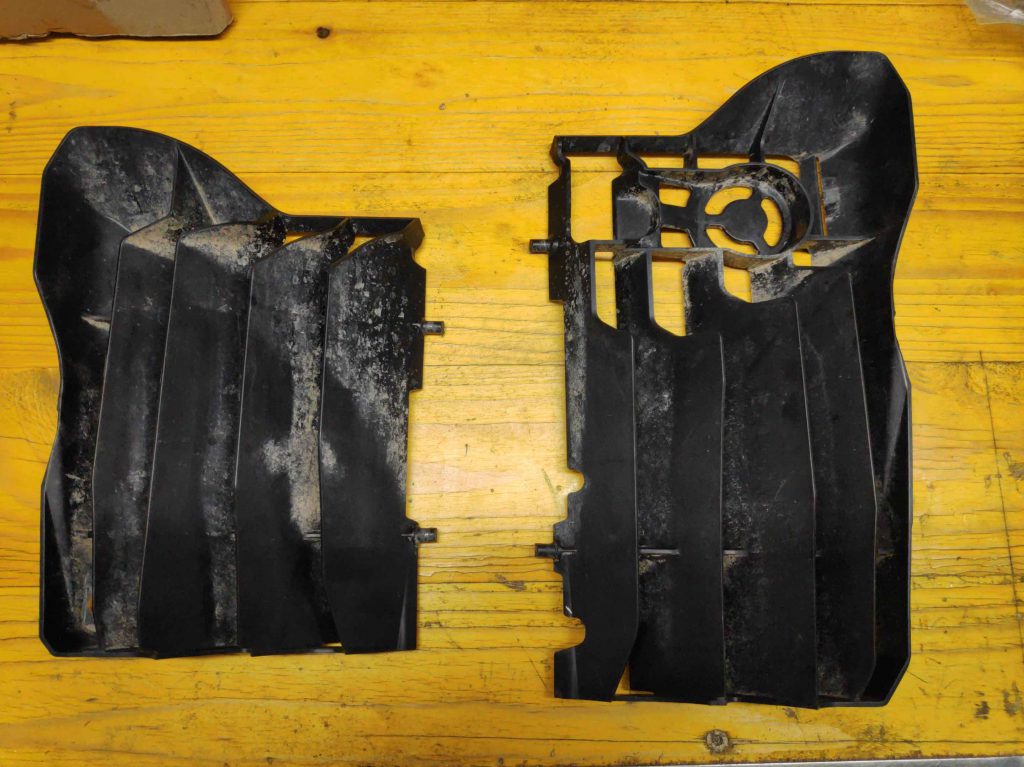
First I threw out the protection frames …
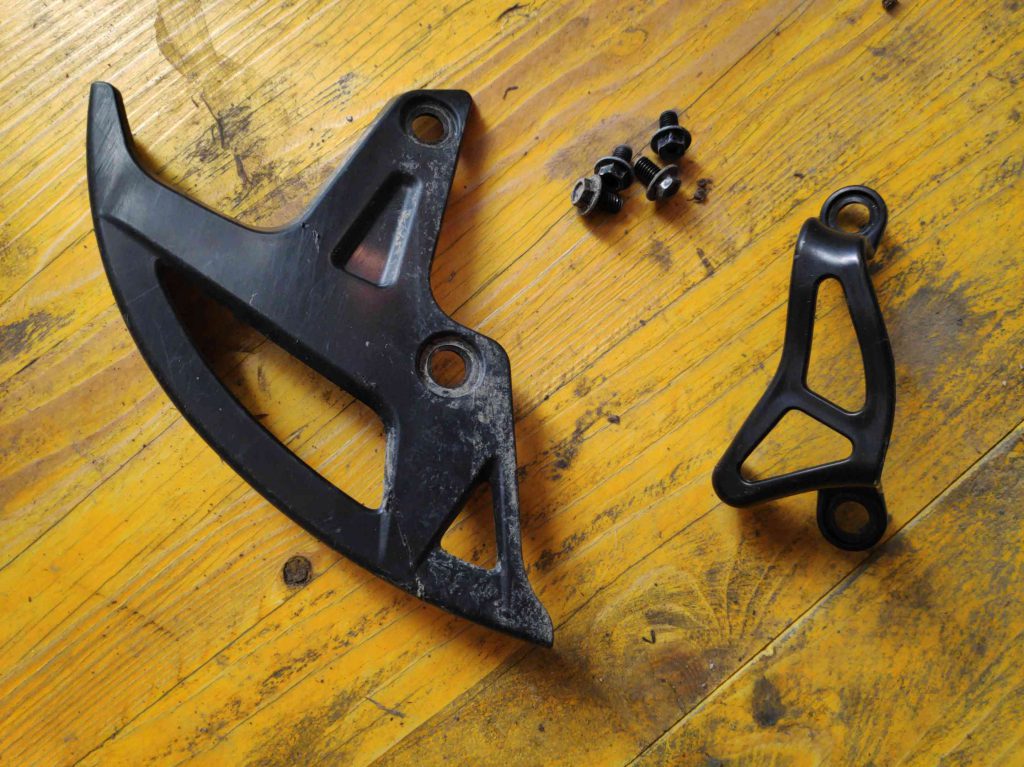
for the rear brake caliper and the rear brake disk. They are made of plastic and due to the lack of doing real heavy terrain riding, I don’t think I will need them.
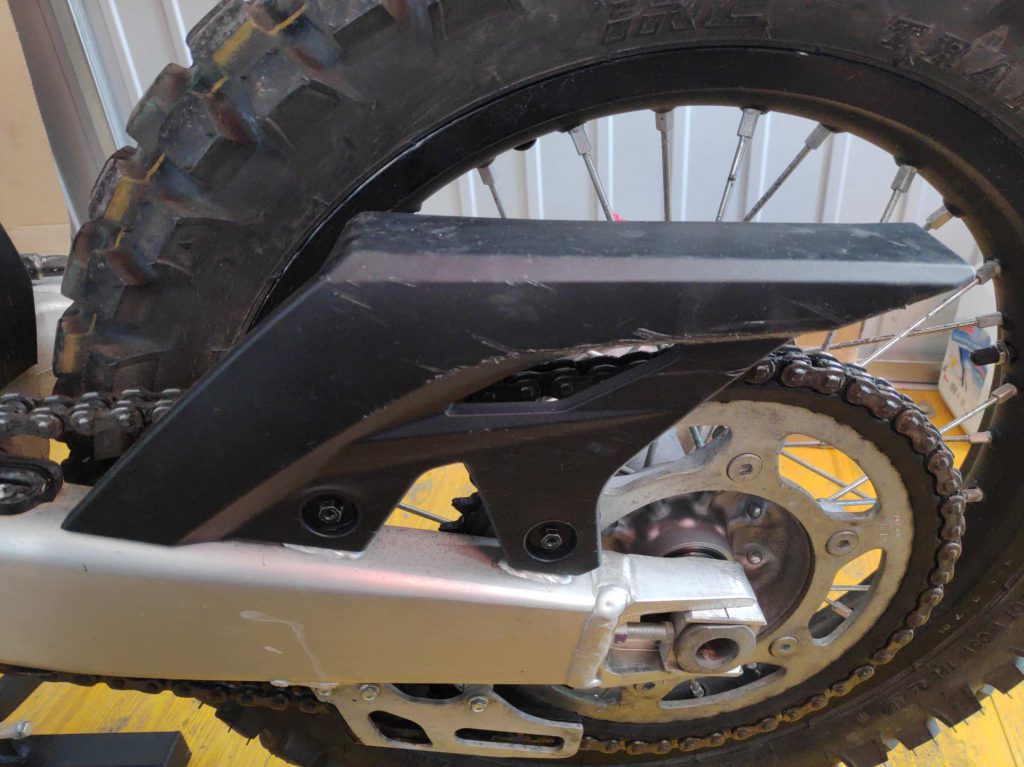
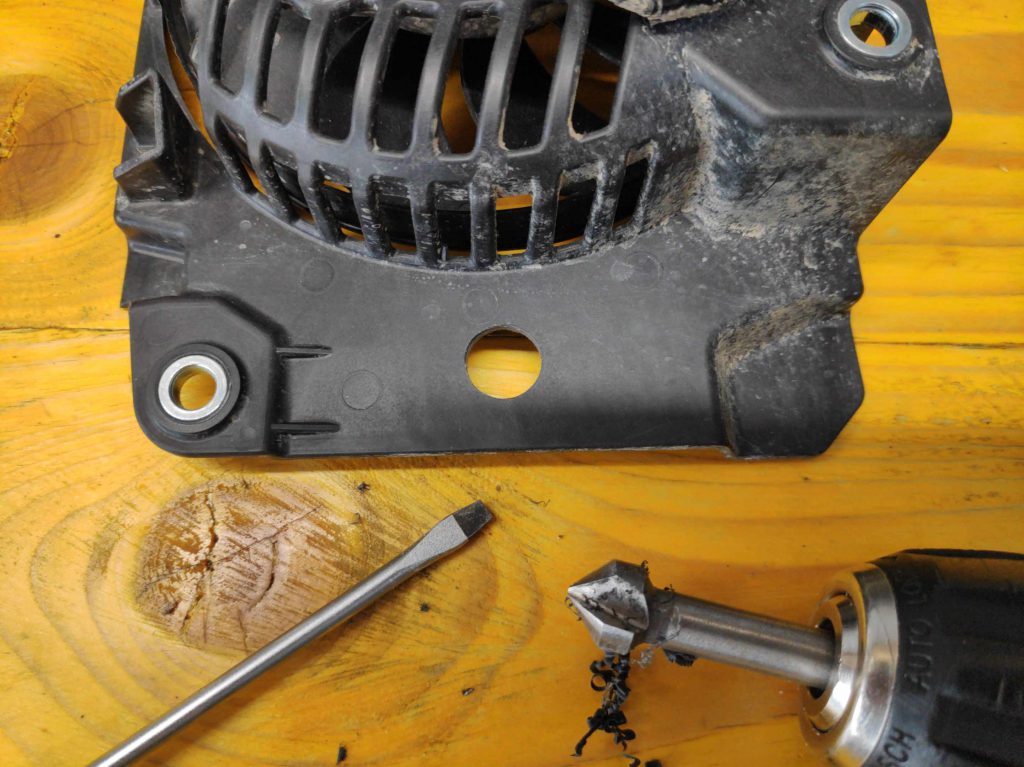
Next was the rear upper chain guard:
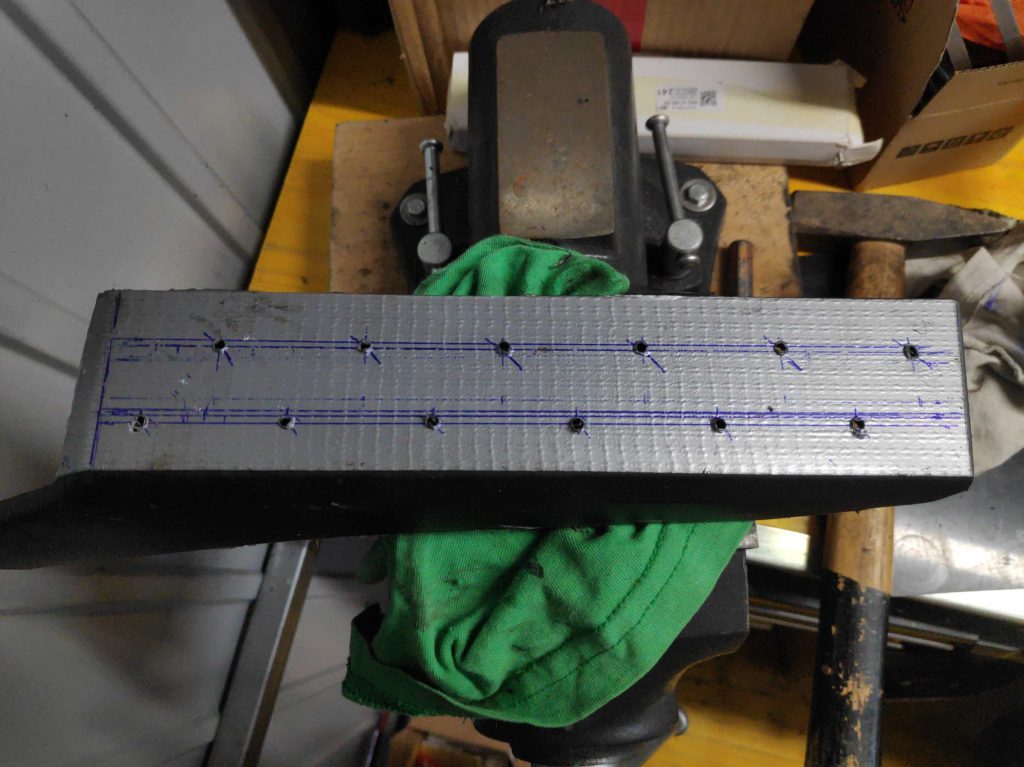
I decided drilling a few big holes into it, for …
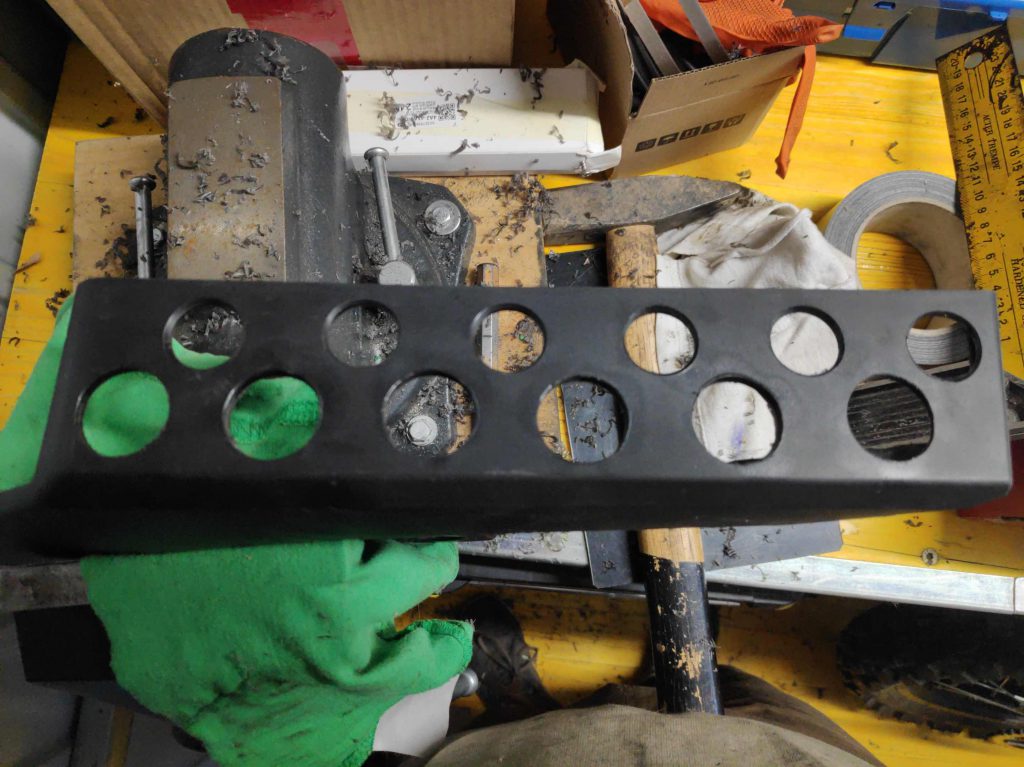
prevent it under muddy conditions from bending the guard towards the back wheel and getting caught. I already made good experiences with this mod at my KTM 690.
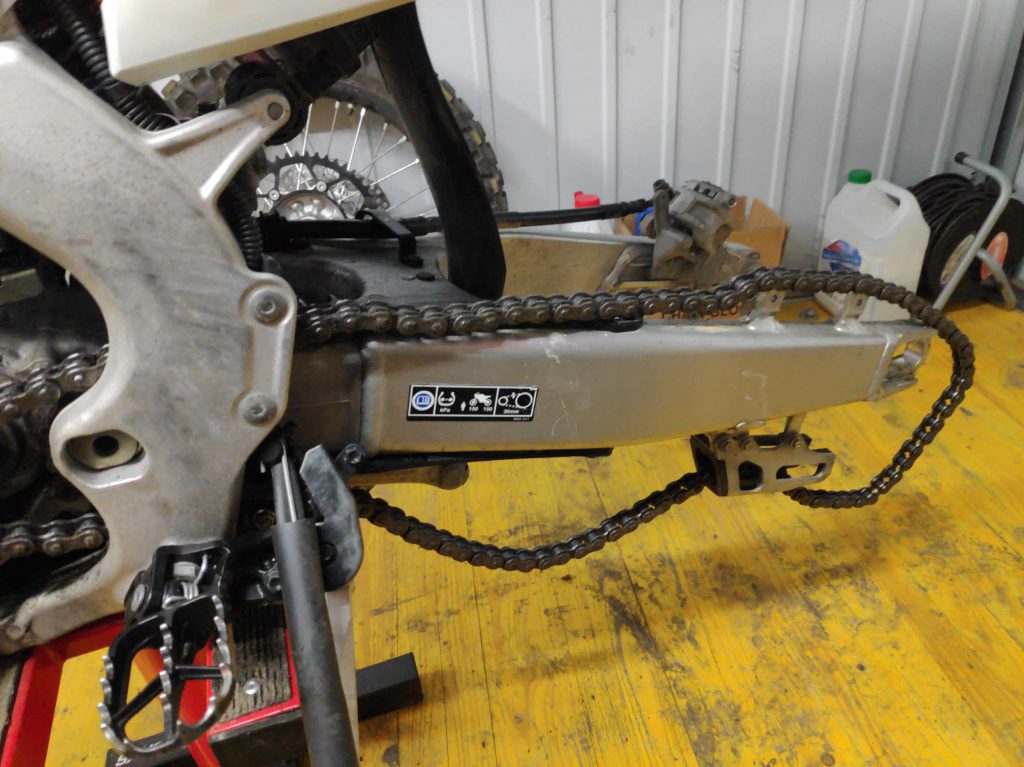
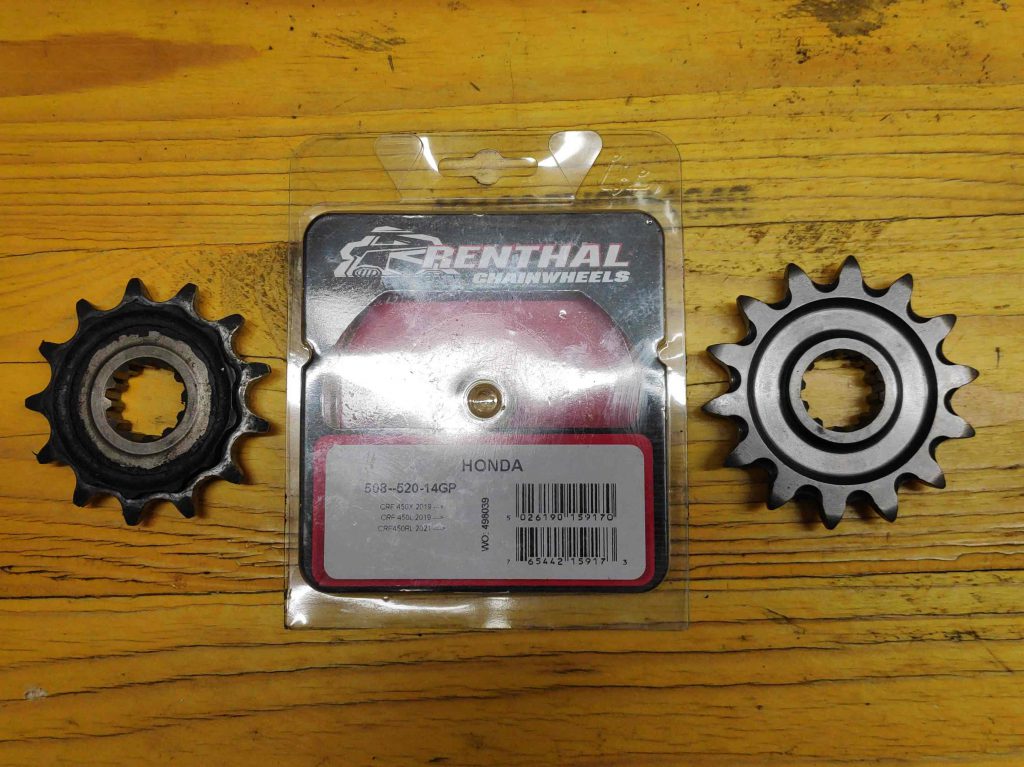
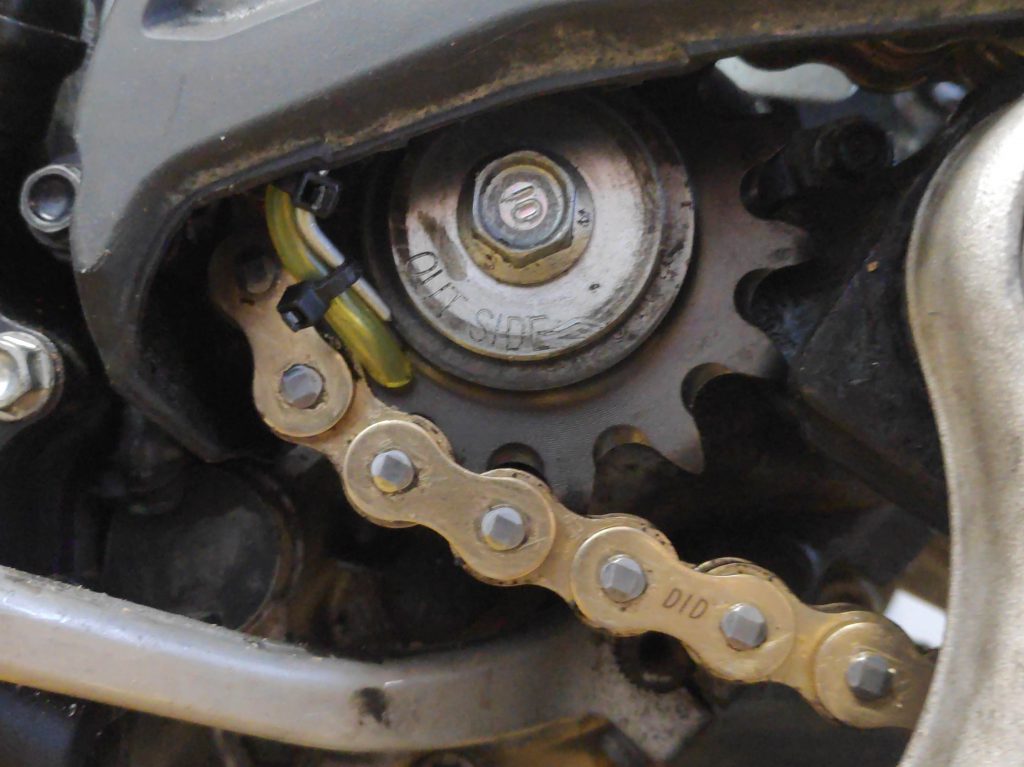
Next I unmounted the whole back wheel and …
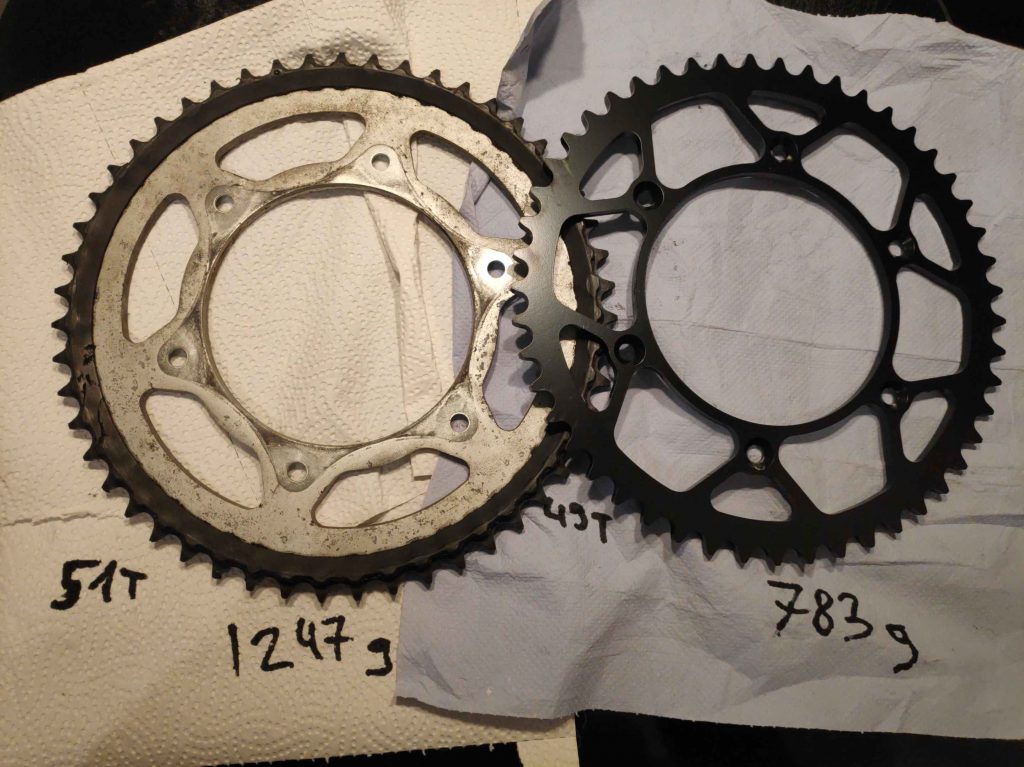
changed the stock chain wheel with a two teeth smaller and about 470 gram less heavy aftermarket chain wheel.

Having the back wheel out, I continued with dismounting the swing arm.
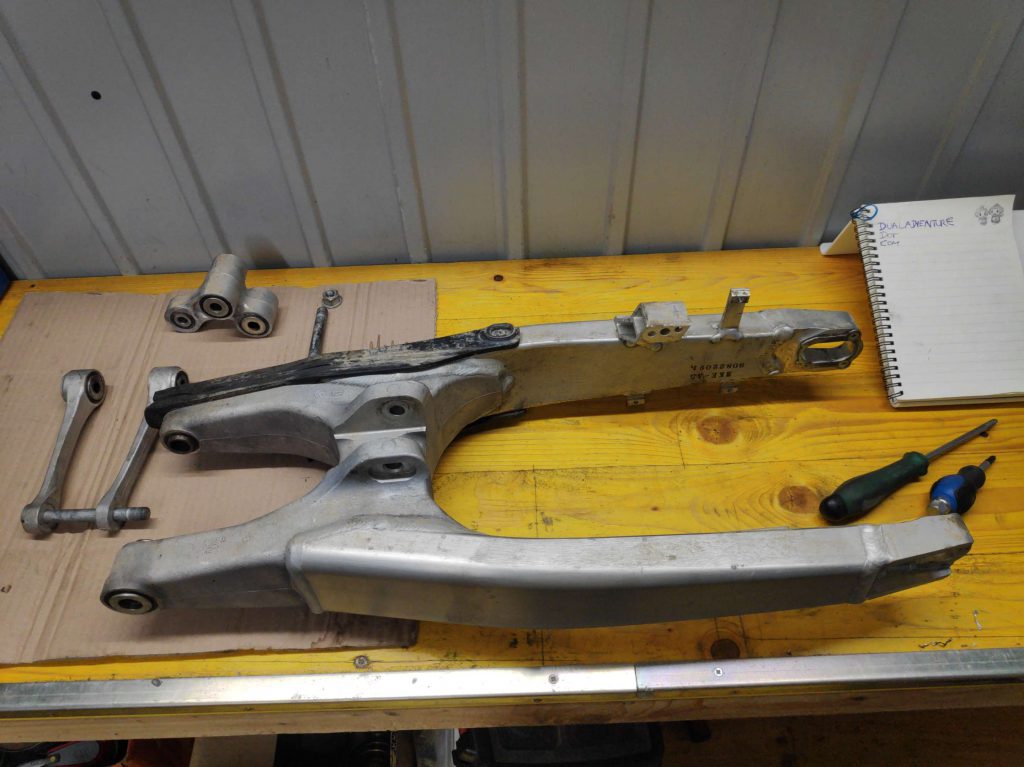
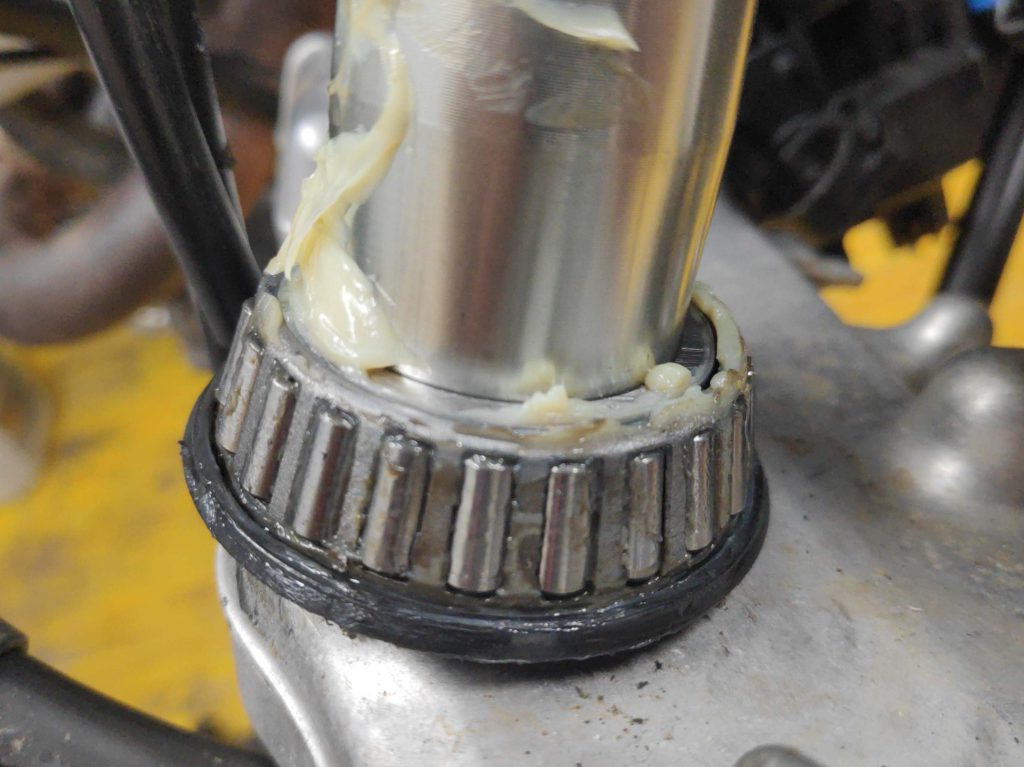
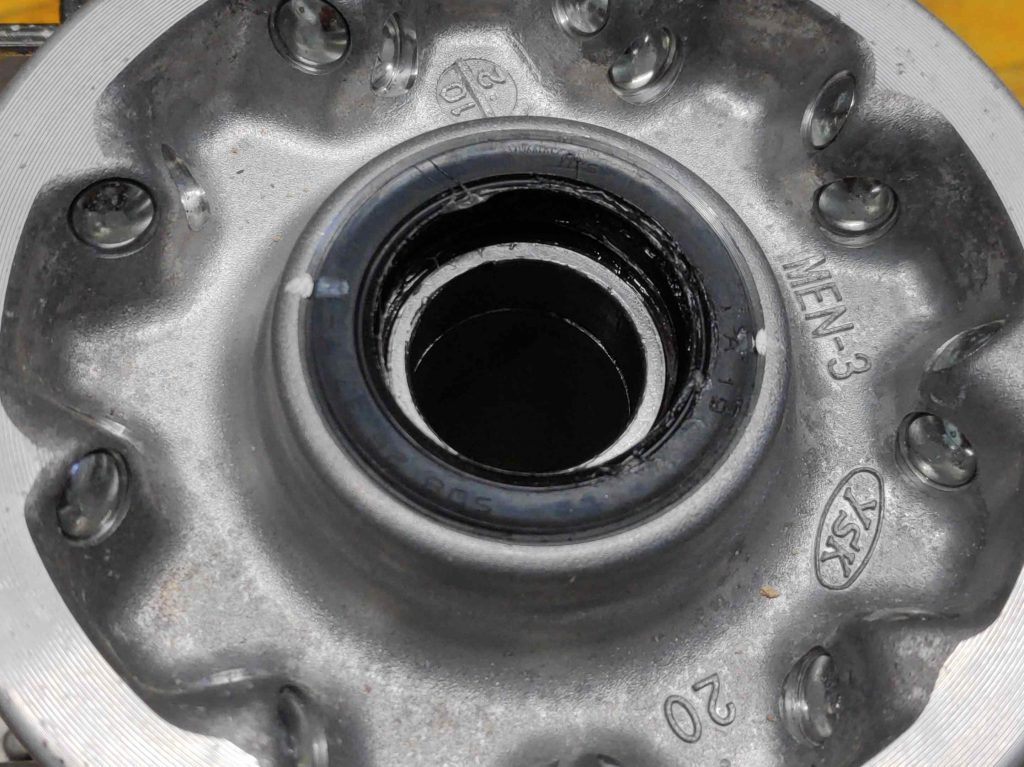
Motorcycle manufacturers in general are well known for being greedy with greasing the main bearings. Honda is no exception:

Dry, …
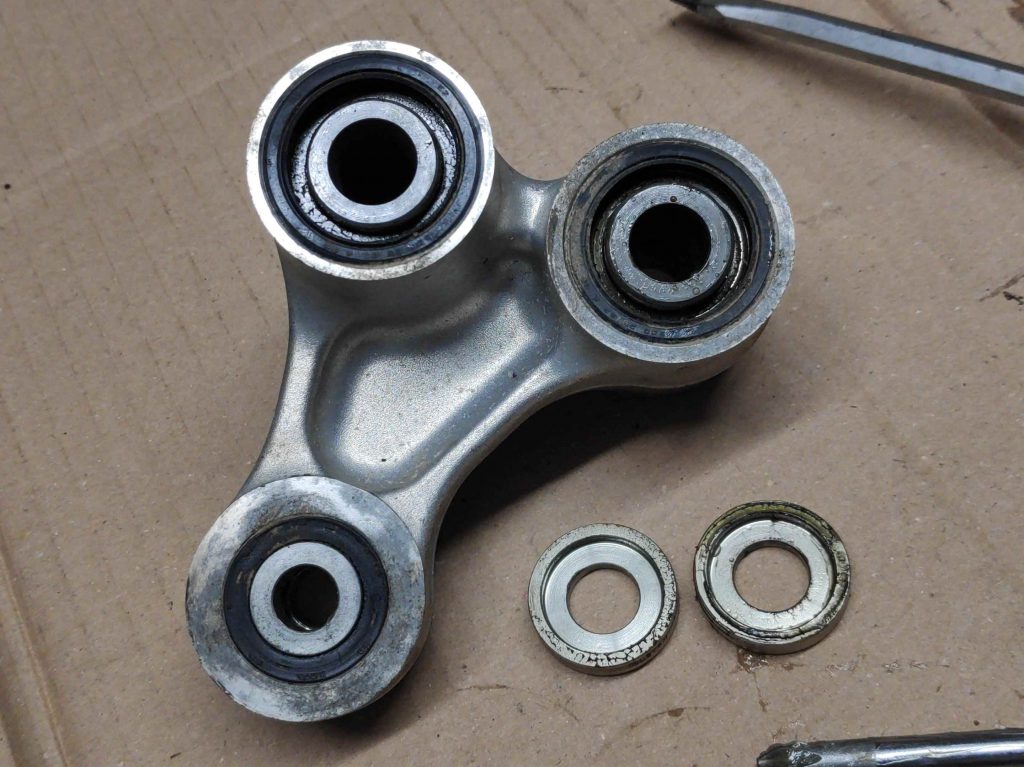
dry …

and dry. Therefore, I …

greased …
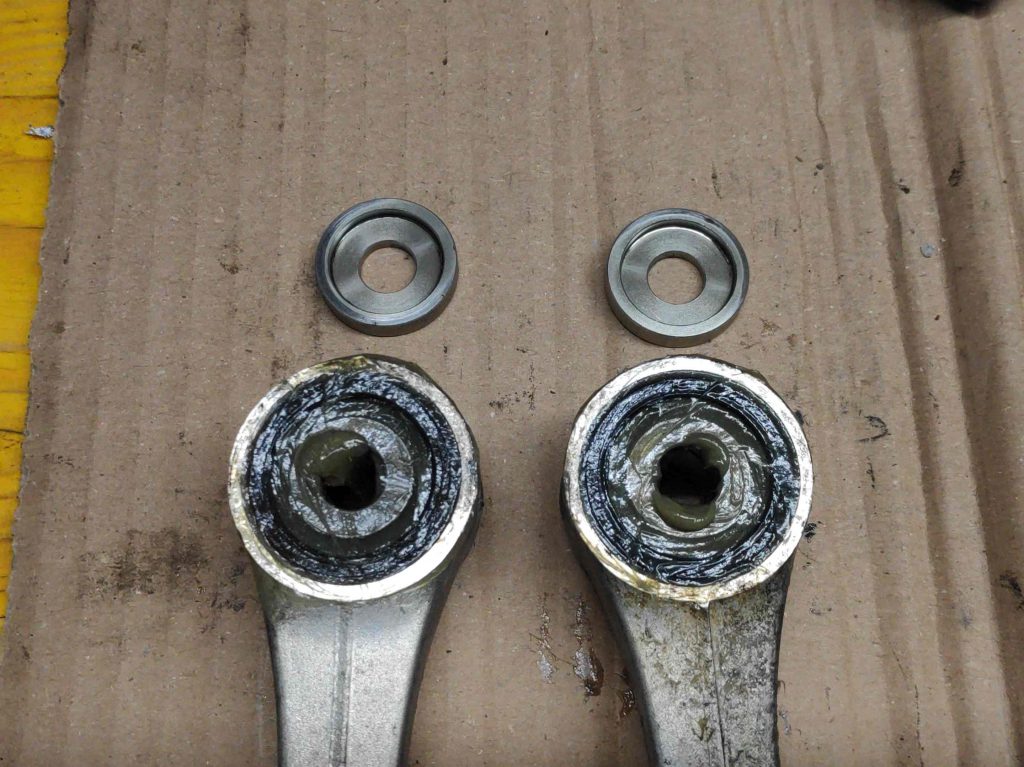
all the swingarm and shock bearings …
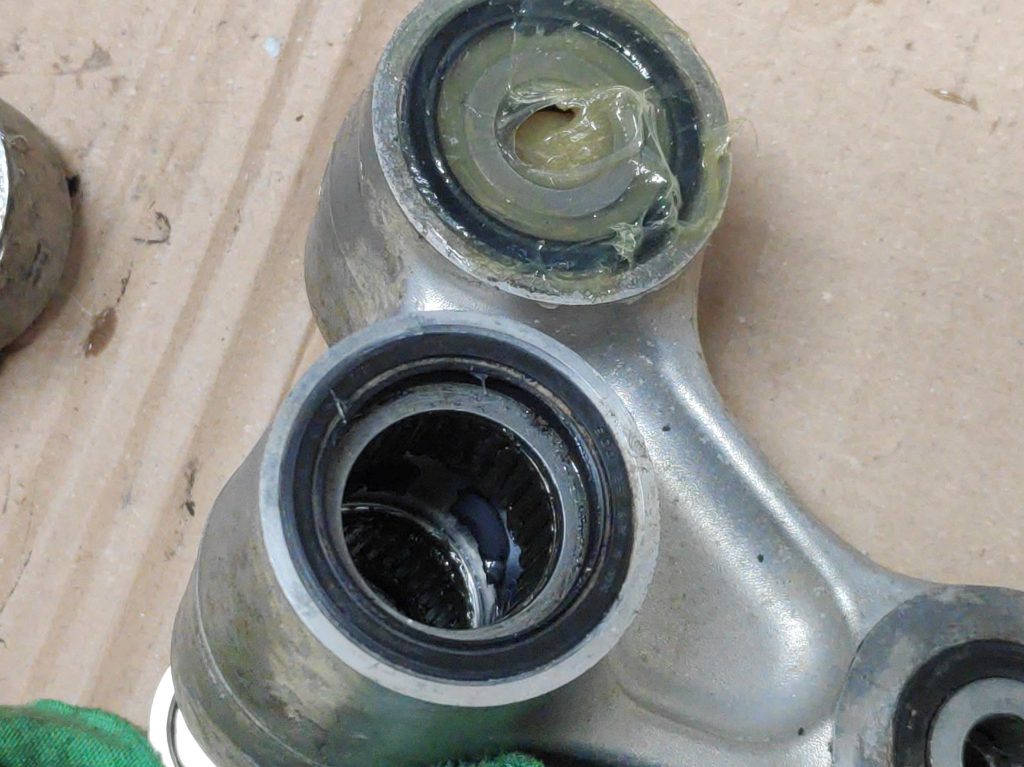
very …
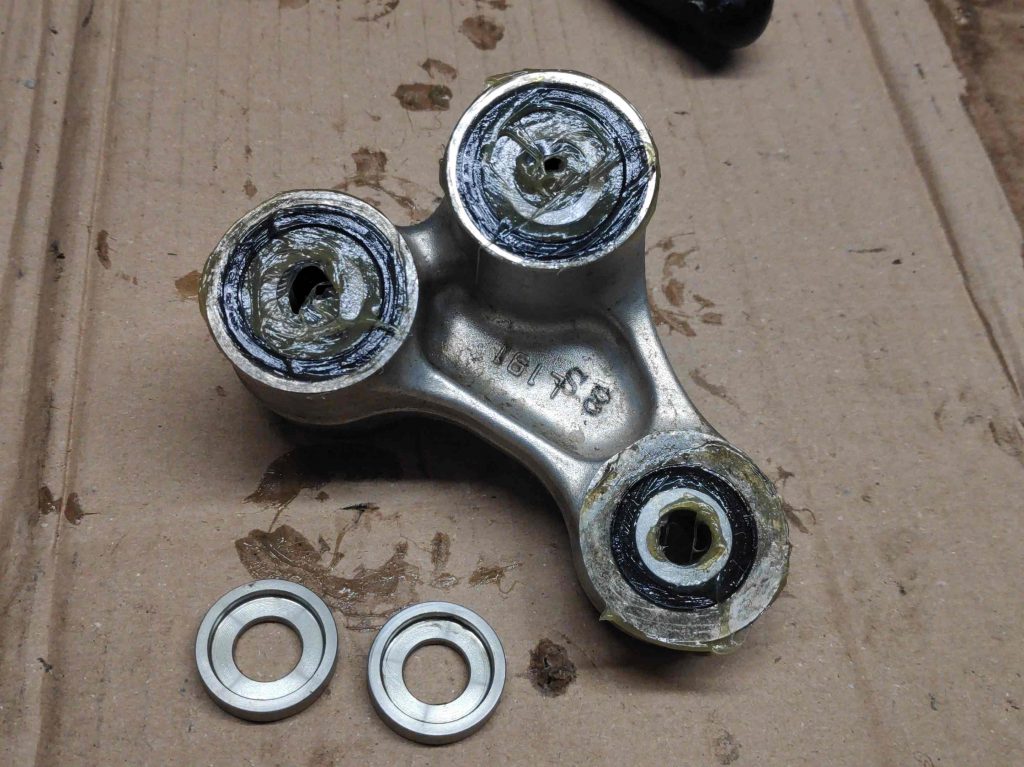
well.
Having done this I built the swing arm back in. Next I stripped ….
the front side- …
and also the back plastics, as well the seat from the bike. Next thing to do: …
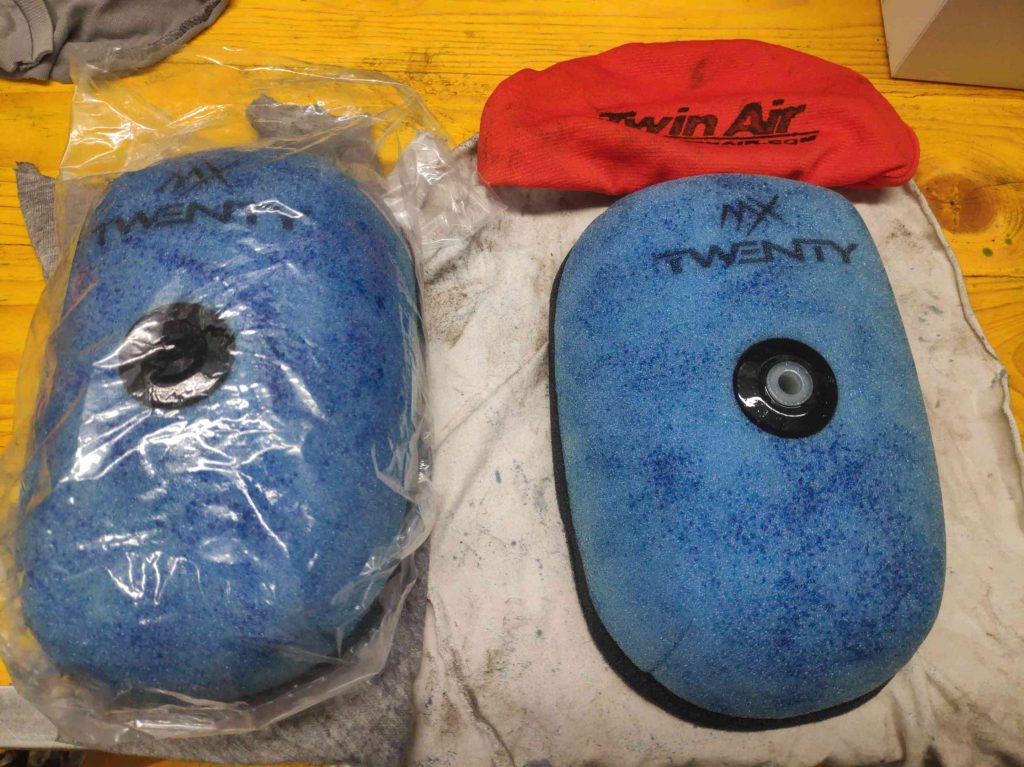
lubing the air filter and putting an air filter sock for additional filter performance over the freshly lubed air filter, before …
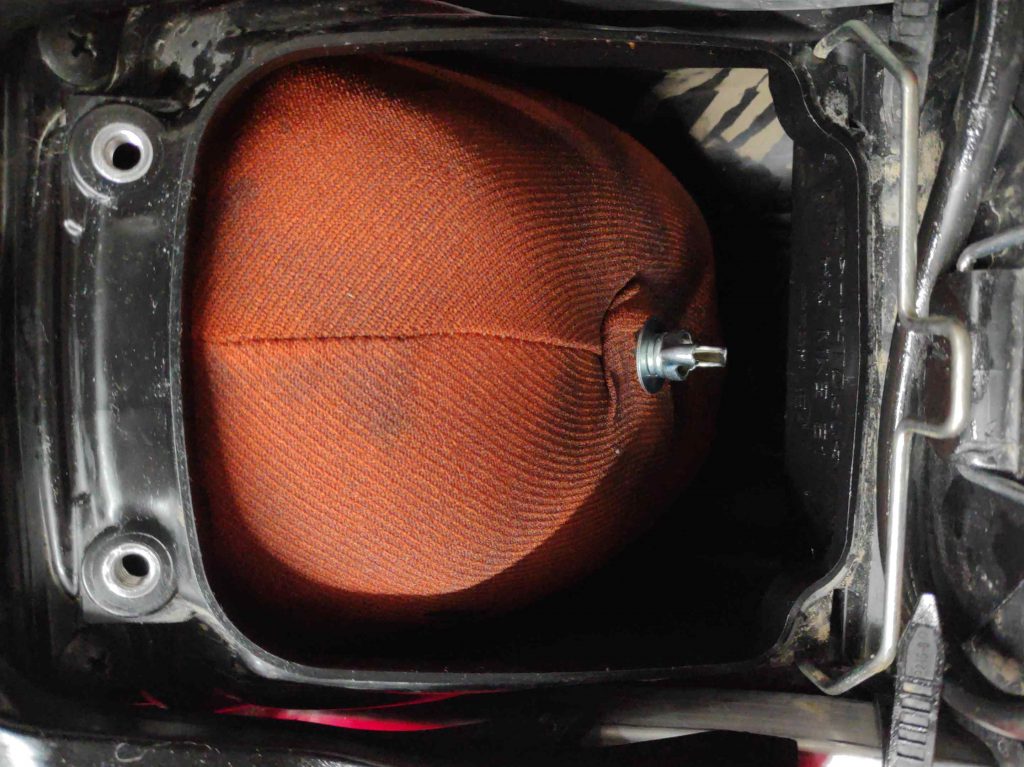
reasambling the airbox.
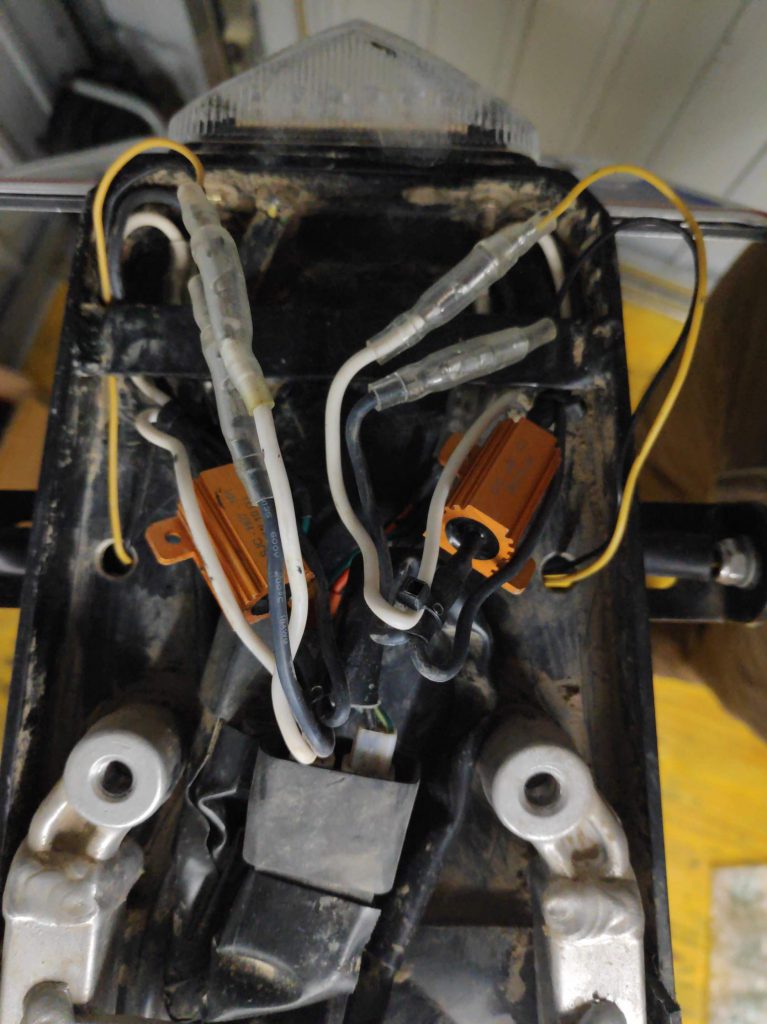
The pre owner of the bike had installed some aftermarket indicators, which needed additional resistors for operating properly. I didn’t like the resulting …
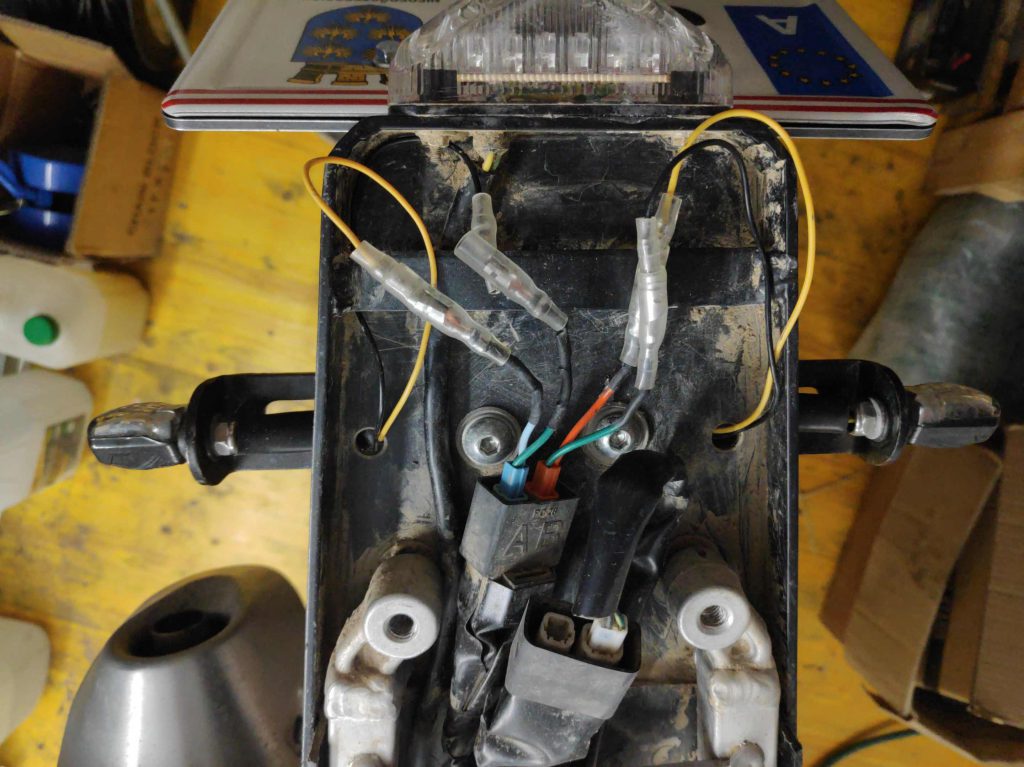
ratnest underneath the tail end cover …
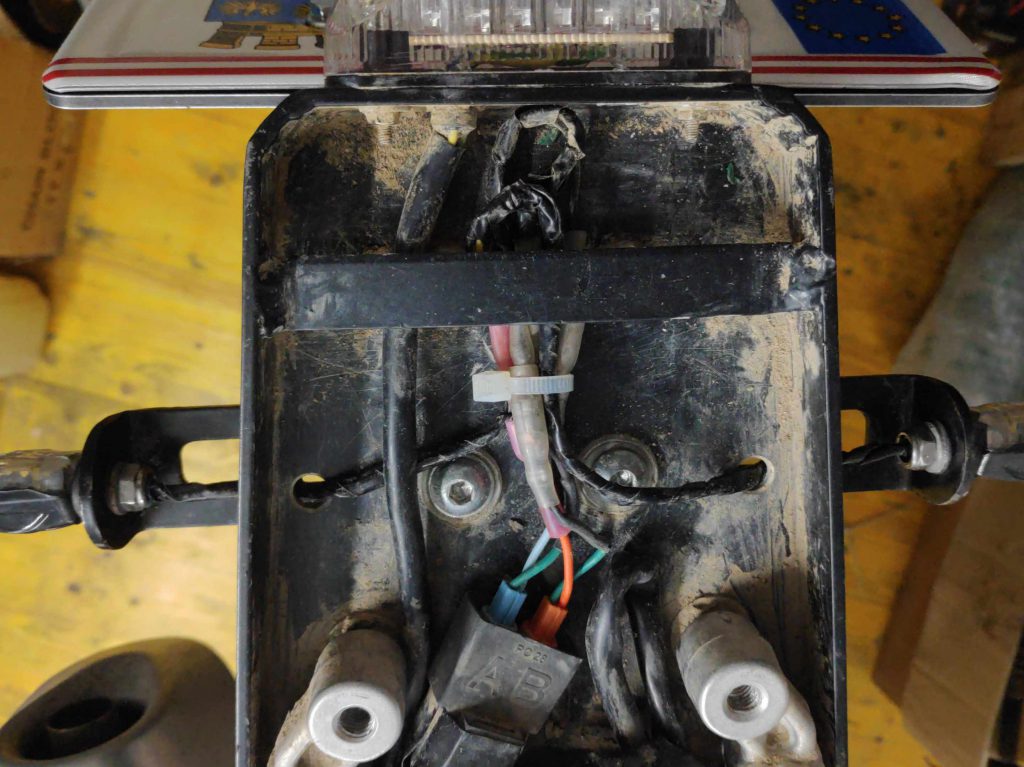
and so I got rid of it …
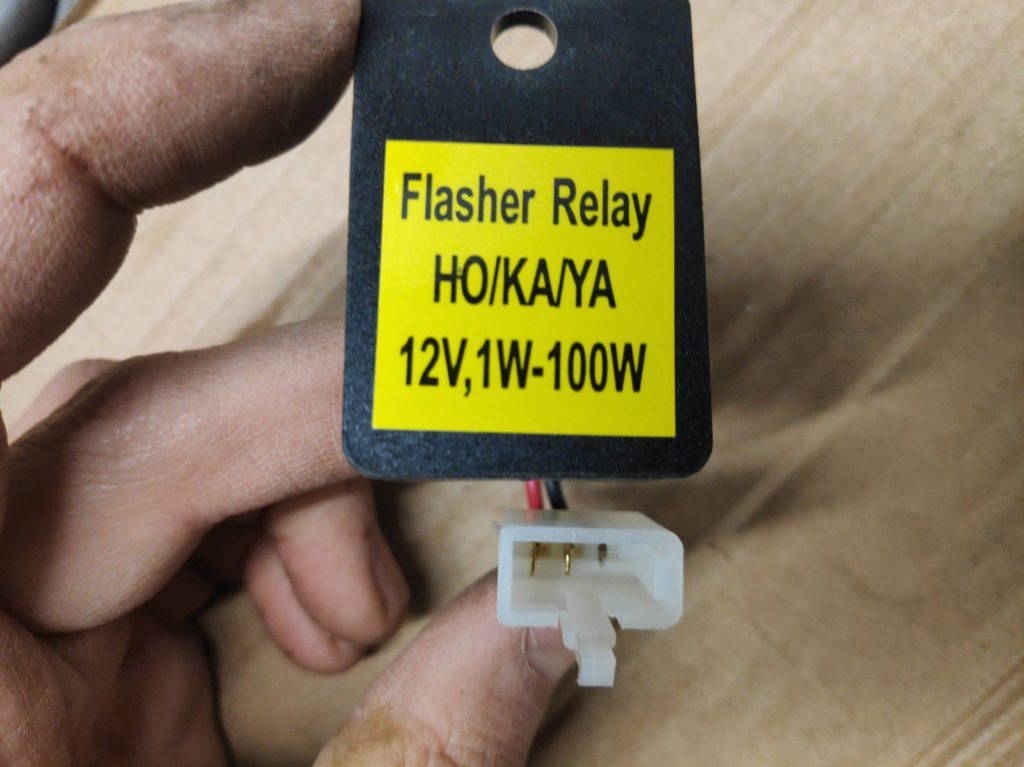
adding a fitting LED-Indicator-Relais to the bike, instead of the original one.
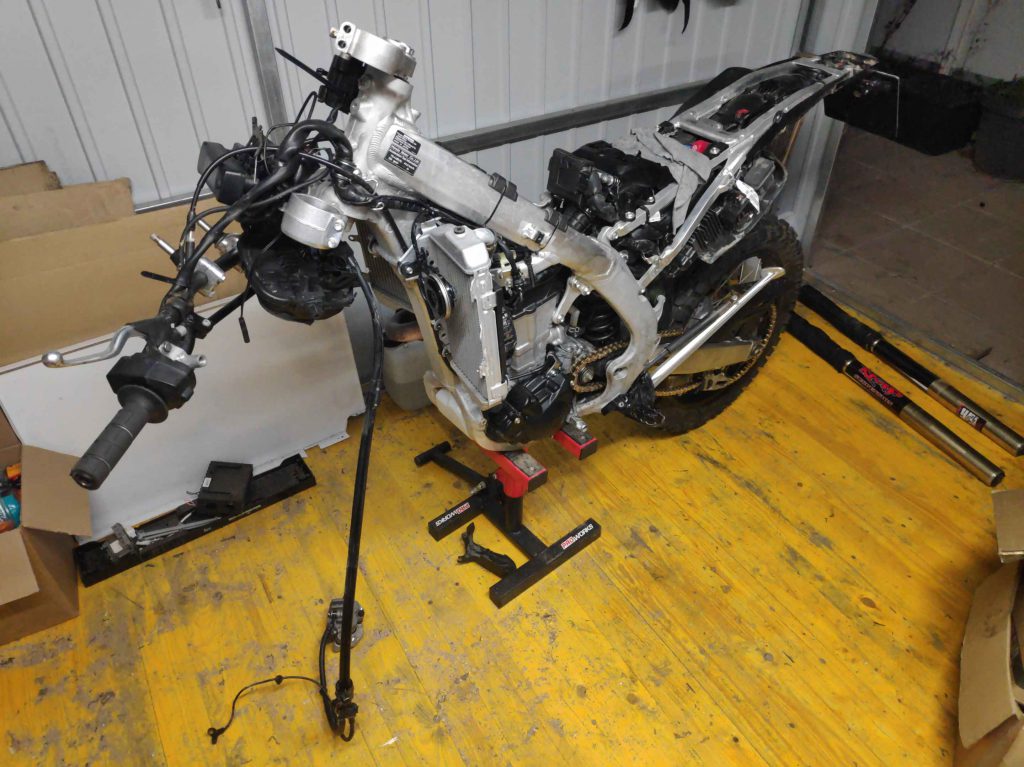
Next I removed …
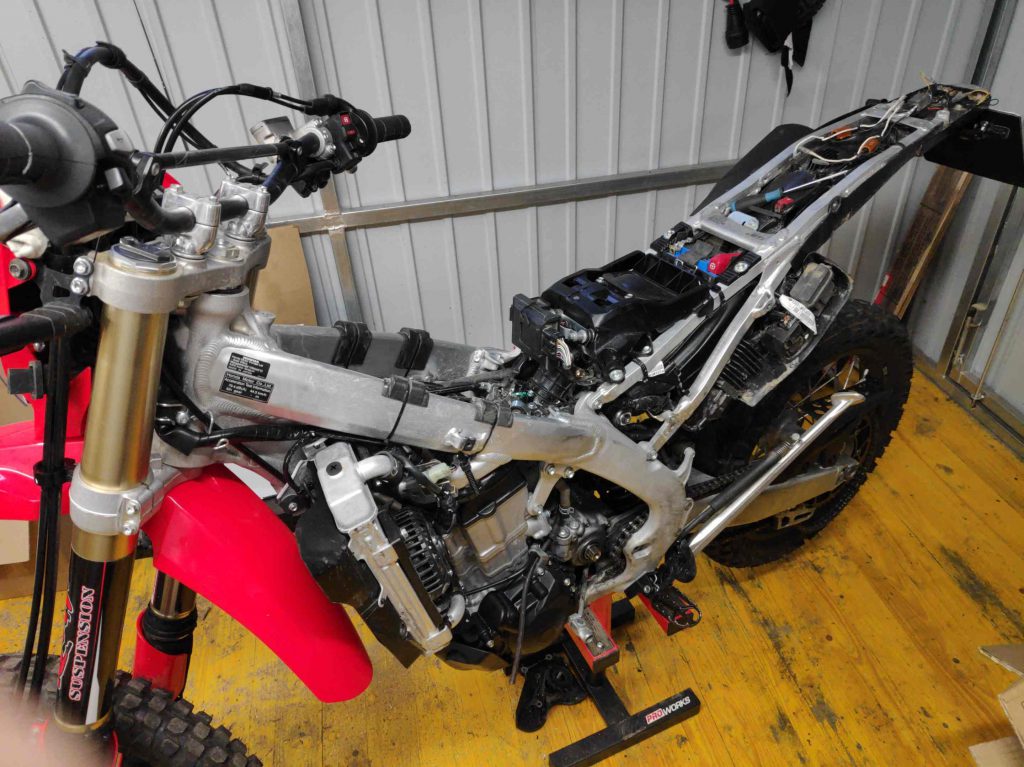
the tank and had a proofing look at …
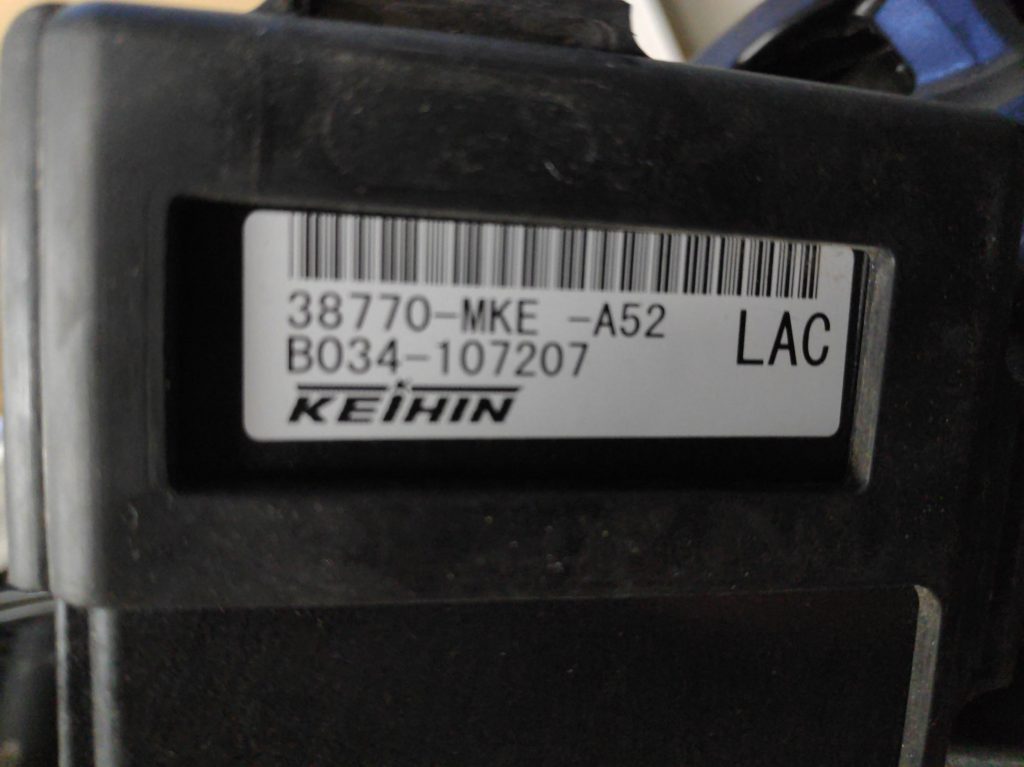
the ECU. Everything is fine there, the pre owner had installed the US Market ECU, the big holed airbox lid and the wide open airbox-connection rubber which squeezes allegedly about 15-18 hp more out of this, in the EU-Market, to 25 hp restricted motorcycle.
Having the tank off …
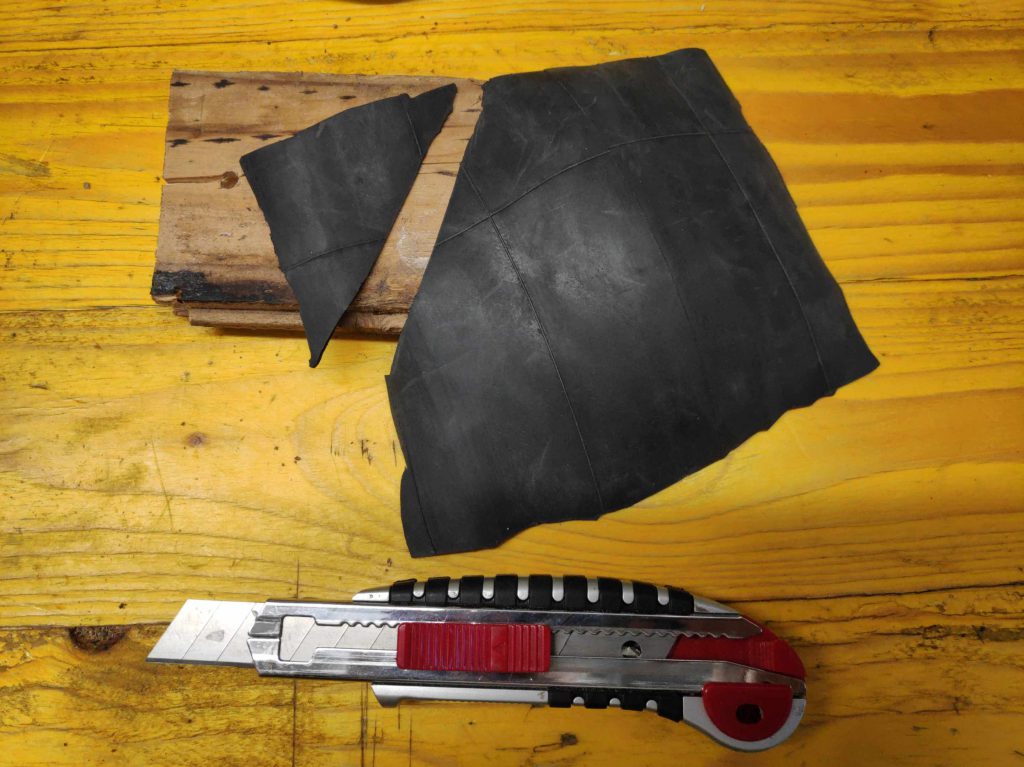
I cut an old front tube into a fitting patch for protecting the Main-Wiring-Beam …
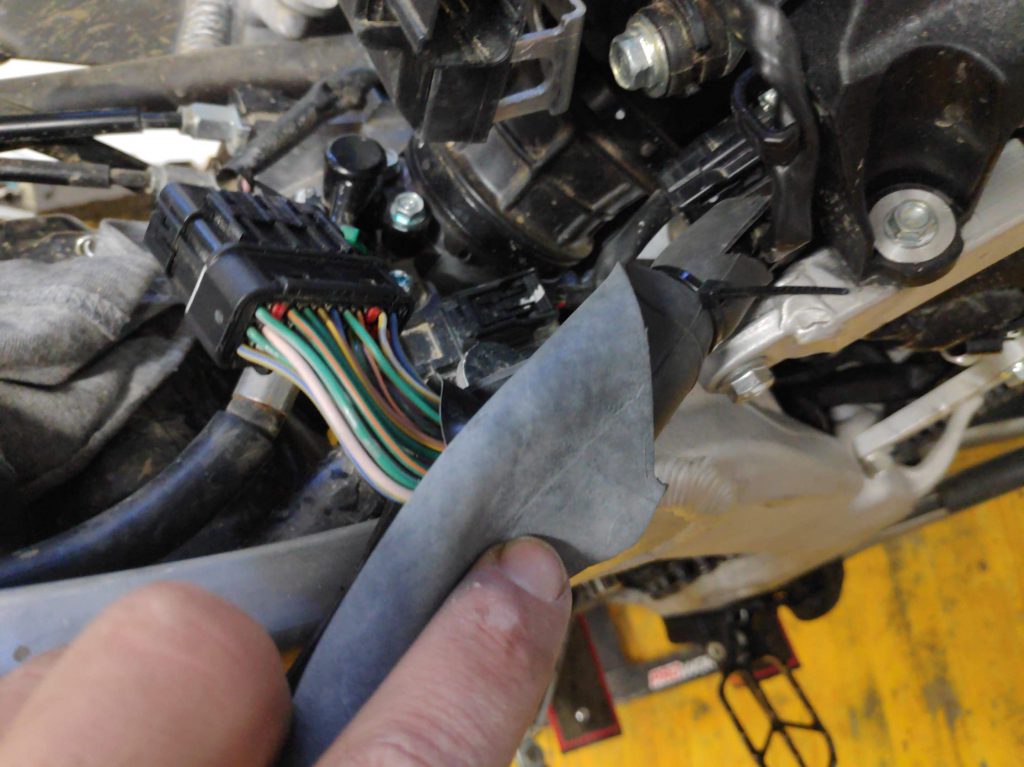
right at the bend …
near the ECU.
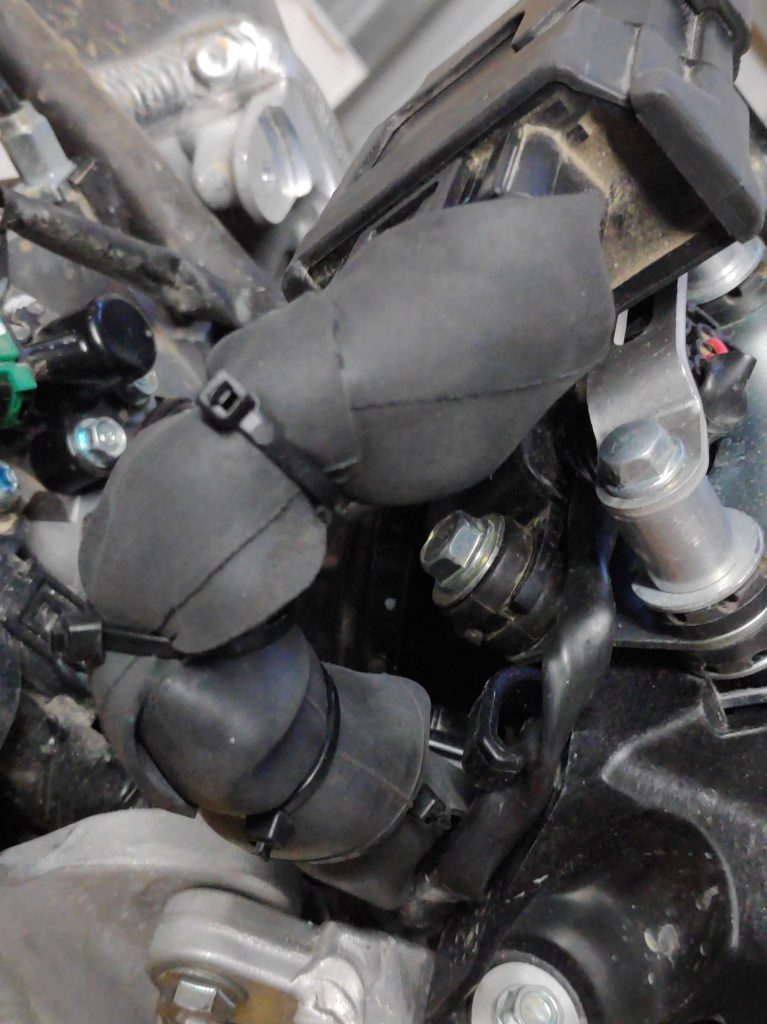
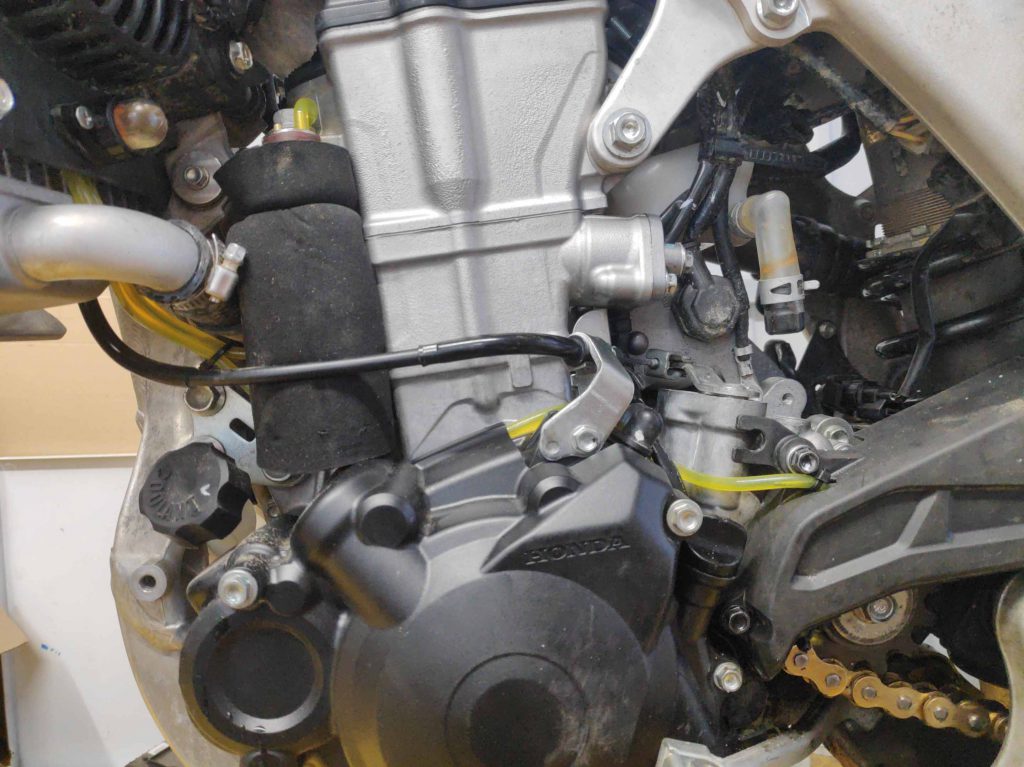
I also got rid of the standard radiator guards, before …
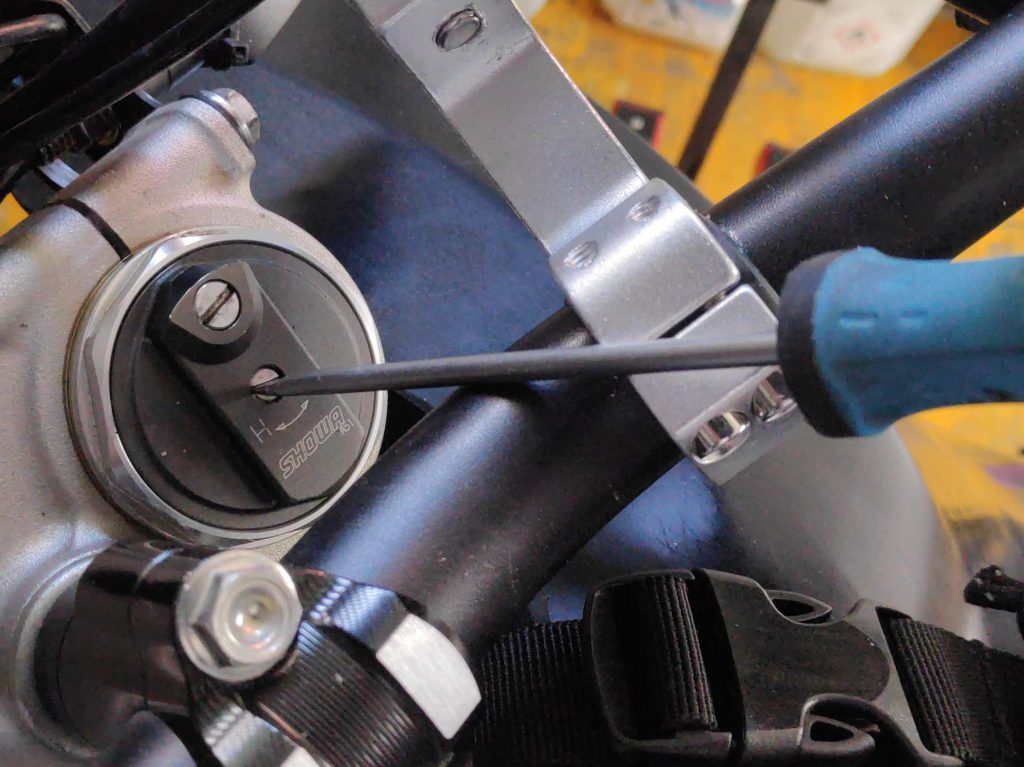
looking into the valve train.
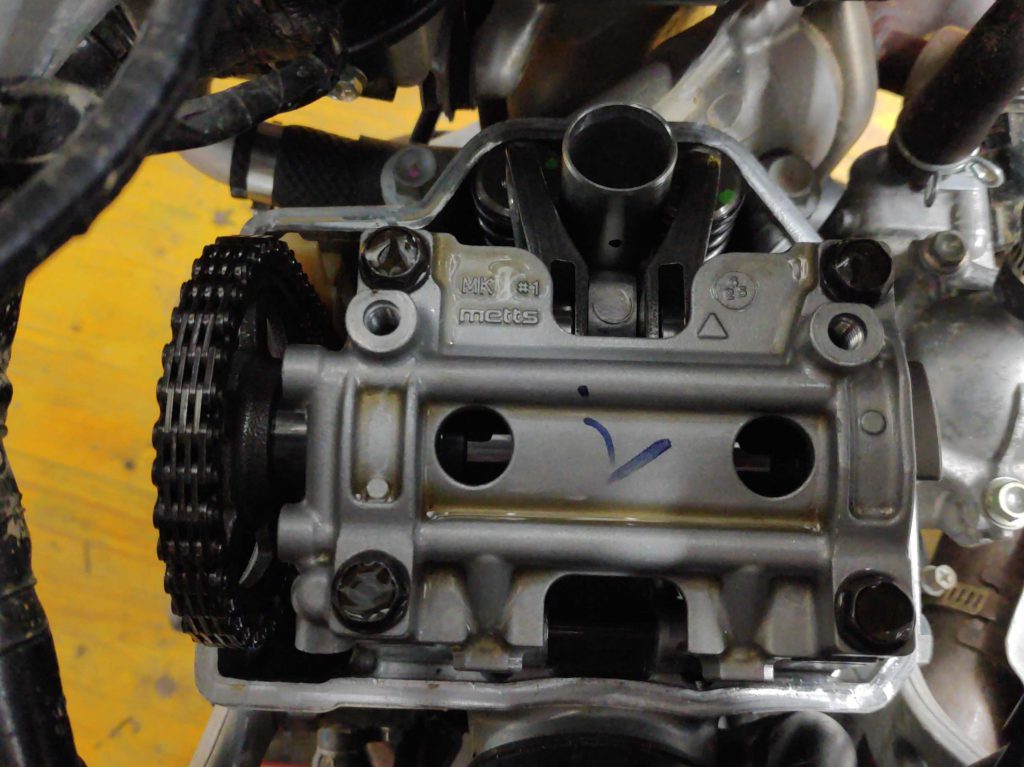
Because valve clearance tend to shrink over the time, I decided to adjust the valve clearance …
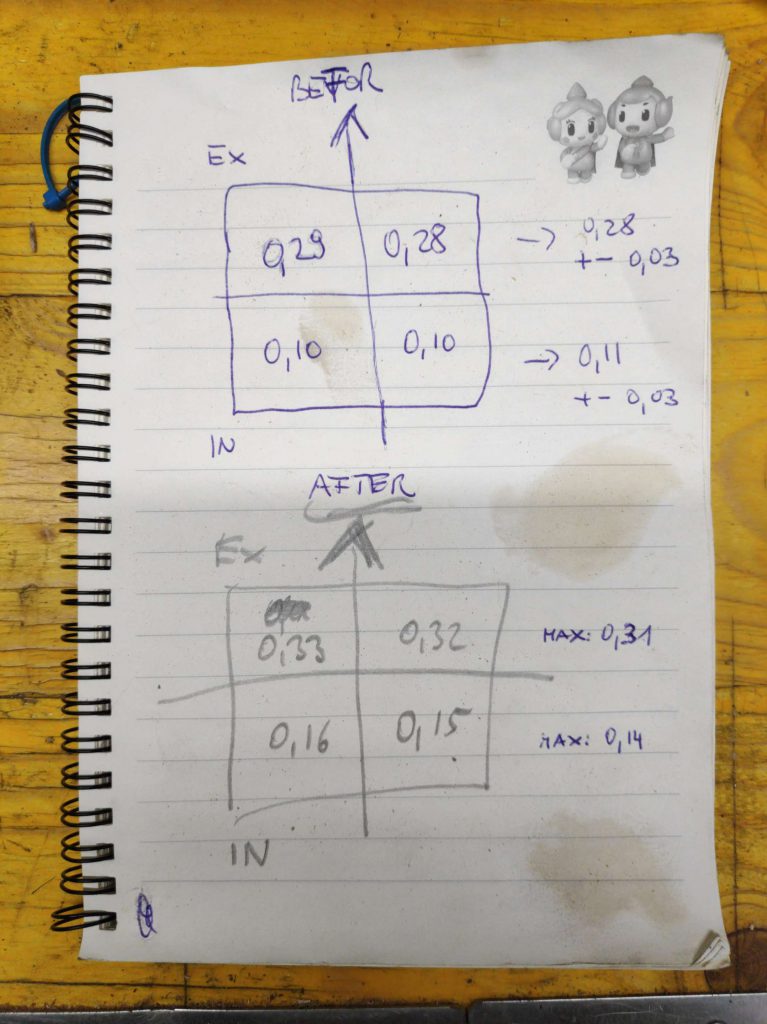
slightly bigger (+0,01 to + 0,02 mm) than Honda recommends for having the option to stretch incoming maintenance intervals this way a bit.
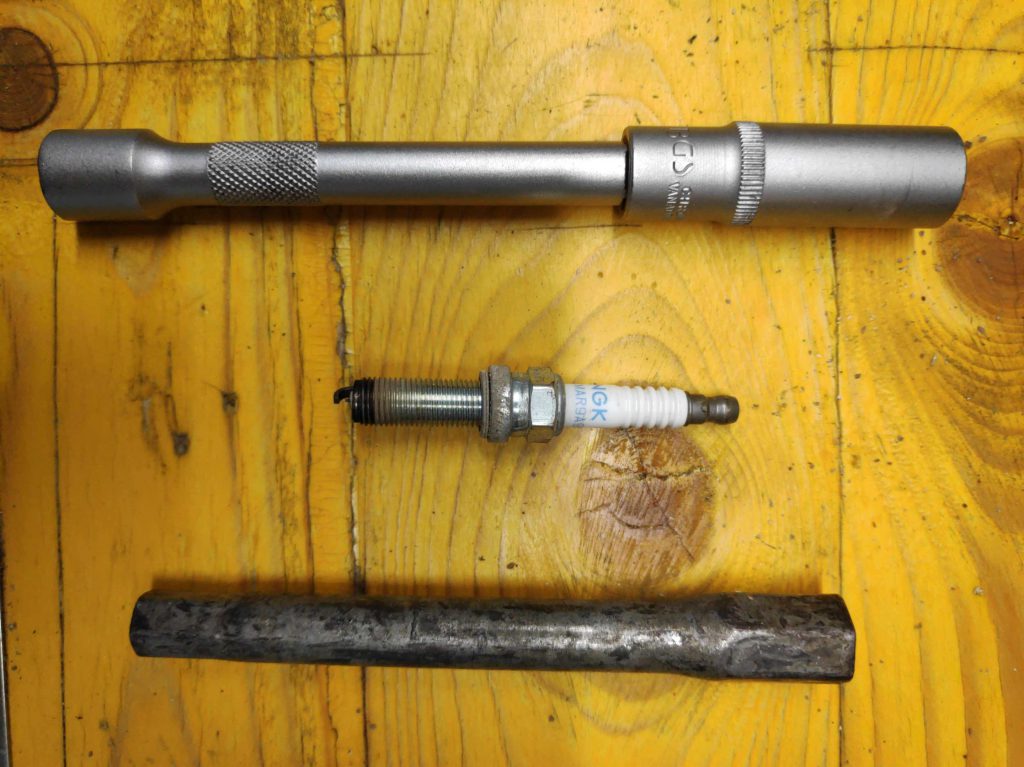
Same with the spark plug which was adjusted to the minimum tolerance, because due to wear …

the spark plug electrode gap increases.
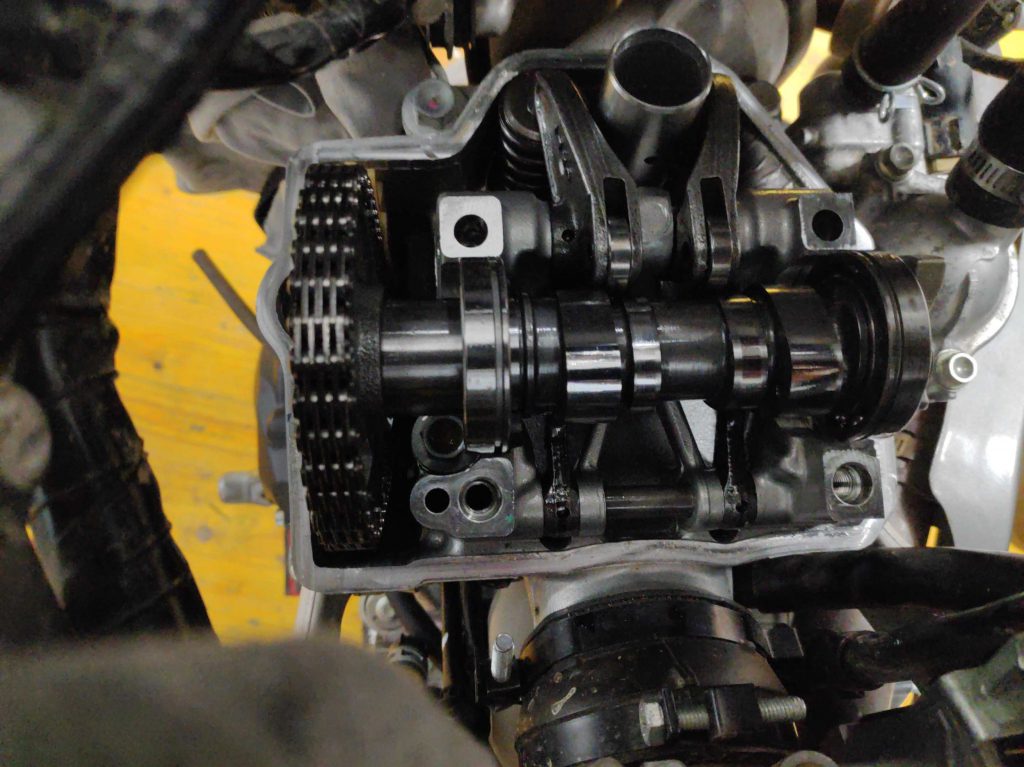
Having the top end reassembled …

it was time to throw the bike on its side …
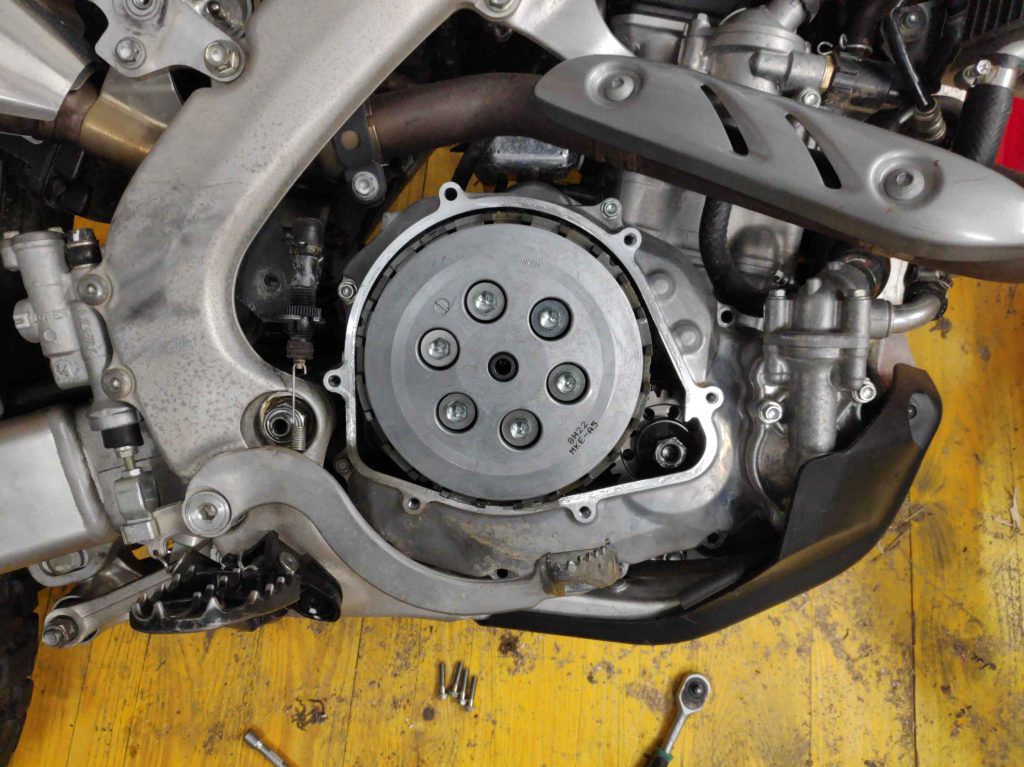
for replacing …
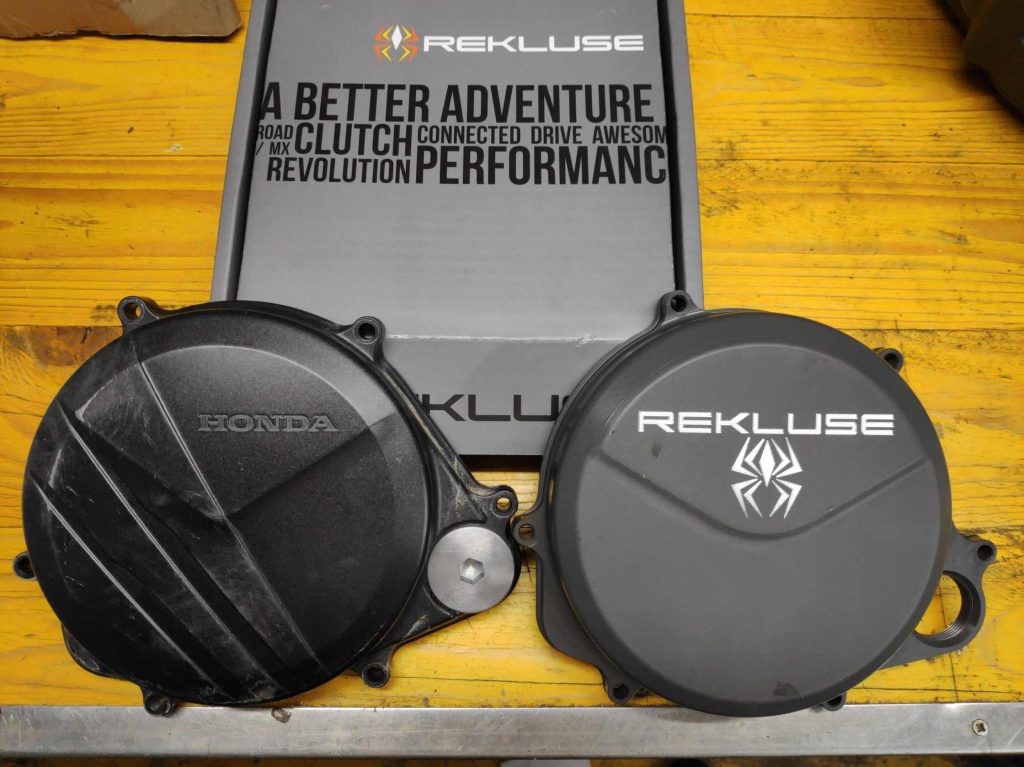
the standard clutch plate cover with an aftermarket part, which adds some oil volume to the bike.
I also …
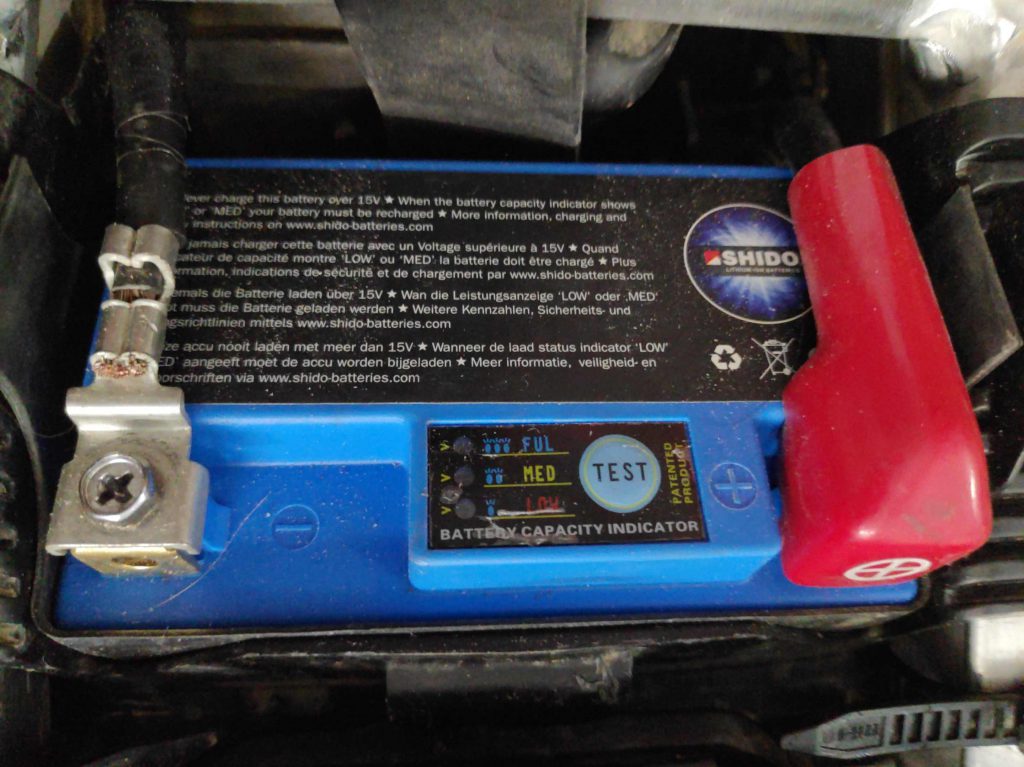
swaped the genuine battery …
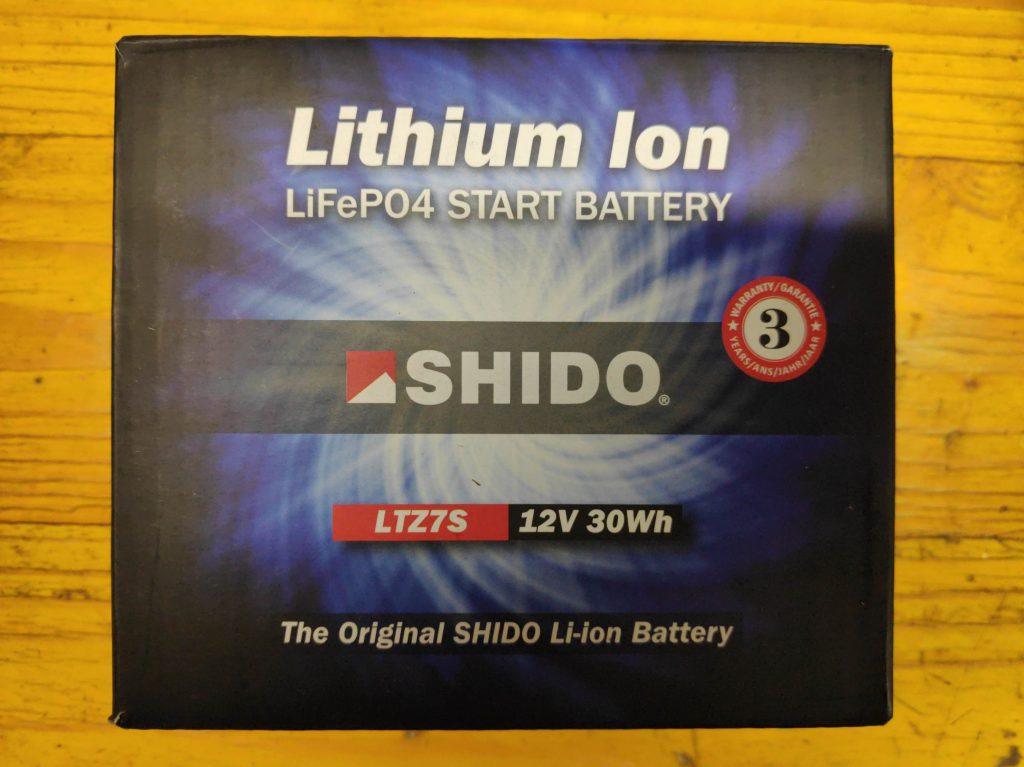
for a less heavy aftermarket part. (minus 600 gramms)
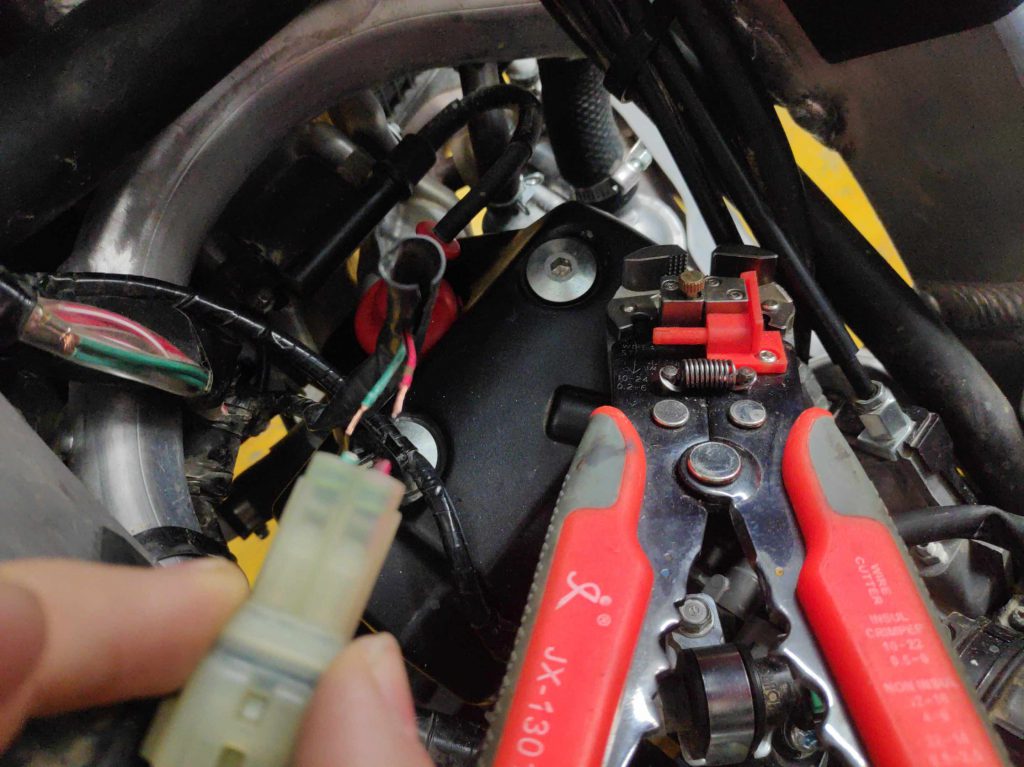
Next thing to do was …
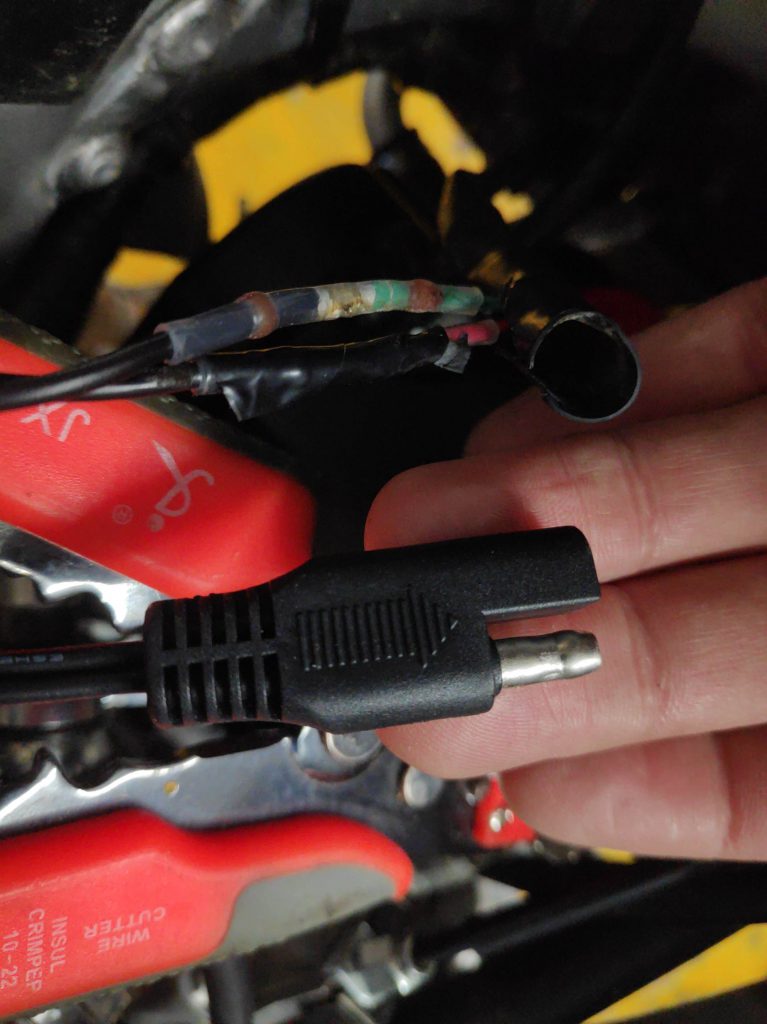
fitting an SAE charging cable, starting from the provided power outlet plug in the left tank area …
to the front …
mask area. Very lately …
the new bigger sprocket (+1 tooth) arrived, which was installed …
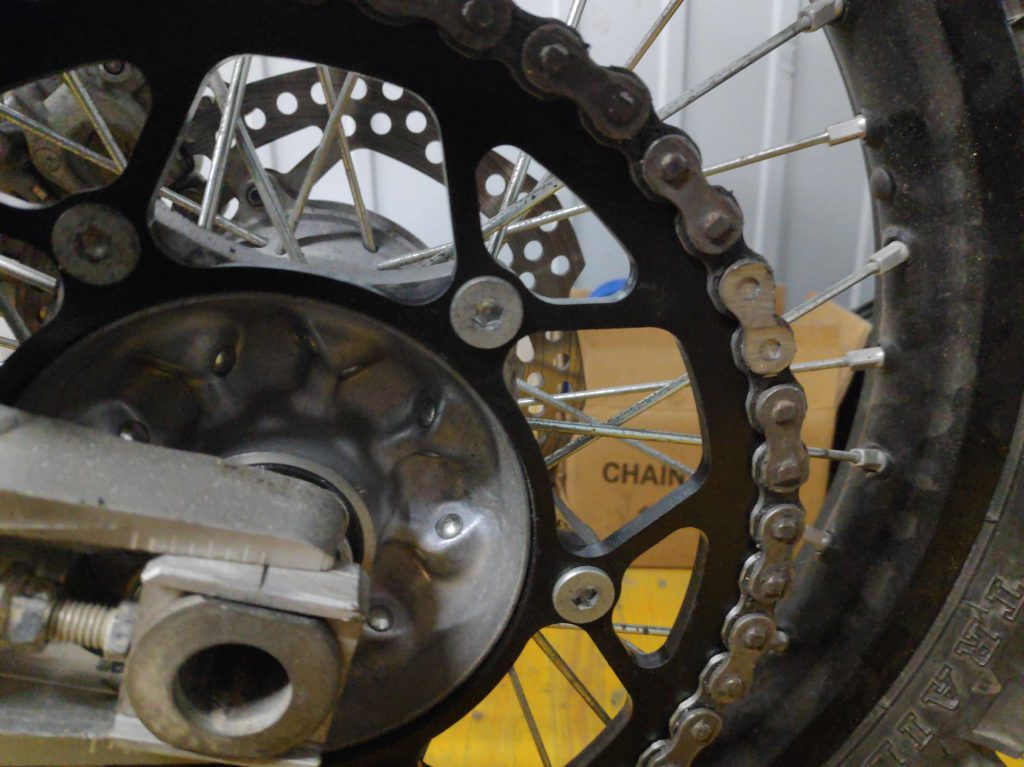
with a stronger than stock chain
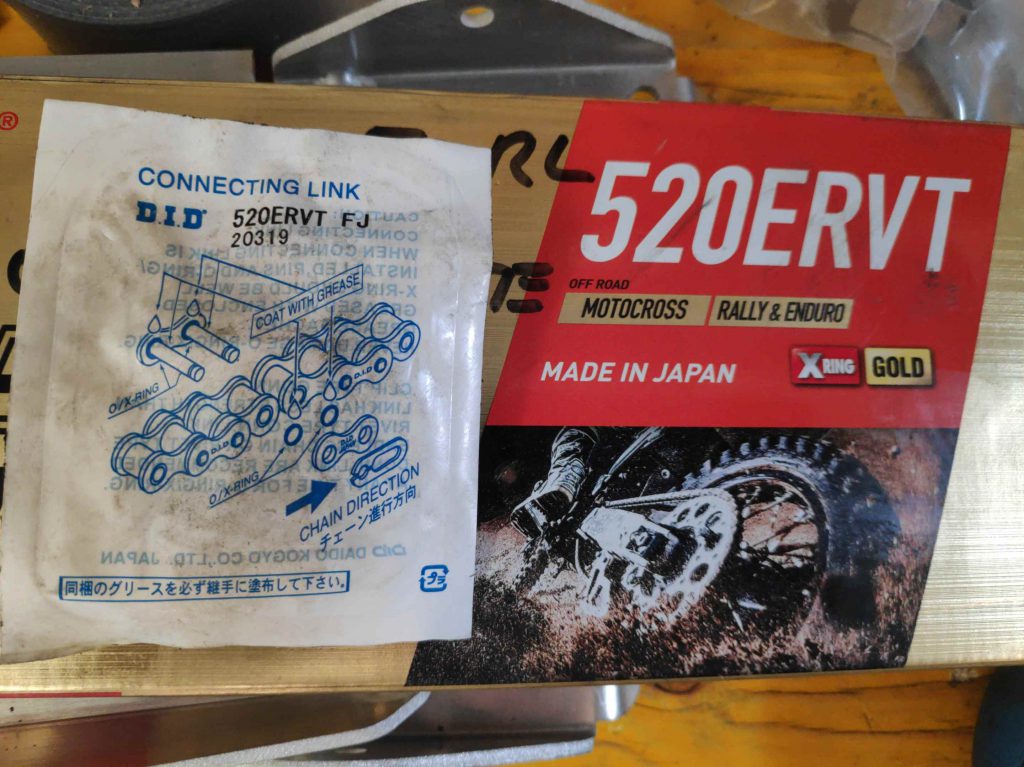
from…
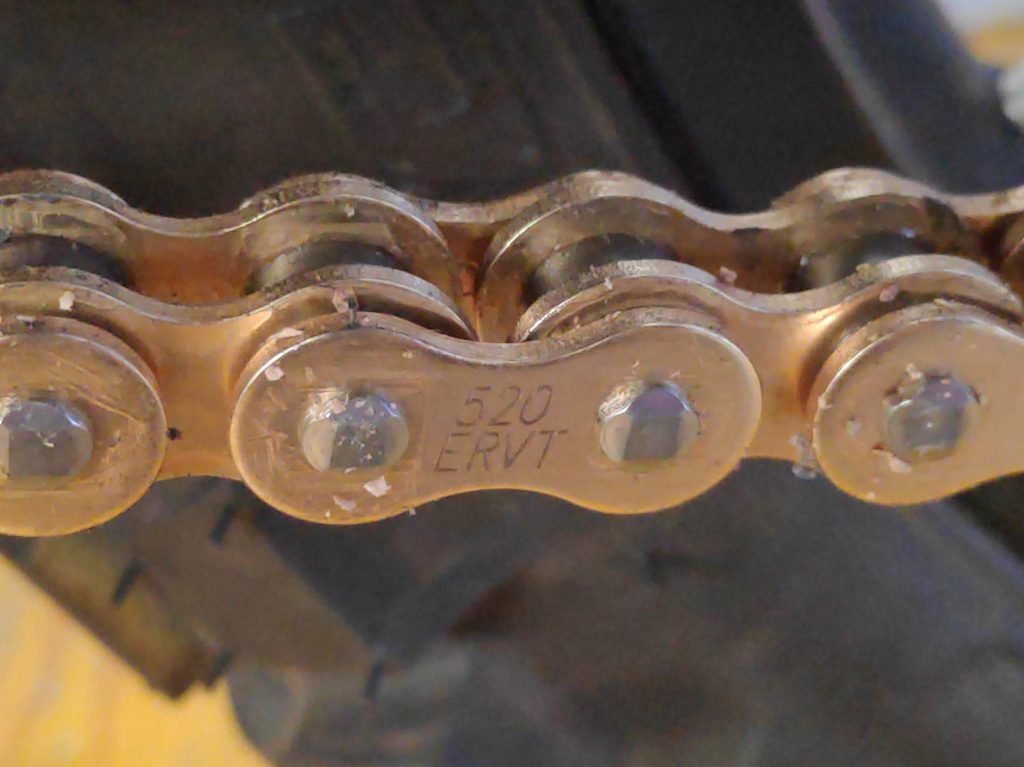
the manufacturer DID (Chain Model: ERVT 520)
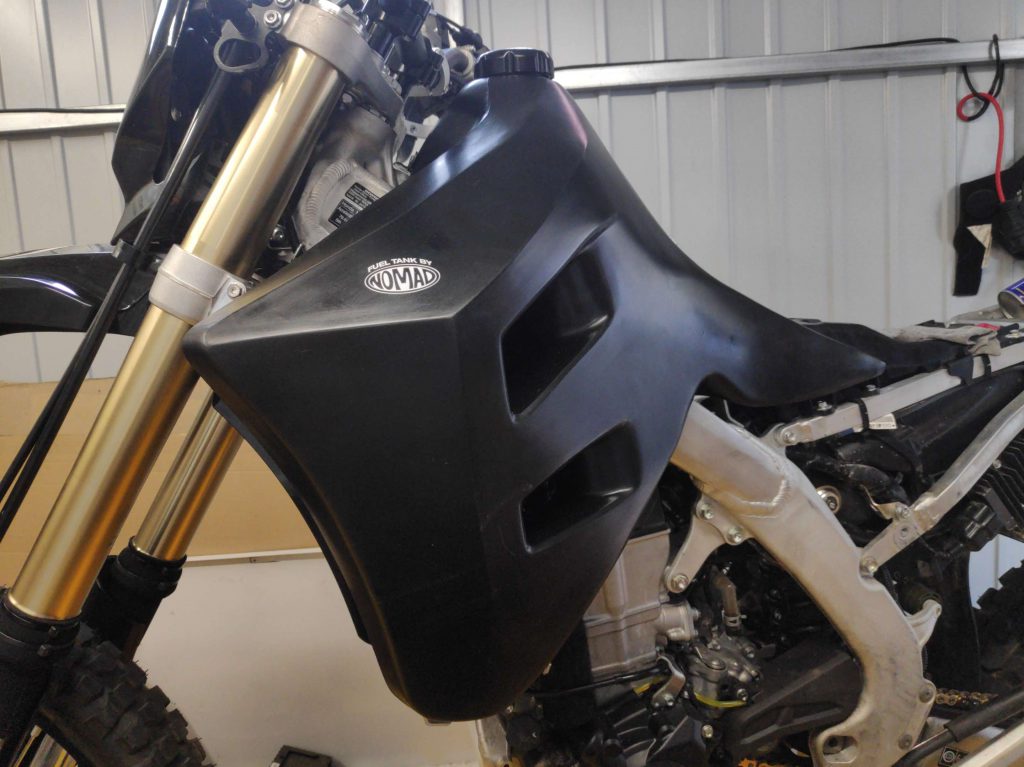
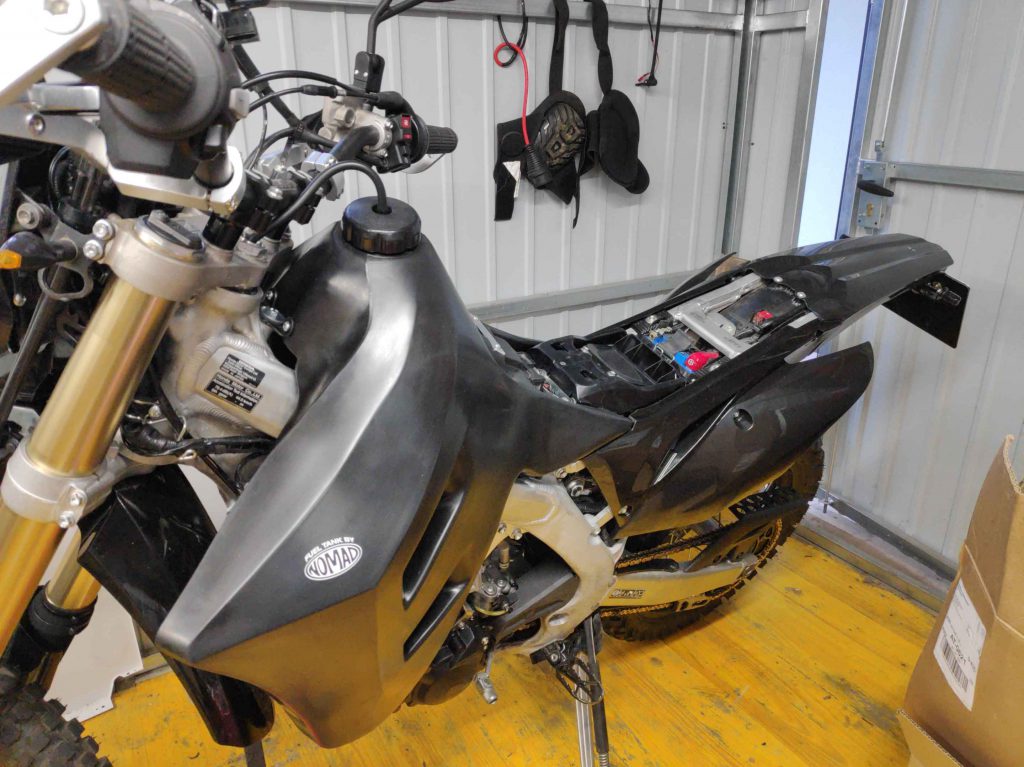
After that I stripped the innards from the genuine tank …
and reassembled them to the new…
bigger 20 Liter Tank from Nomad-Australia.
Now it was time …
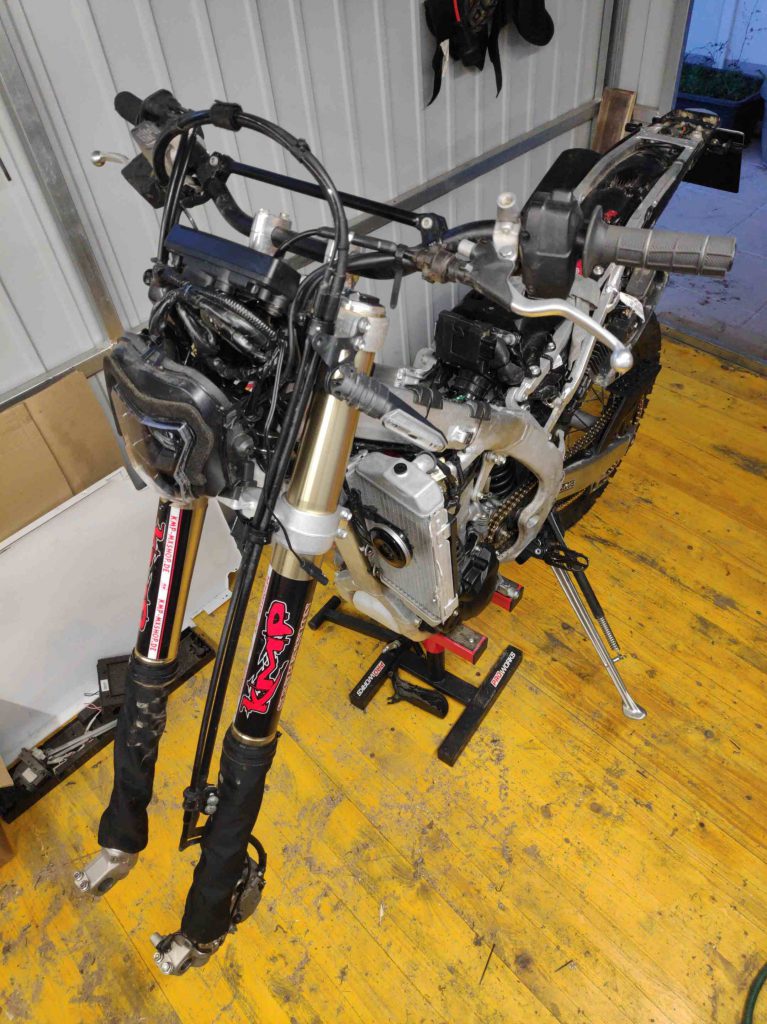
for disassembling the front …
of the bike. Taking off the front fork, I found out …
that the mounted protection Socks wheren’t mounted properly and got …
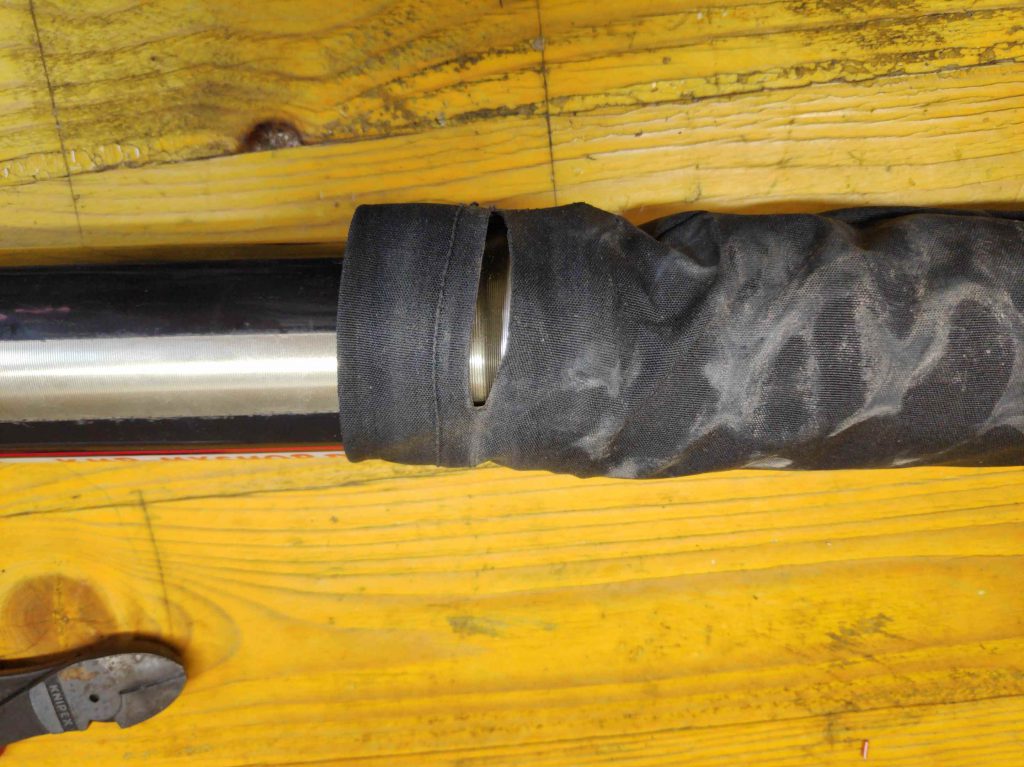
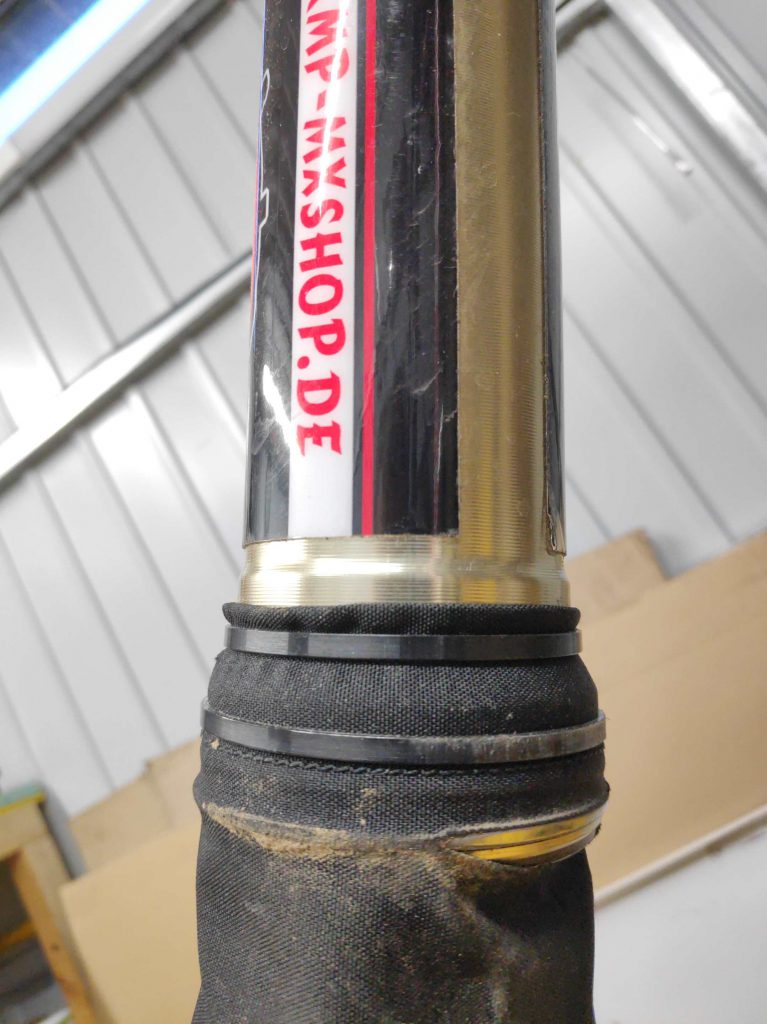
worn through. Despite the Pre owner already had let overhaul / strengthen the fork and back damper, I did some small maintenance to them:
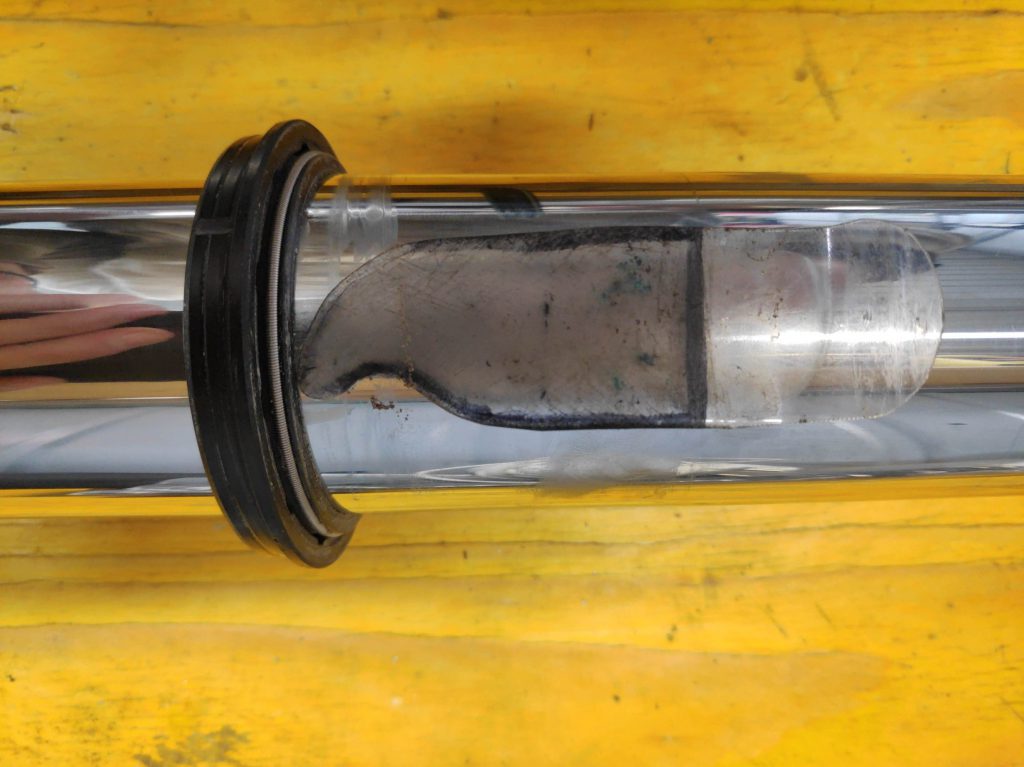
I cleaned the dust seals with a self made fork cleaning tool and …
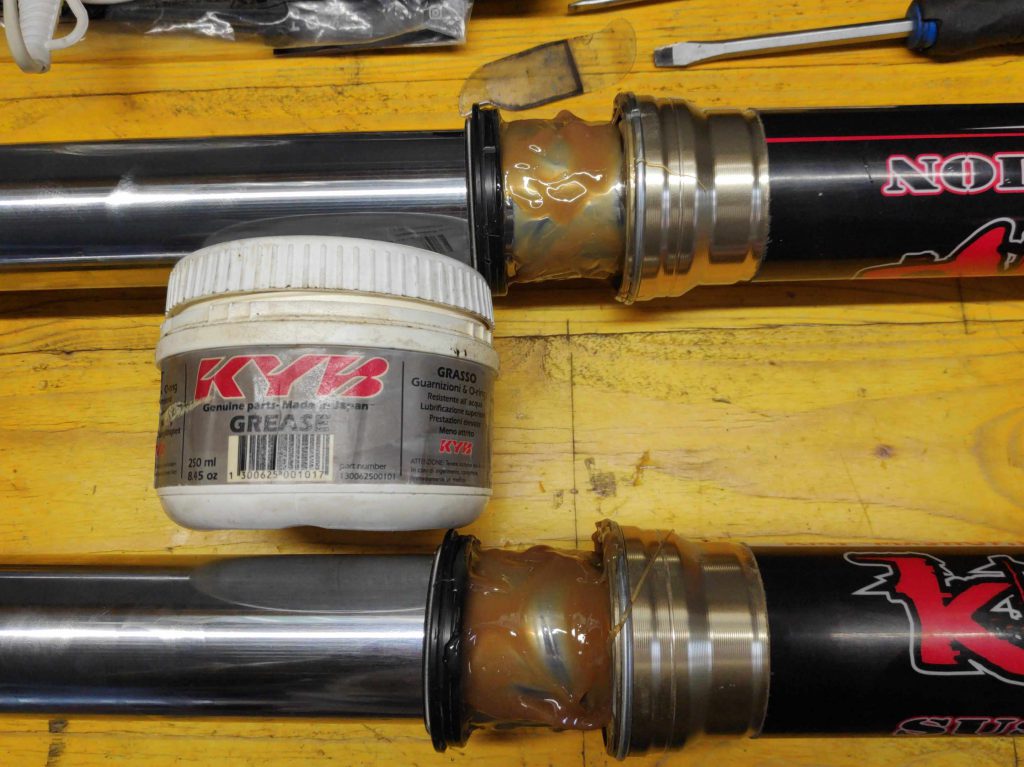
added a proper amount of water-resistant grease, which obviously wasn’t done at the last fork service.
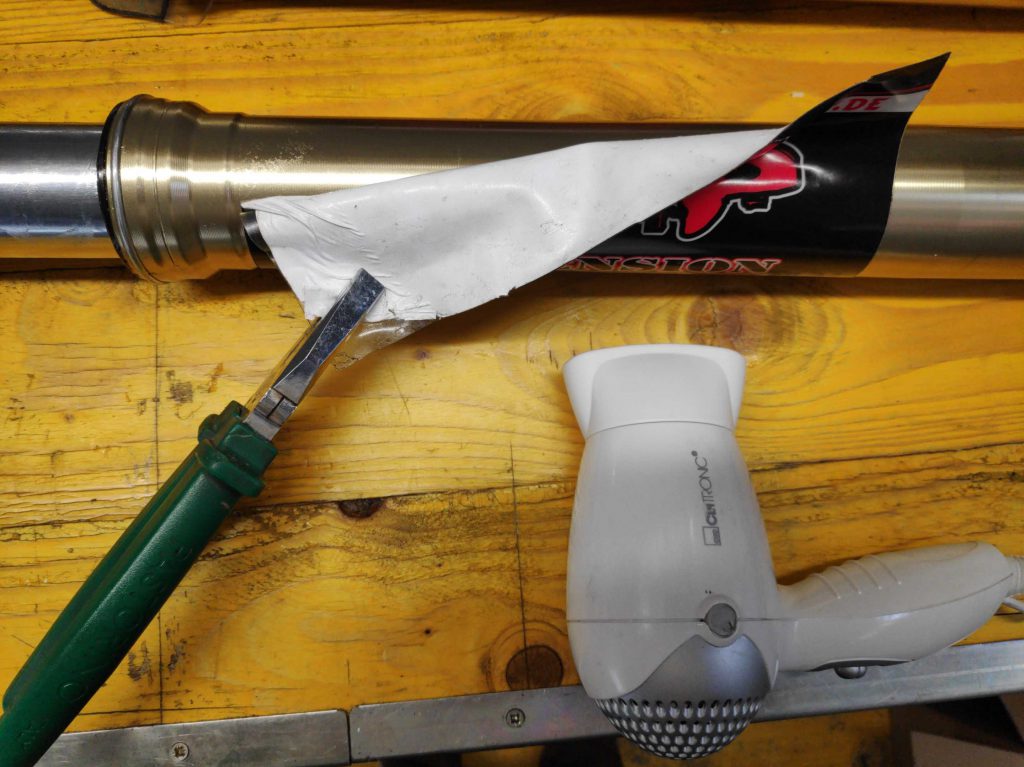
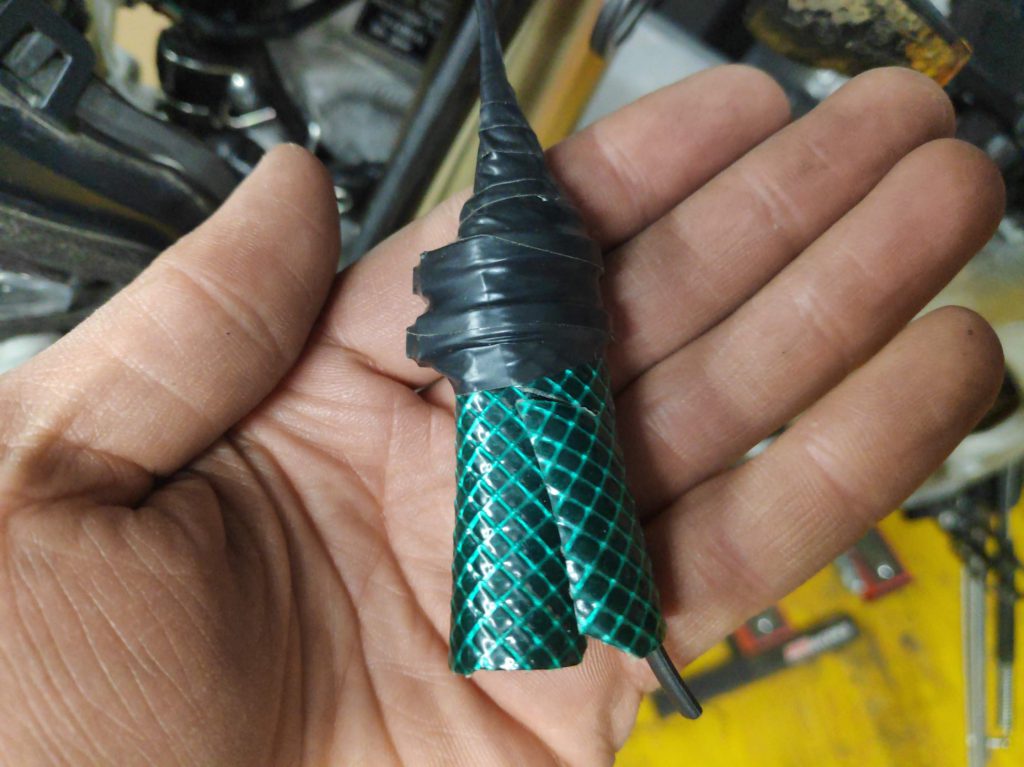
I didn`t like the mounted fork stickers, so I removed them, what was a pain in the ass to do. The damaged fork socks, …
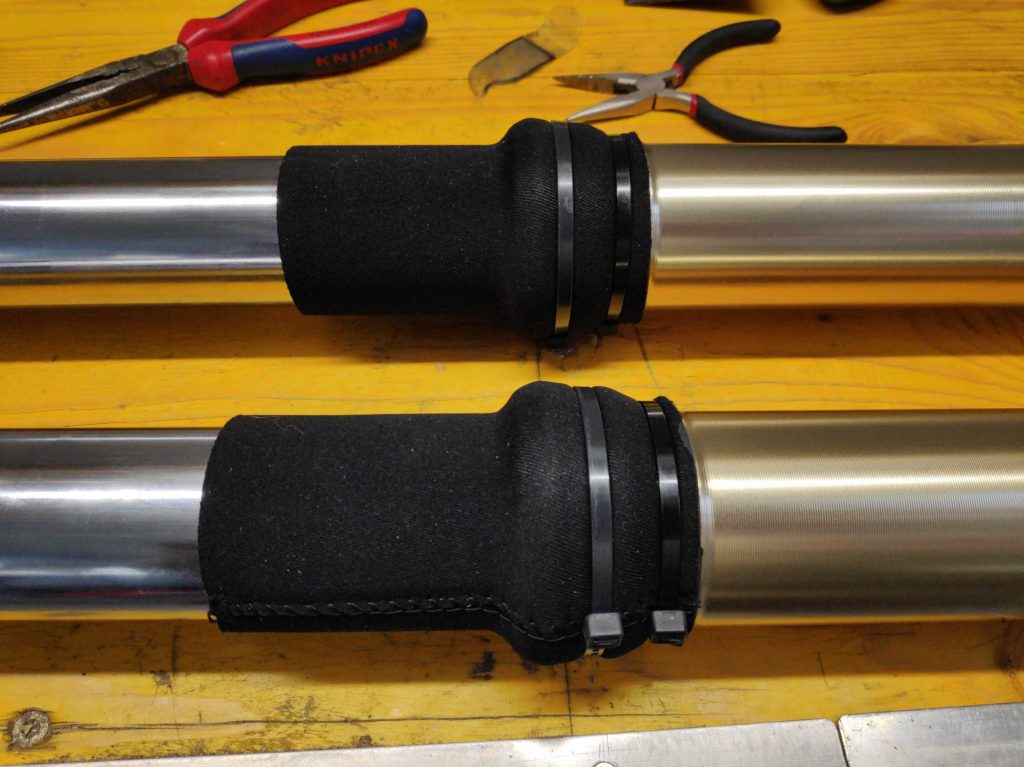
got replaces with short neoprene socks, self-made from a single …
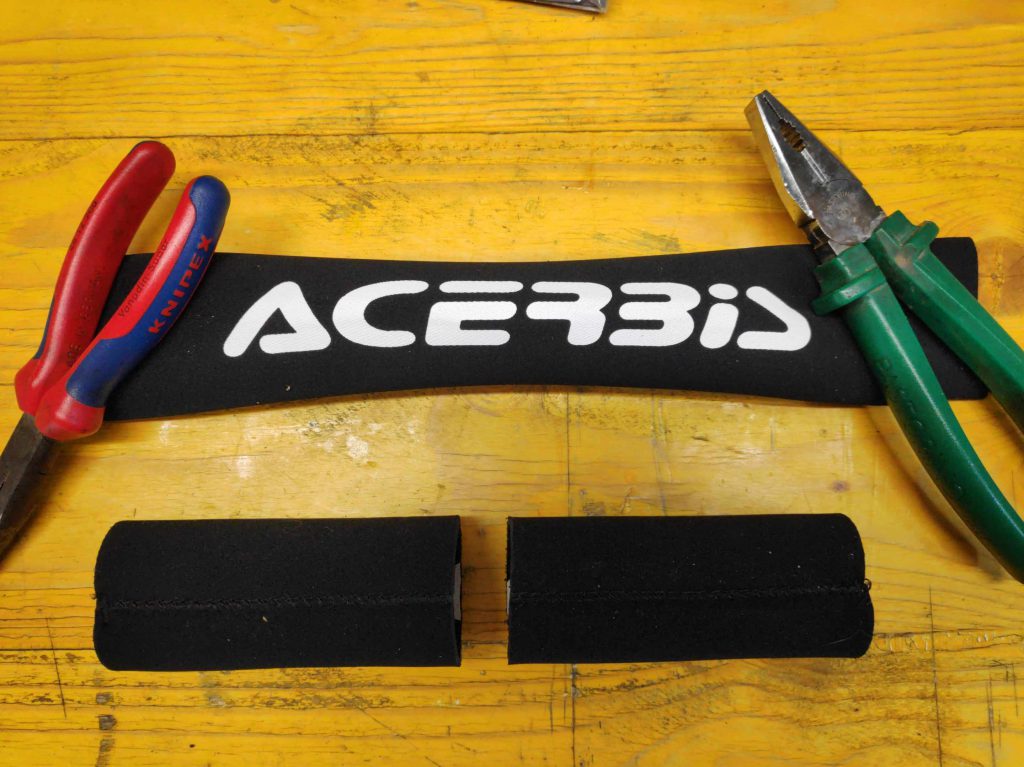
left over neopren sock.
Having the whole fork mounts out, I also had an inspecting eye …
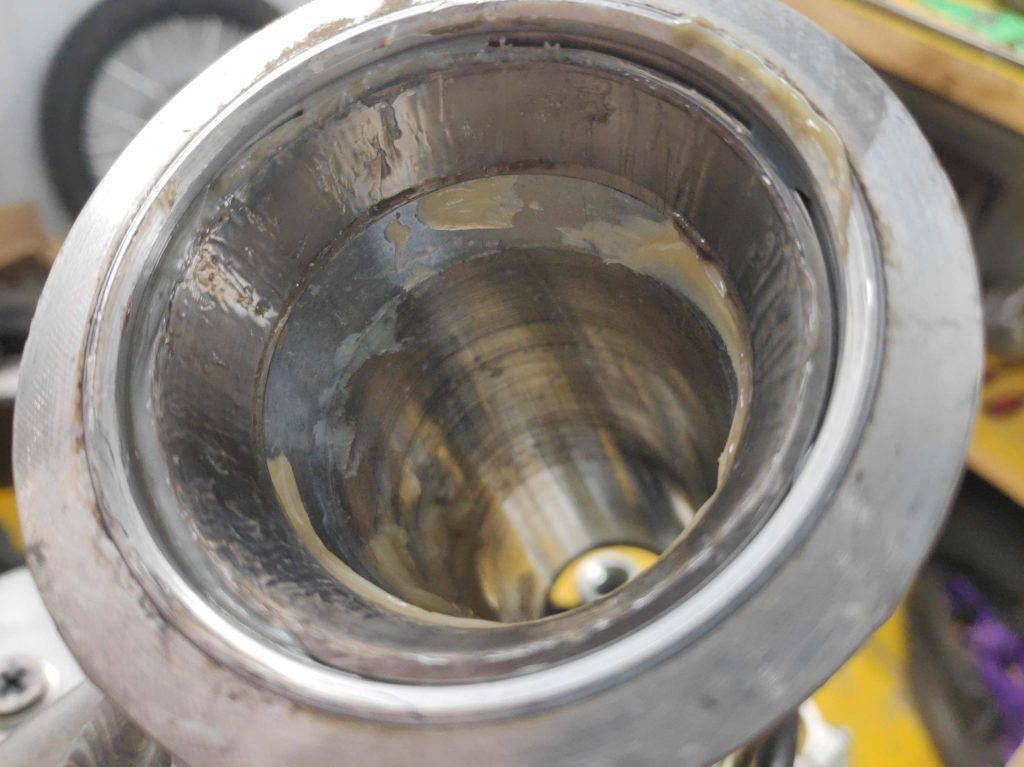
to the upper and lower …
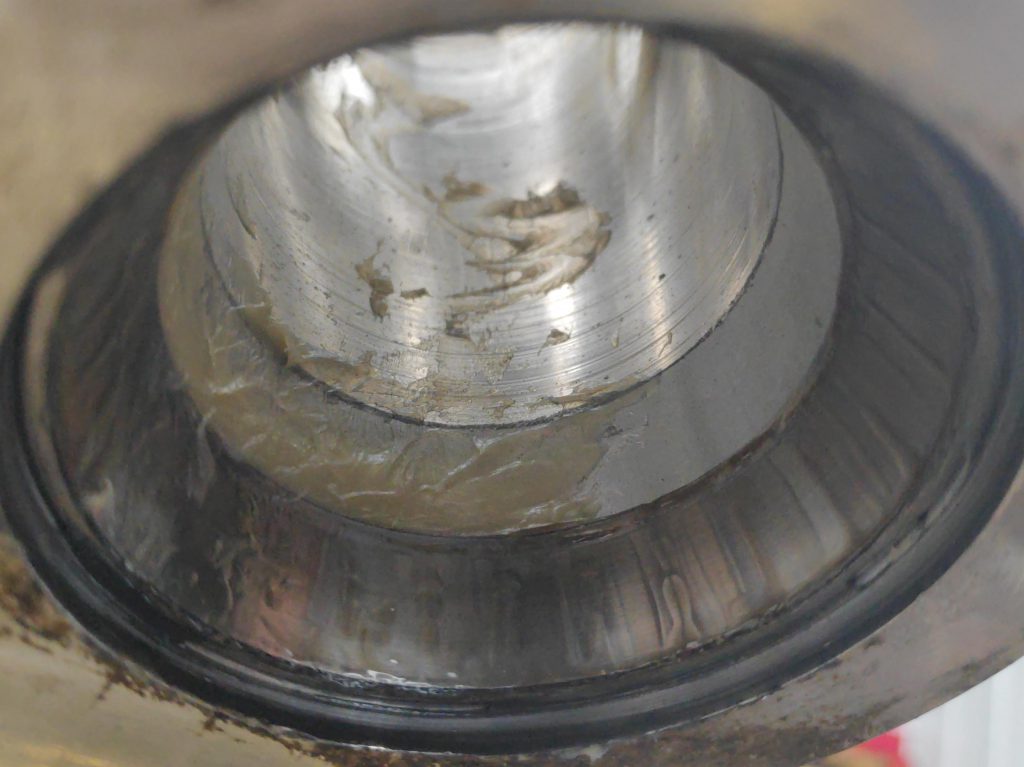
main steering bearing. Like the swing arm bearings, this bearings …
Haven’t seen much grease in Honda’s assembling factory. So I added to …
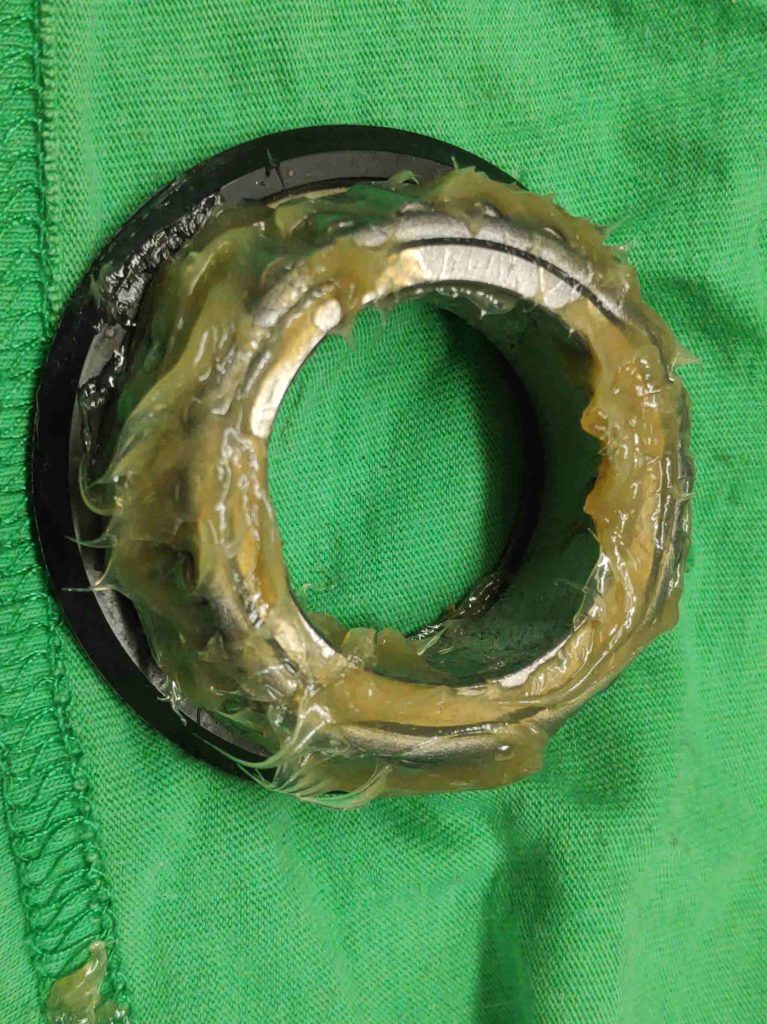
all the …
bearing …
spots …
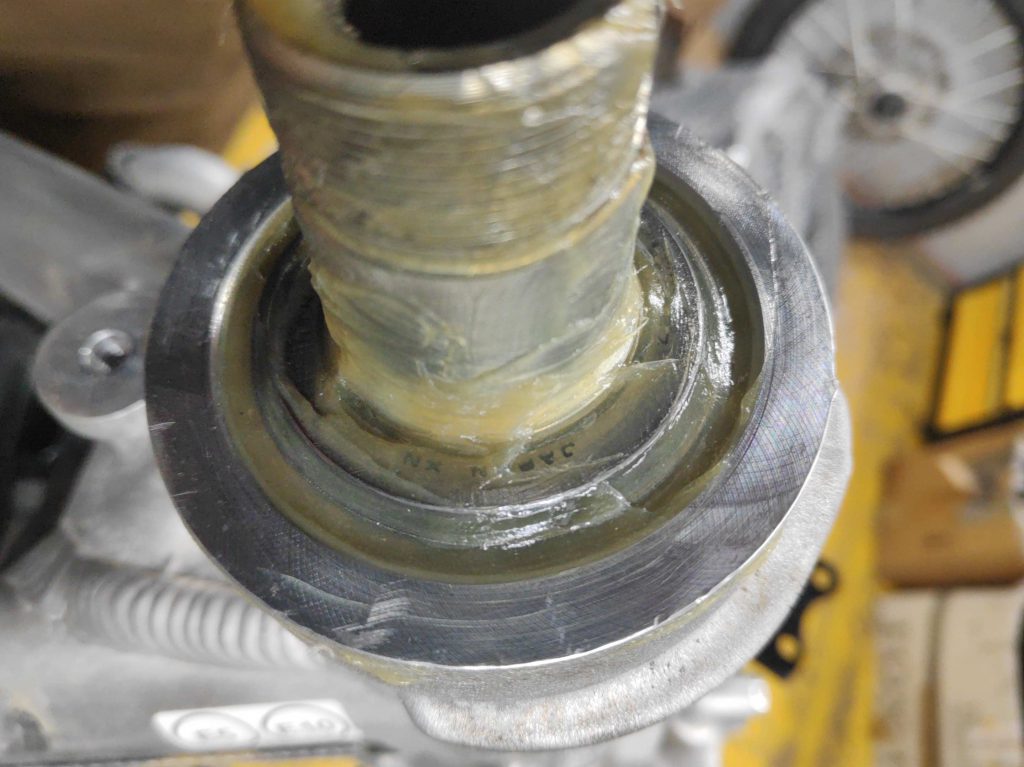
a proper amount of grease.
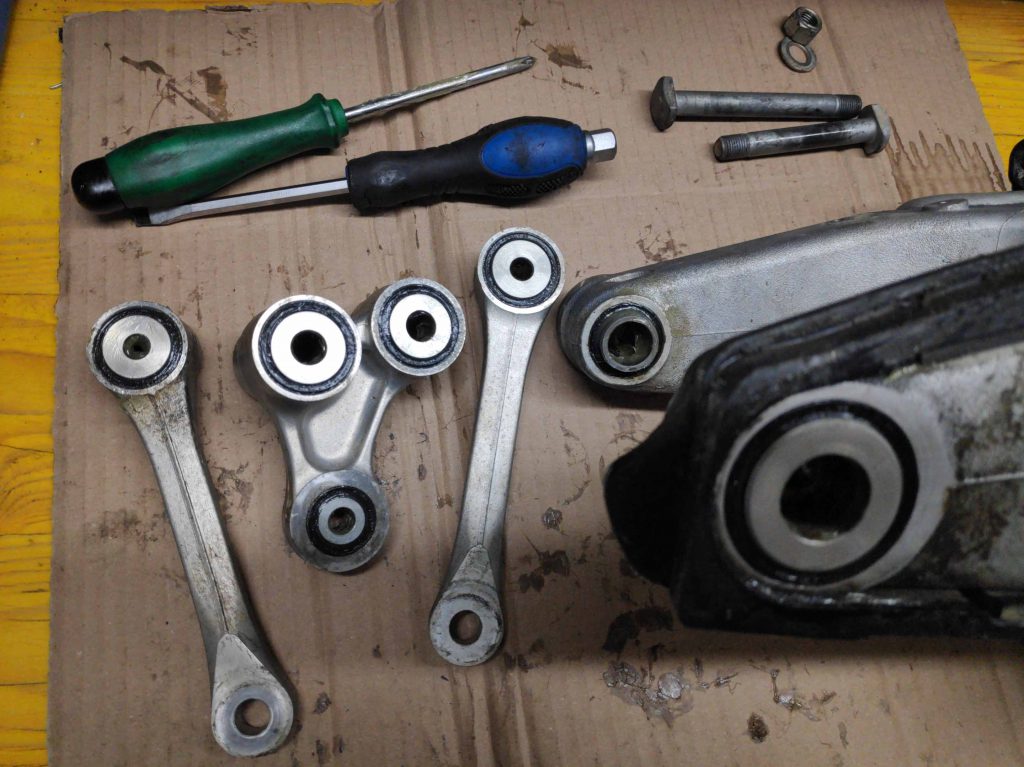
In the meanwhile I had dismounted quite a lot of parts from the bike, so I made myself this …
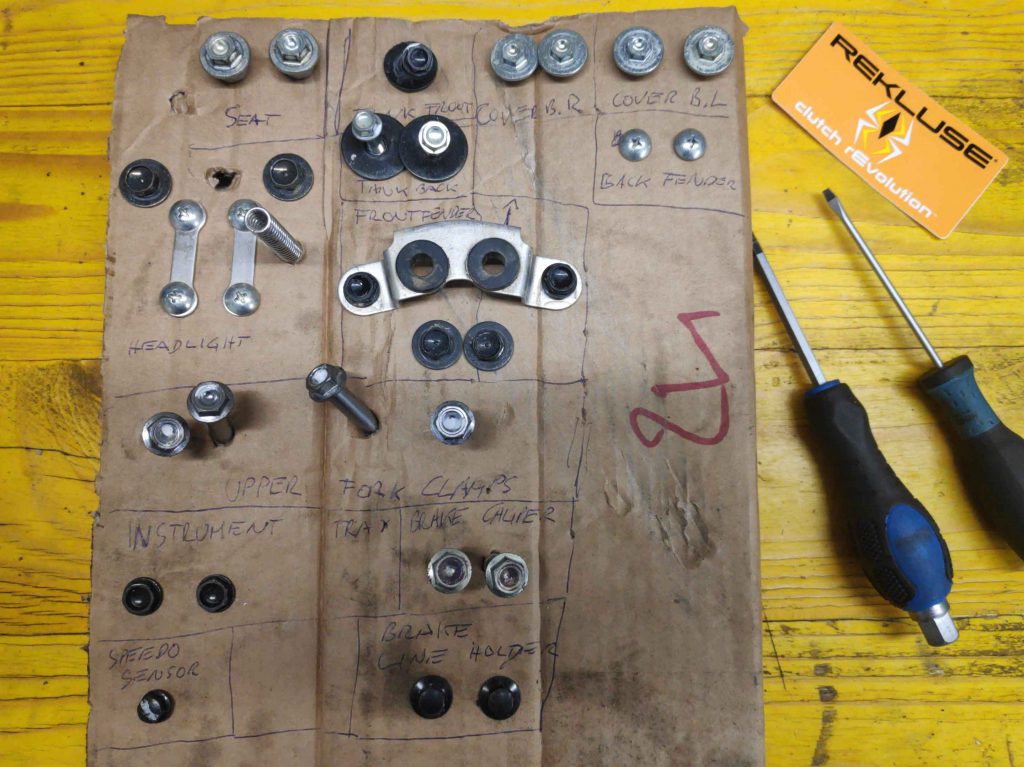
fake sheet out of cardboard for reassembling the bike without getting confused.

I also installed some smaller aftermarket indicators in the front and made a …

small cable tie modification to them …
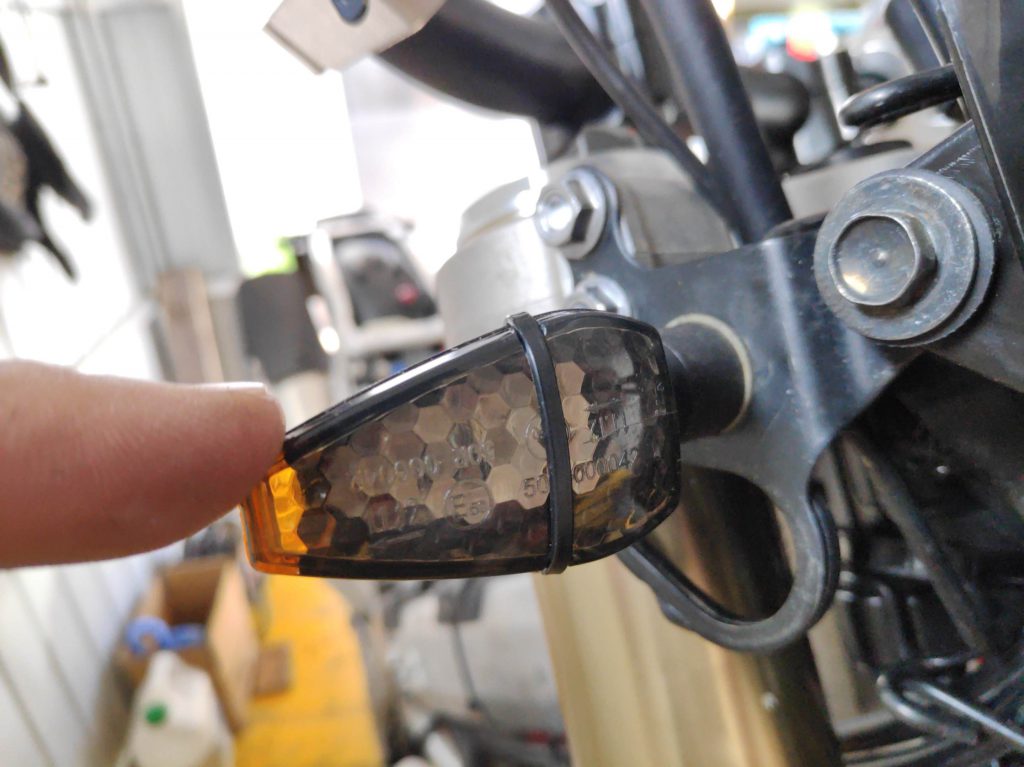
for protecting the indicator-clear-screen from loosing.
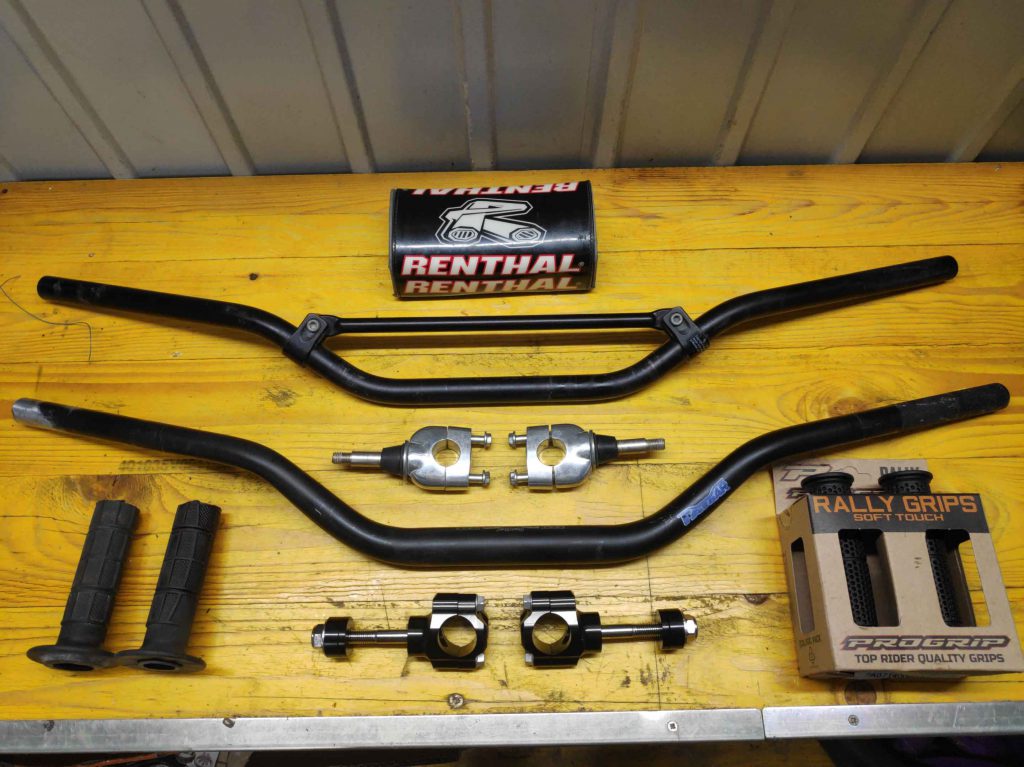
Because I don’t like the standard Renthal Bars from Honda with the additional stiffening-bar in the middle, I swapped it to an identical, but less heavy Fat Bar from Renthal without this stiffening bar. Doing this I also …
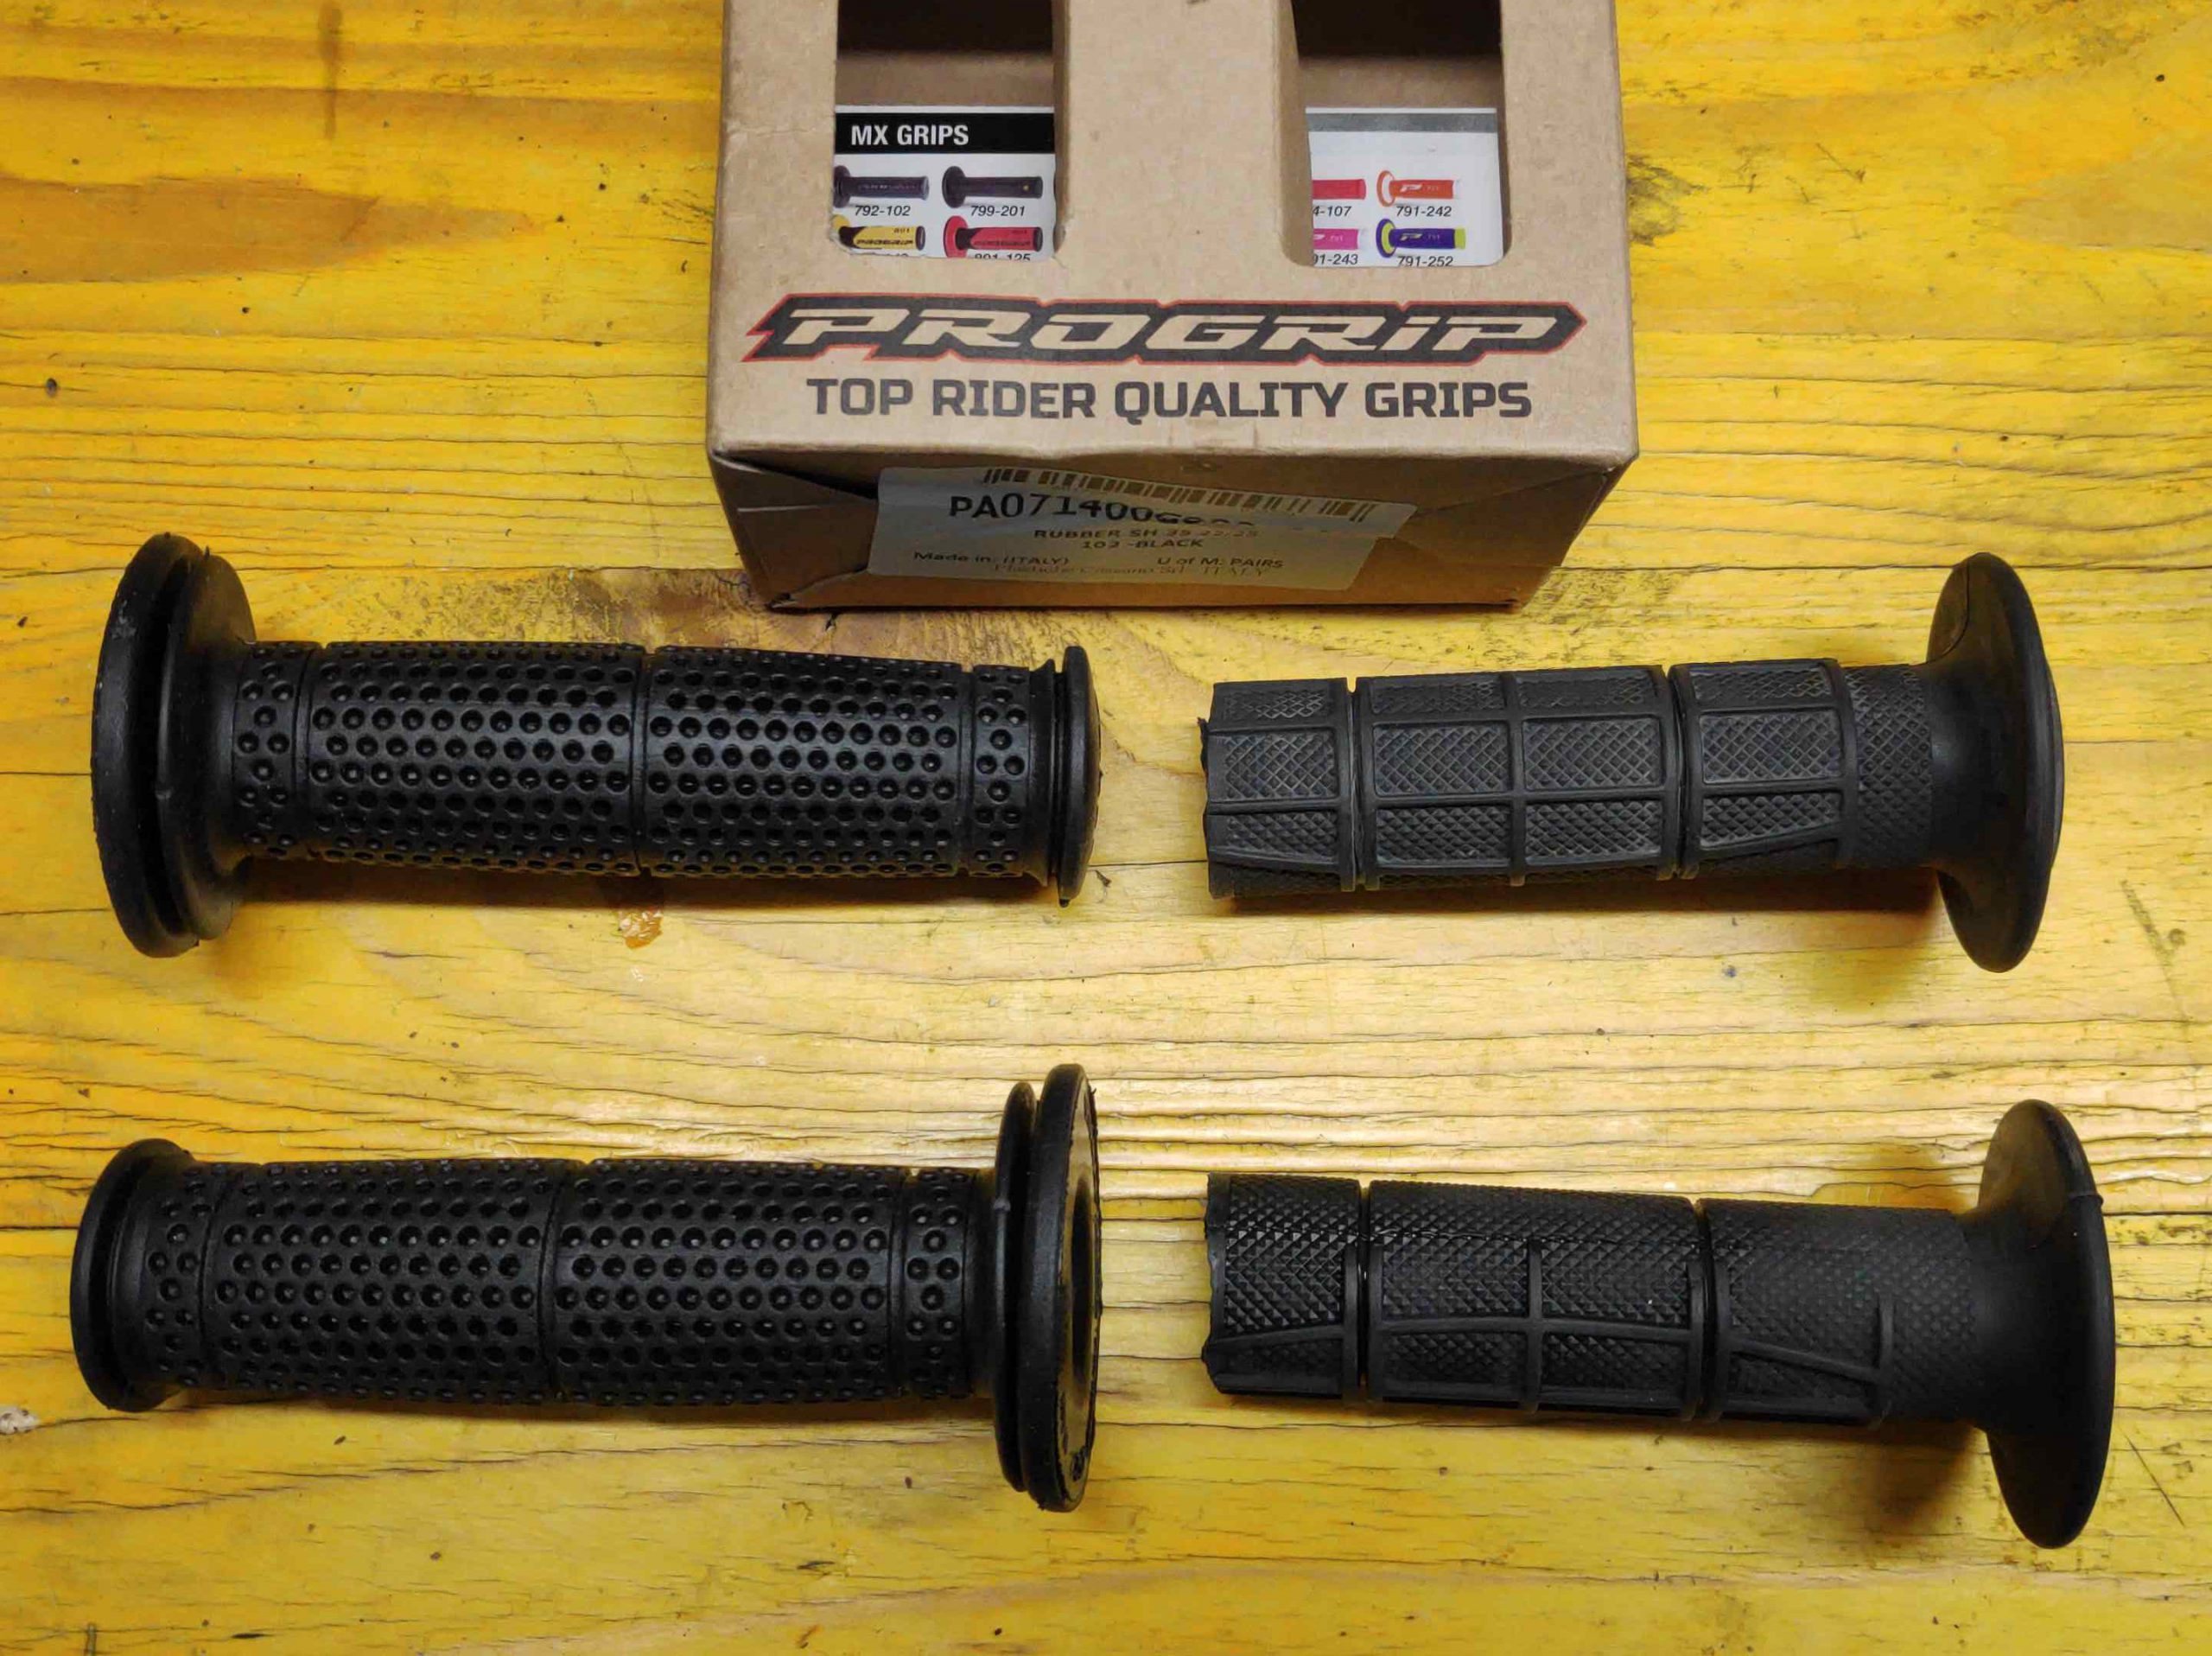
installed thicker handlebar Rubbers and…
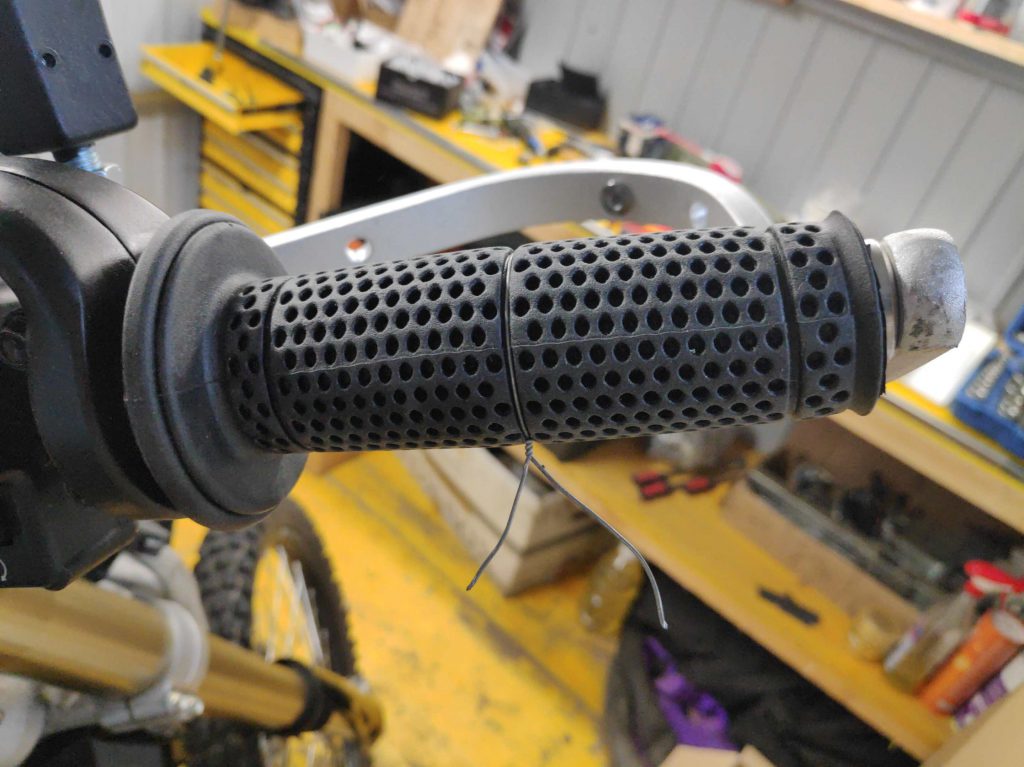
secured them with safety wire.
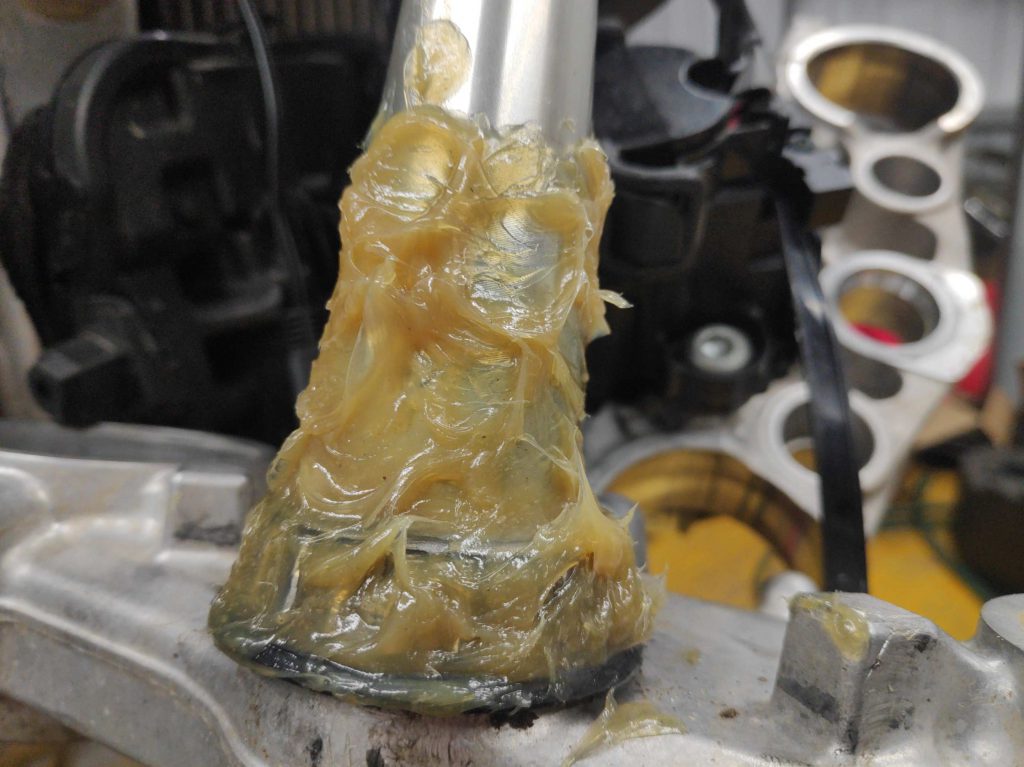
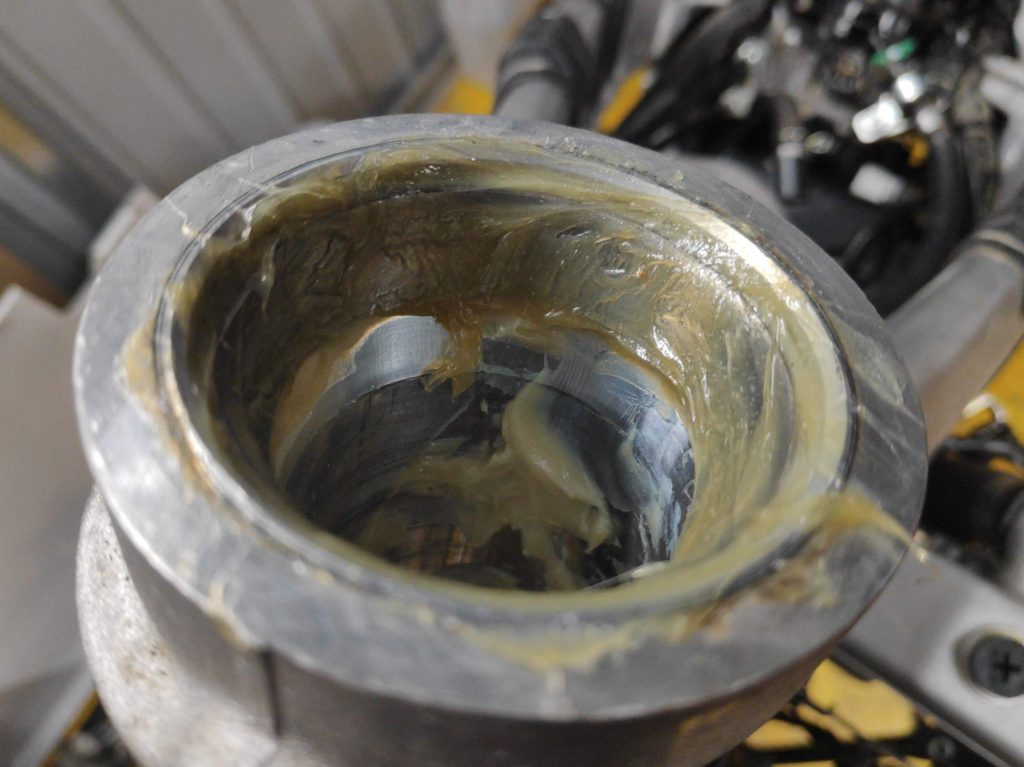
Before mounting the front wheel I also greased this dry bearing ..

properly.
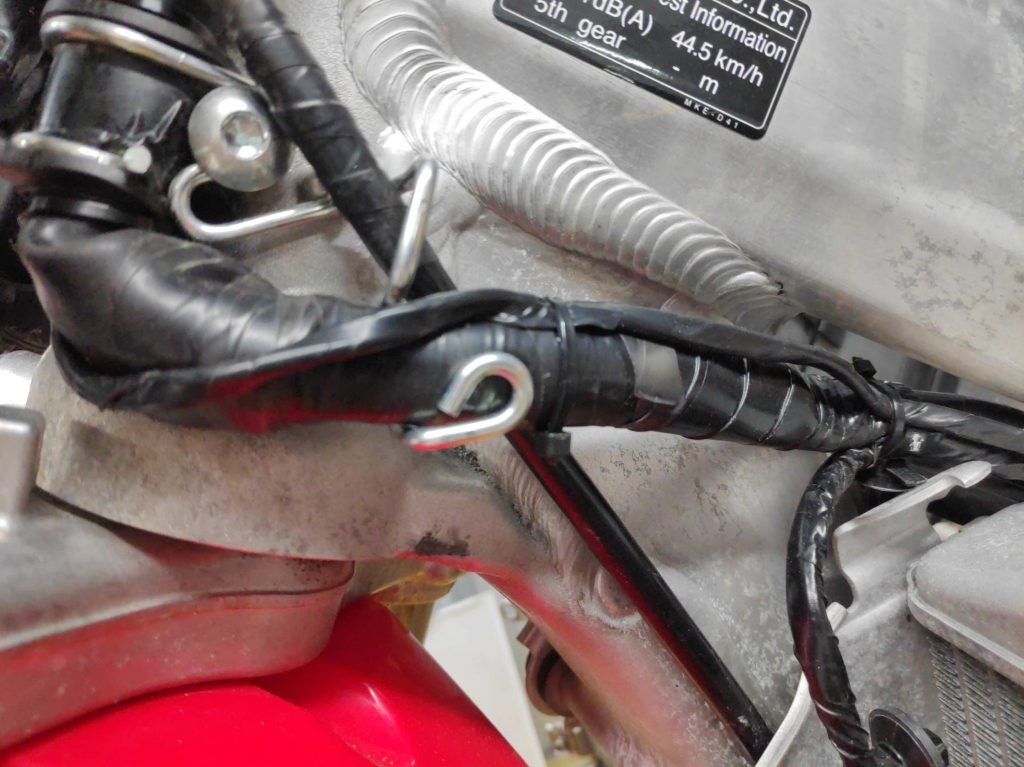
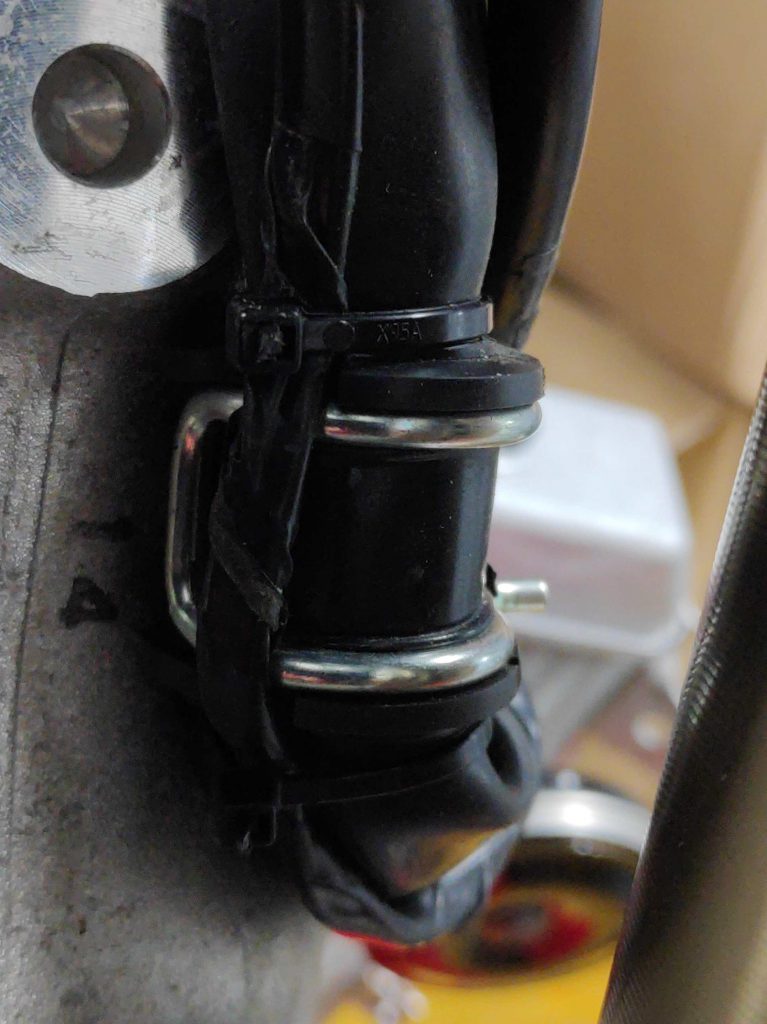
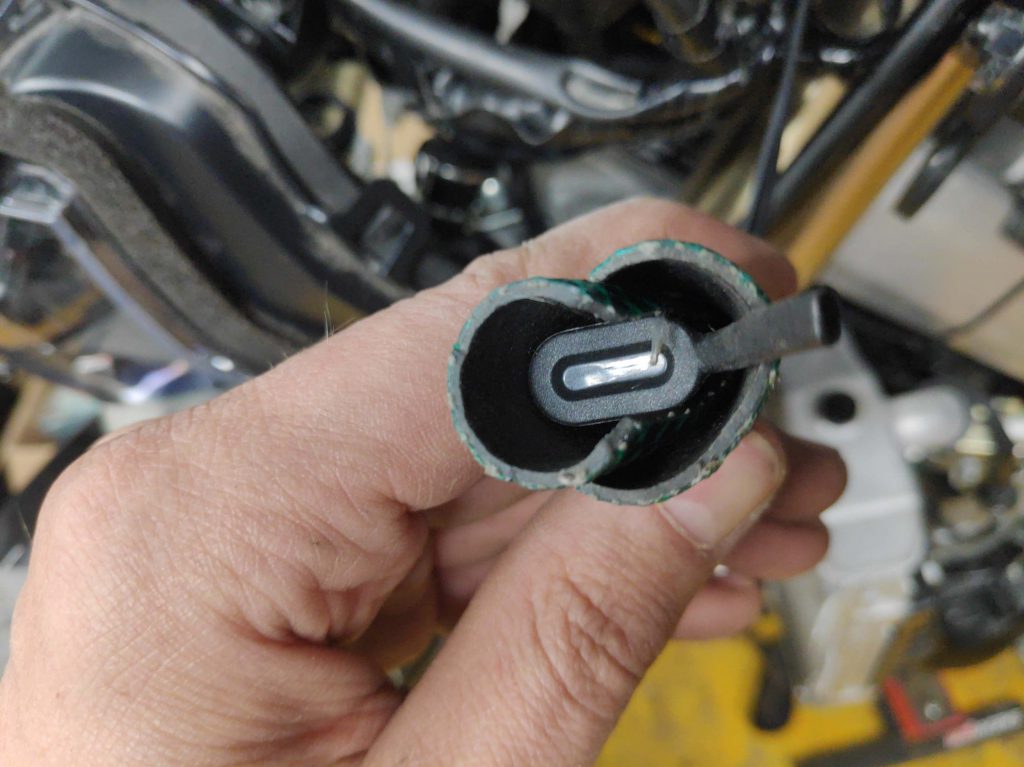
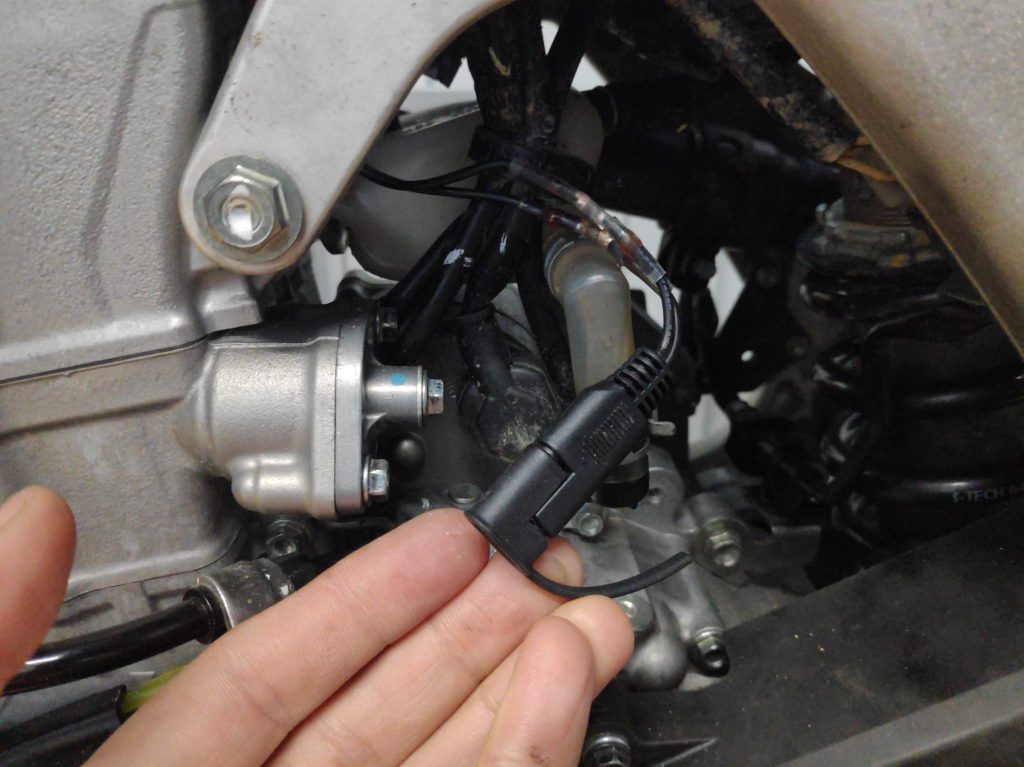
Because I decided to keep the front disk plastic screen unmounted, I had to find a solution for protecting the speedo signal cable. Therefore…
I used a small black plastic part, heated and bent it into shape, for …
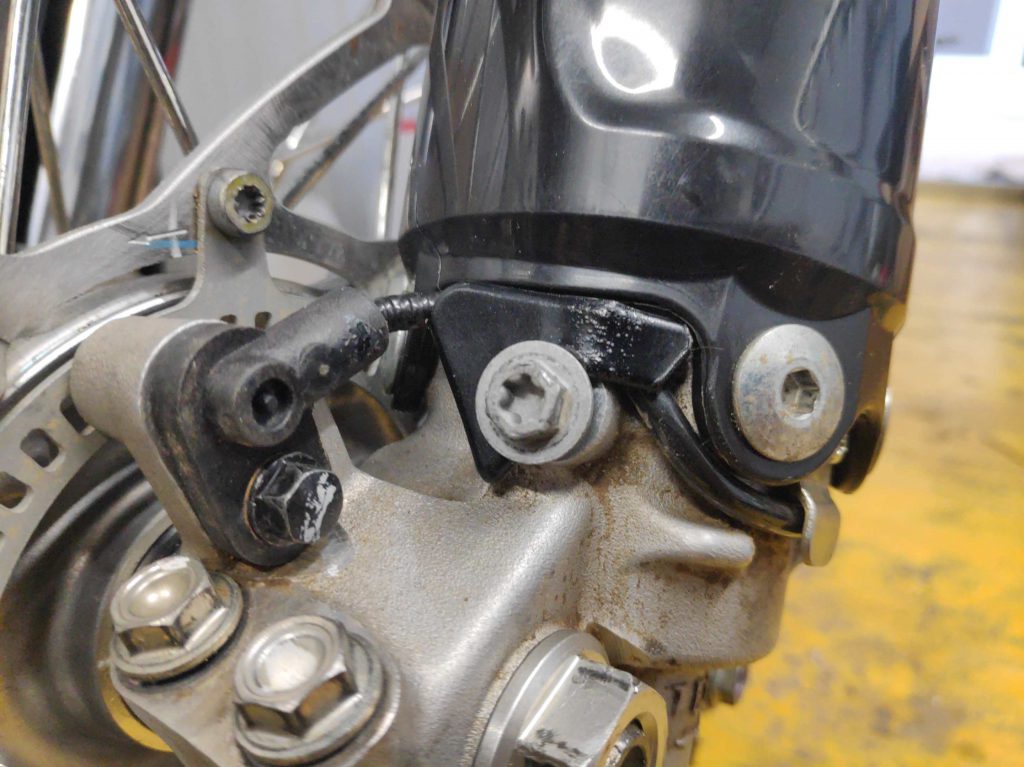
adding some protection to this cable.
After adding some cheap handuards with an alloy frame, the black front fender, black fork protectors and the mirrors, the bike slowly …
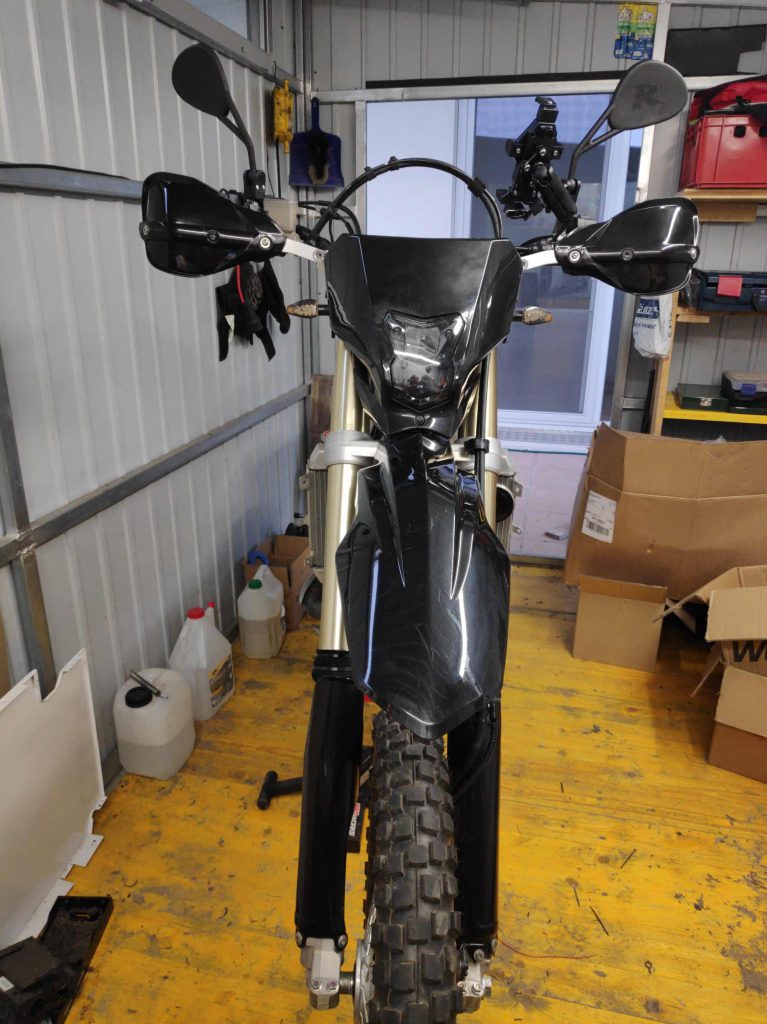
achieved its final face.
Oh wait:
before adding the front mask, I …

made a little protection housing
for the SAE Plug, which is stowed behind …
the front mask for easy access when charging a device is needed. Therefore I also have a SAE to 12V cigarette lighter socket with a small USB 2 Amps charging socket stuck into it, which is always stowed in my tank bag.
I mounted this wireless charging bracket for a rugged smartphone with 6-7 inch.
Push-Button-Motorcycle-Chain-Oiler
Like on my 690ty before, I installed a bulletproof DIY Chain Oiler System, which I found a longt time ago in the internet: What is needed:
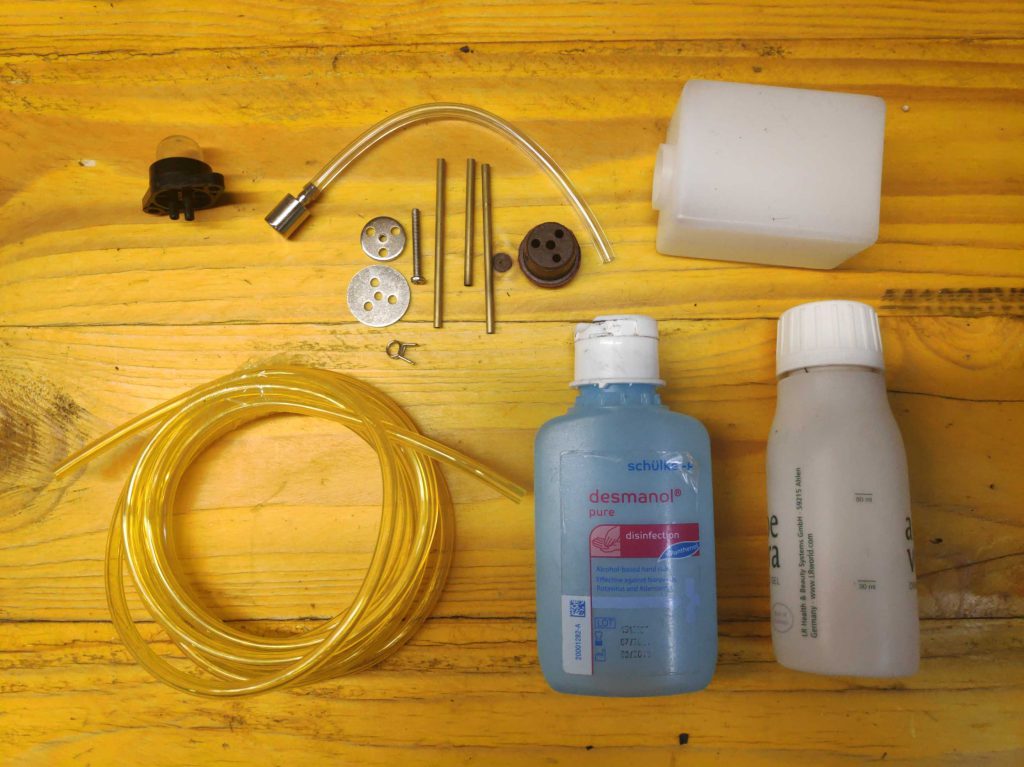
A lawn mover rubber primer bulb. A small 100 – 200 ml bottle or mini RC-Tank as an oil reservoir, RC-Tank innerts and a 3-4 mm oil resistant fuel line. It took me a while finding the right position for fitting this little white plastic bottle onto the Mule. When I had found it, I …
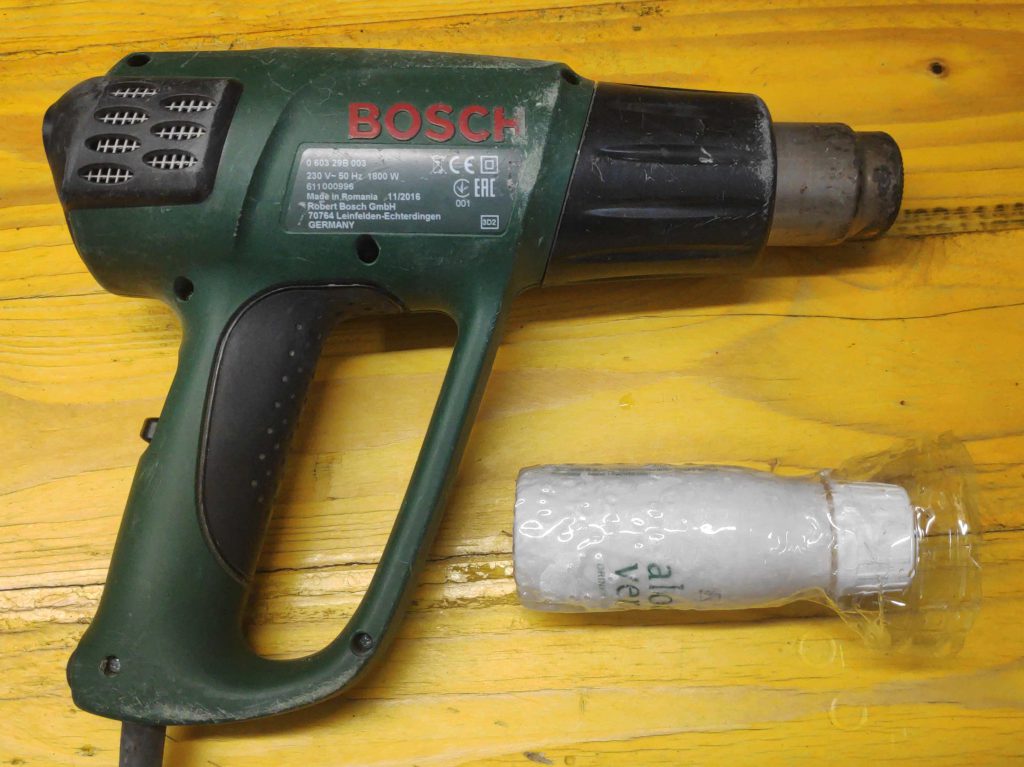
heatshrinked a small clear plastic bottle with the heat gun around the white reservoir bottle for extra protection and more stabilty.
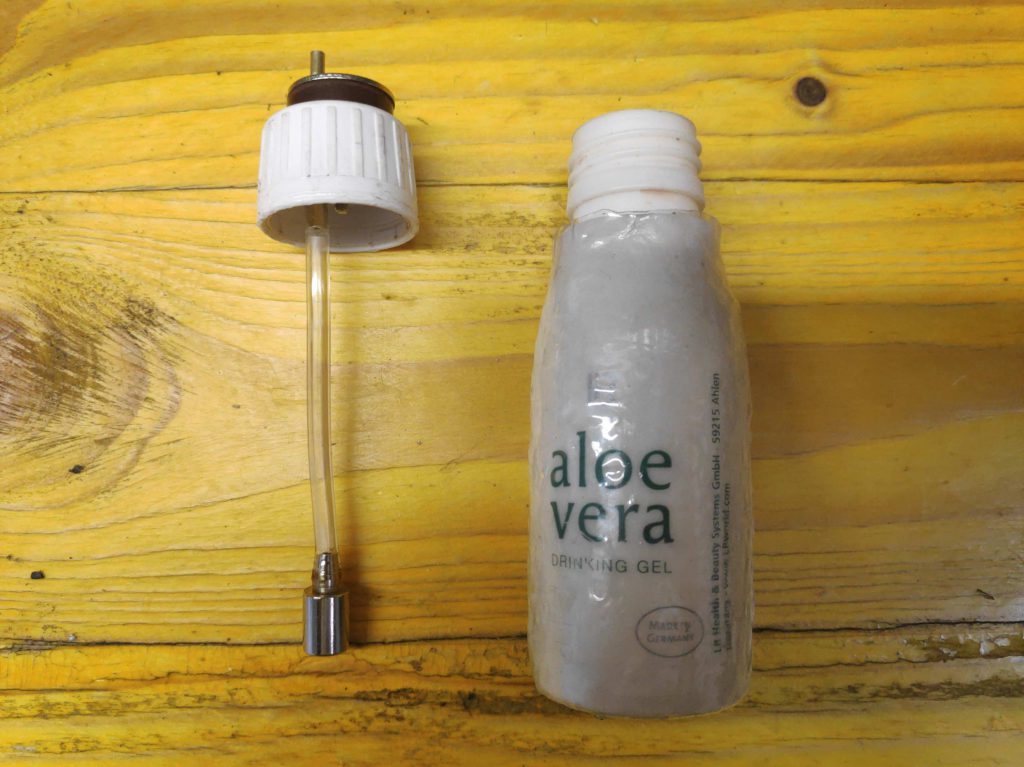
Next the RC-Tank-innerts got mounted to the cap of the white reservoir bottle.
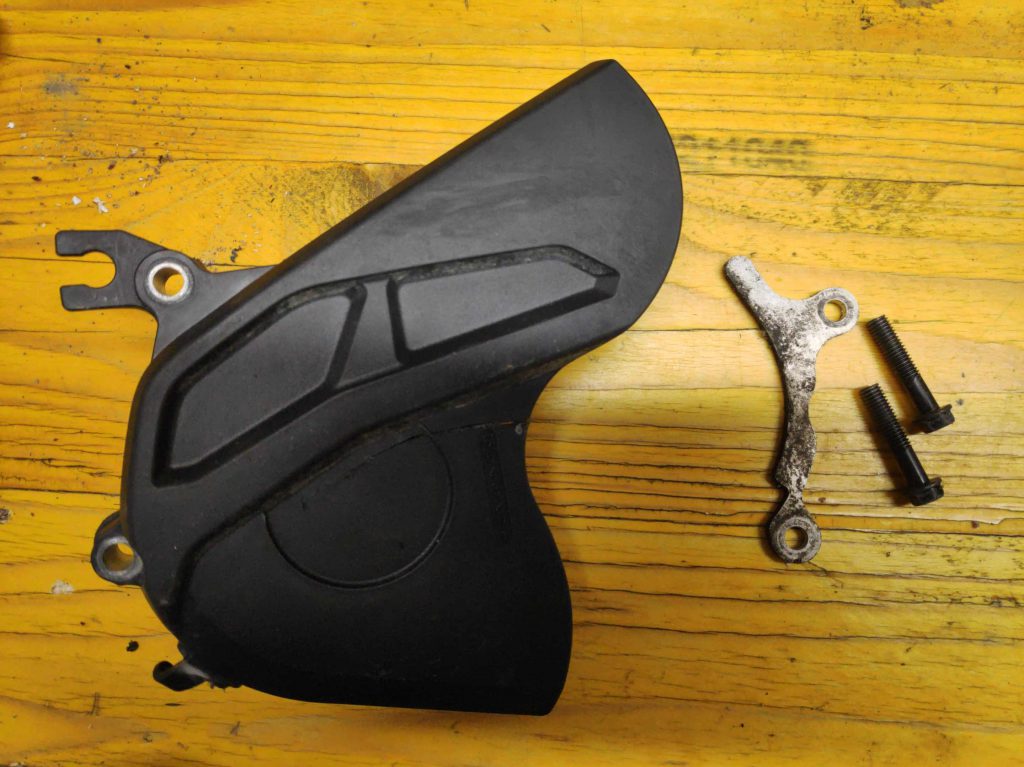
After that …
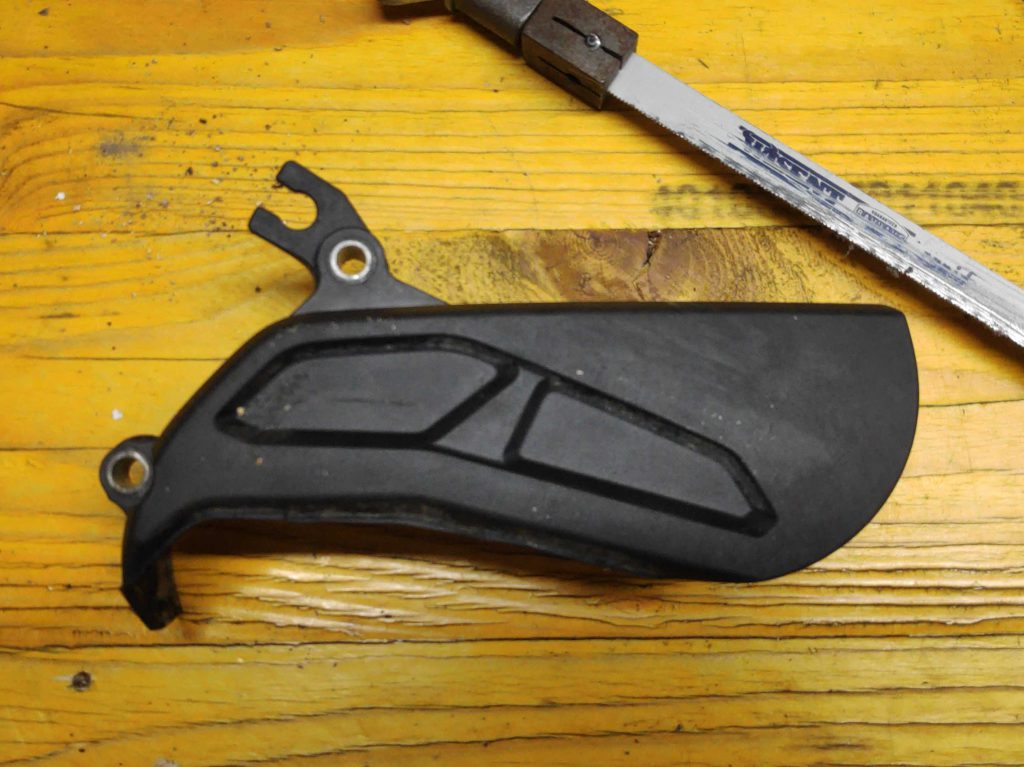
I cut down the sprocket guard and …
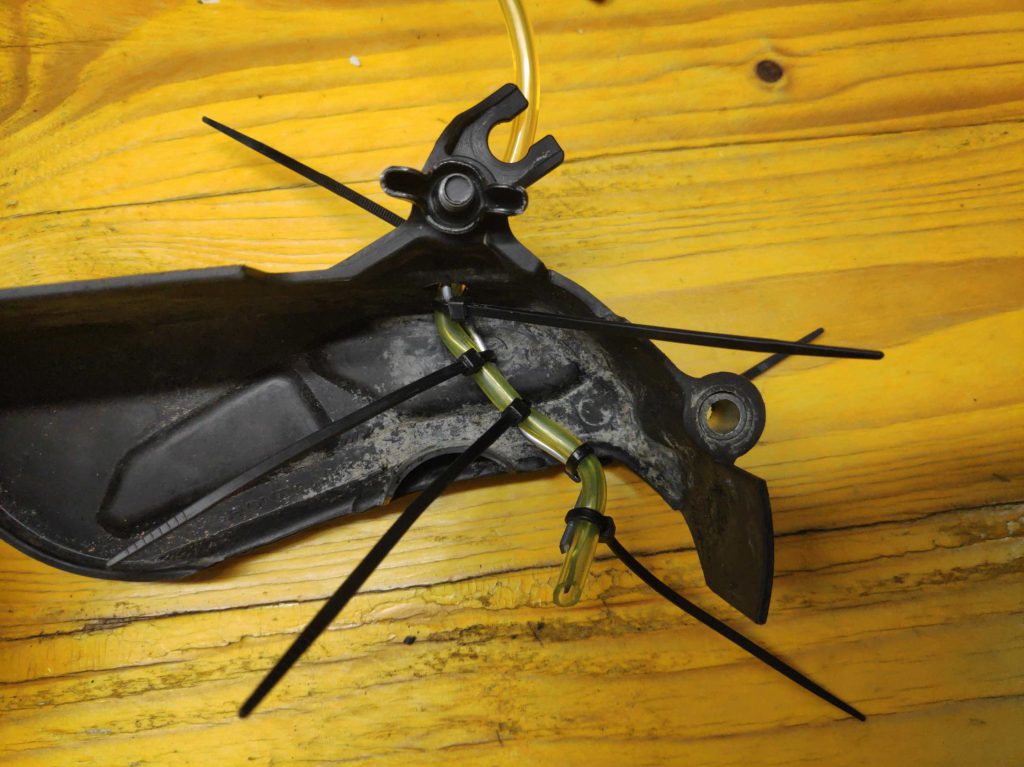
formed with a strong wire and cable ties a stiff bracket, which goes directly right to the sweet oiling spot of the …
the Mules front sprocket.
For the primer bulb, the perfect position is in my case the lower end of the radiator housing, where I can reach it also during the ride. So I drilled a hole in it…
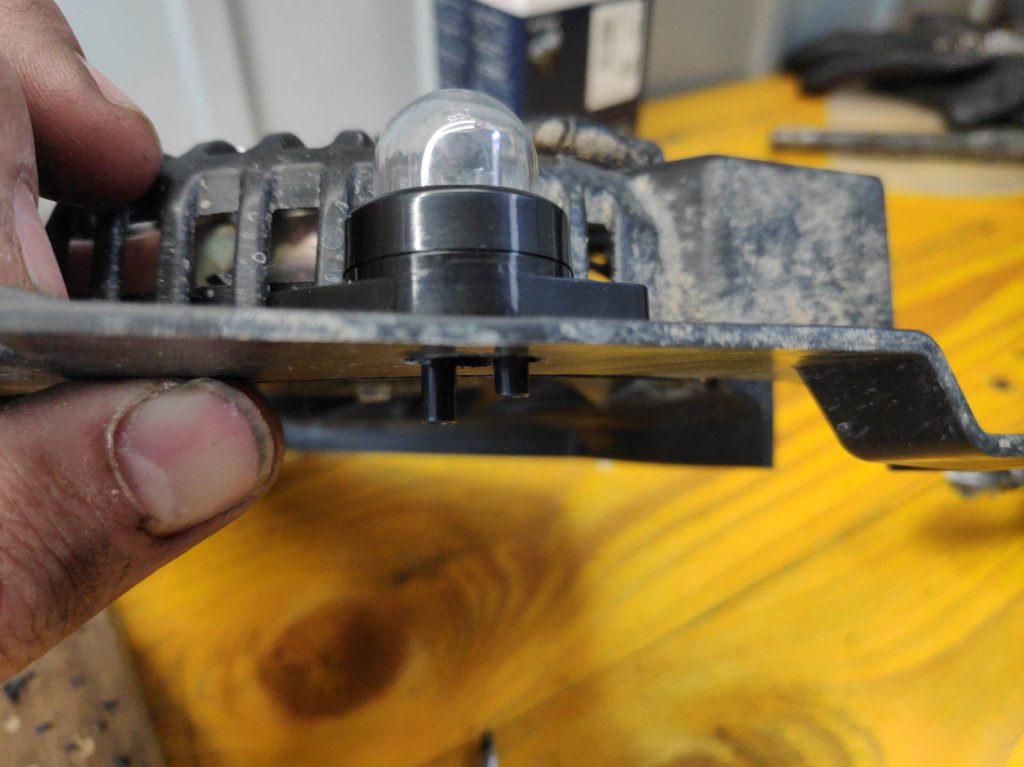
and made a little bracket for getting the connectors of the primer bulb into distance from the radiator rips. What looked like this:
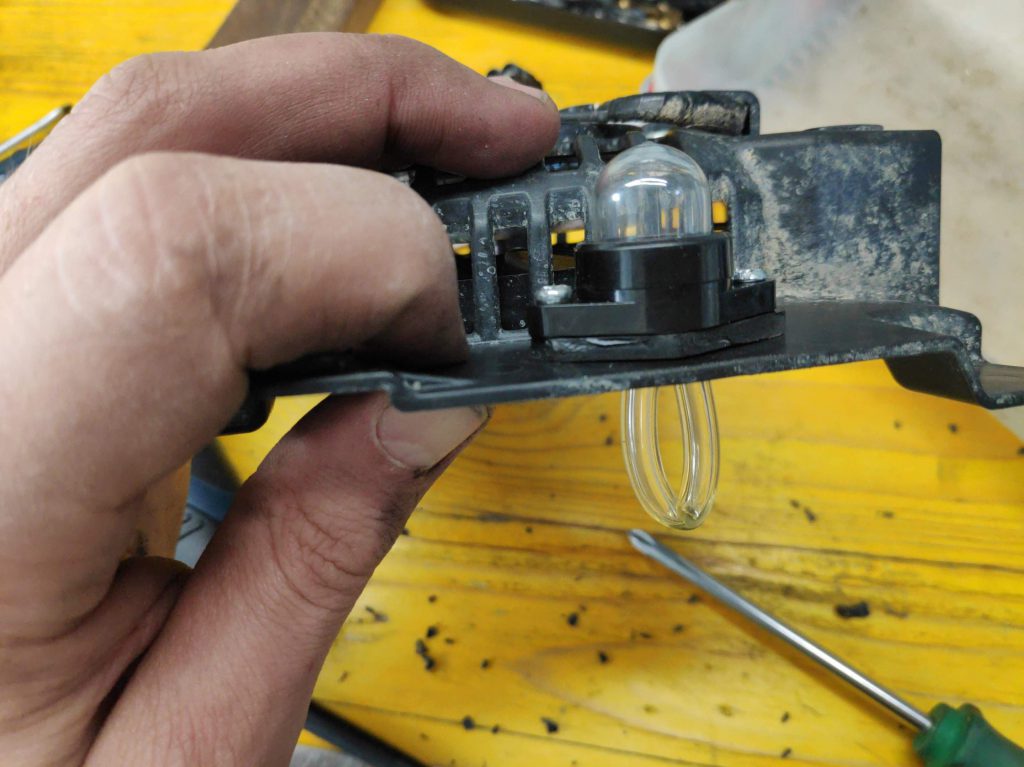
The whole system looks like this:
Reservoir bottle in black neoprene cover –> Fuel line –> Primer Bulb at the radiator housing –> Fuel Line –> Fuel line Wire-Alignment through Sprocket Cover –> Sprocket.
The big advantage of this system is, that it can’t clog, because you have always a big hydraulic lever, which will spill out each dirt of the ending of the oilline. Biggest disadvantage is surely that it works not automatically. You have to push each 50 km or 30 mi about one time for proper oiling of the chain.
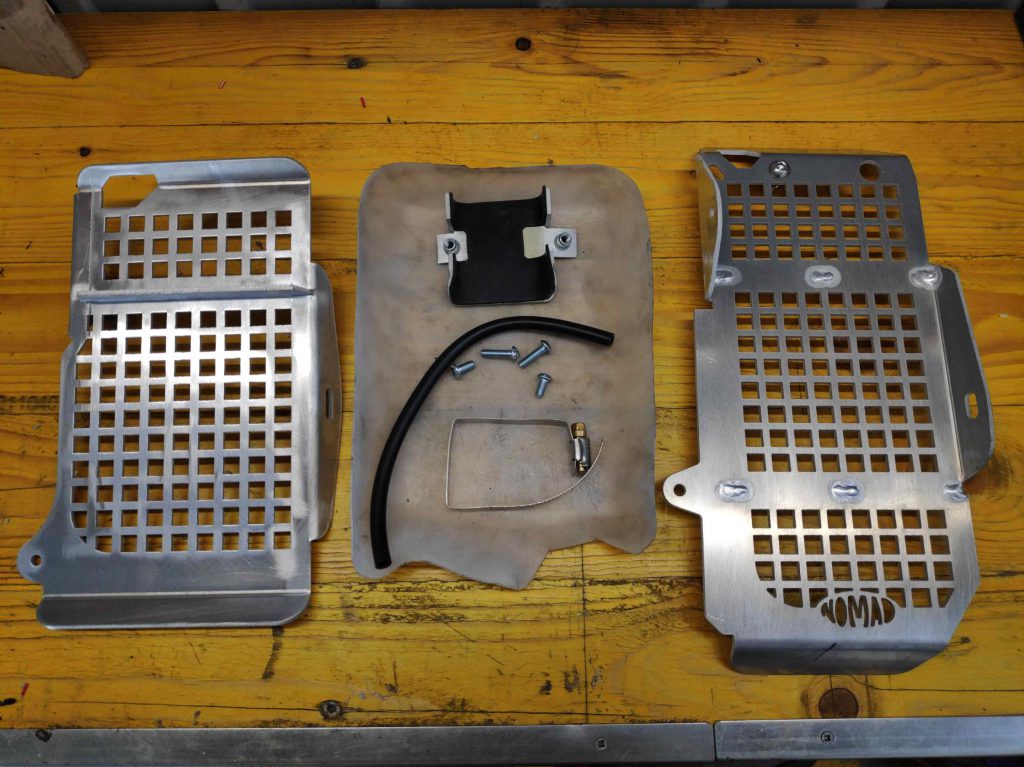
Now it was time mounting the radiator …
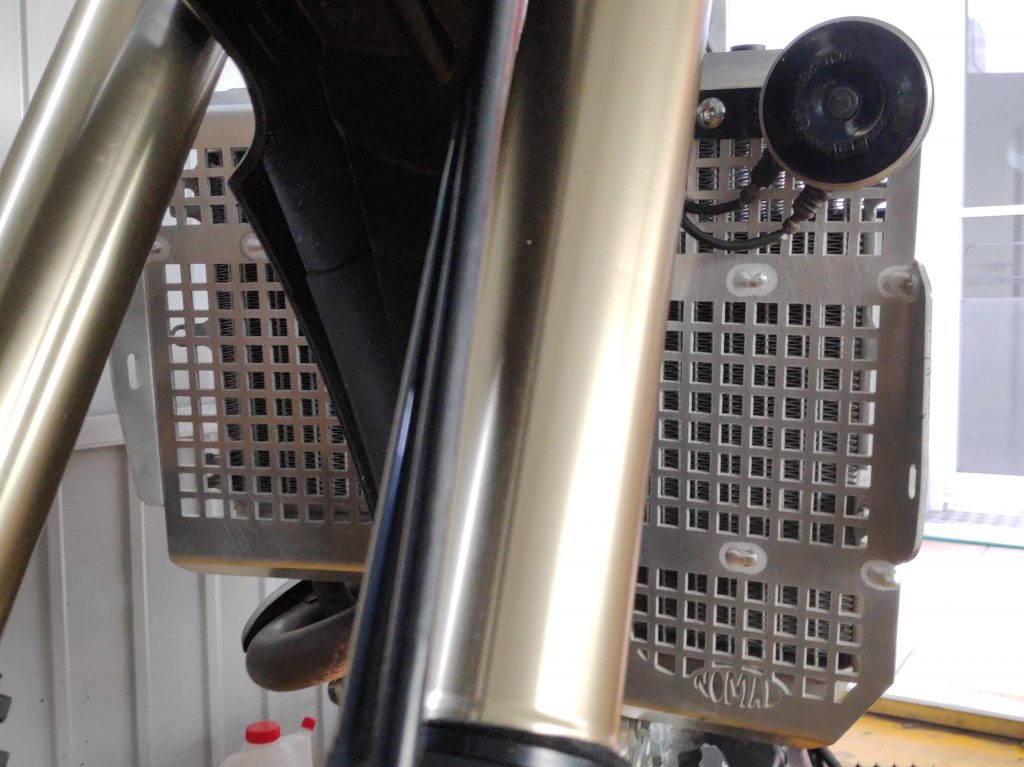
saver shrouds and …
fitting the 20 Liter Nomad Fuel Tank to the bike. I also invested some money into …
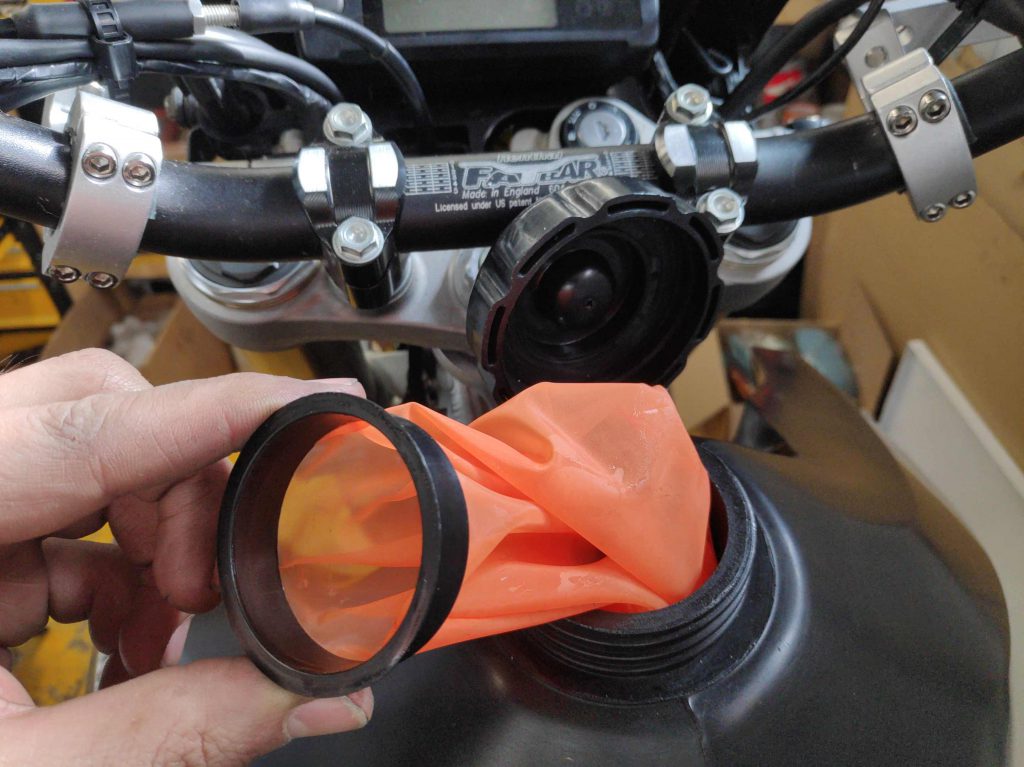
a In-Tank-Fuel-Sock from Twin Air for keeping away dirt from the fuel pump.
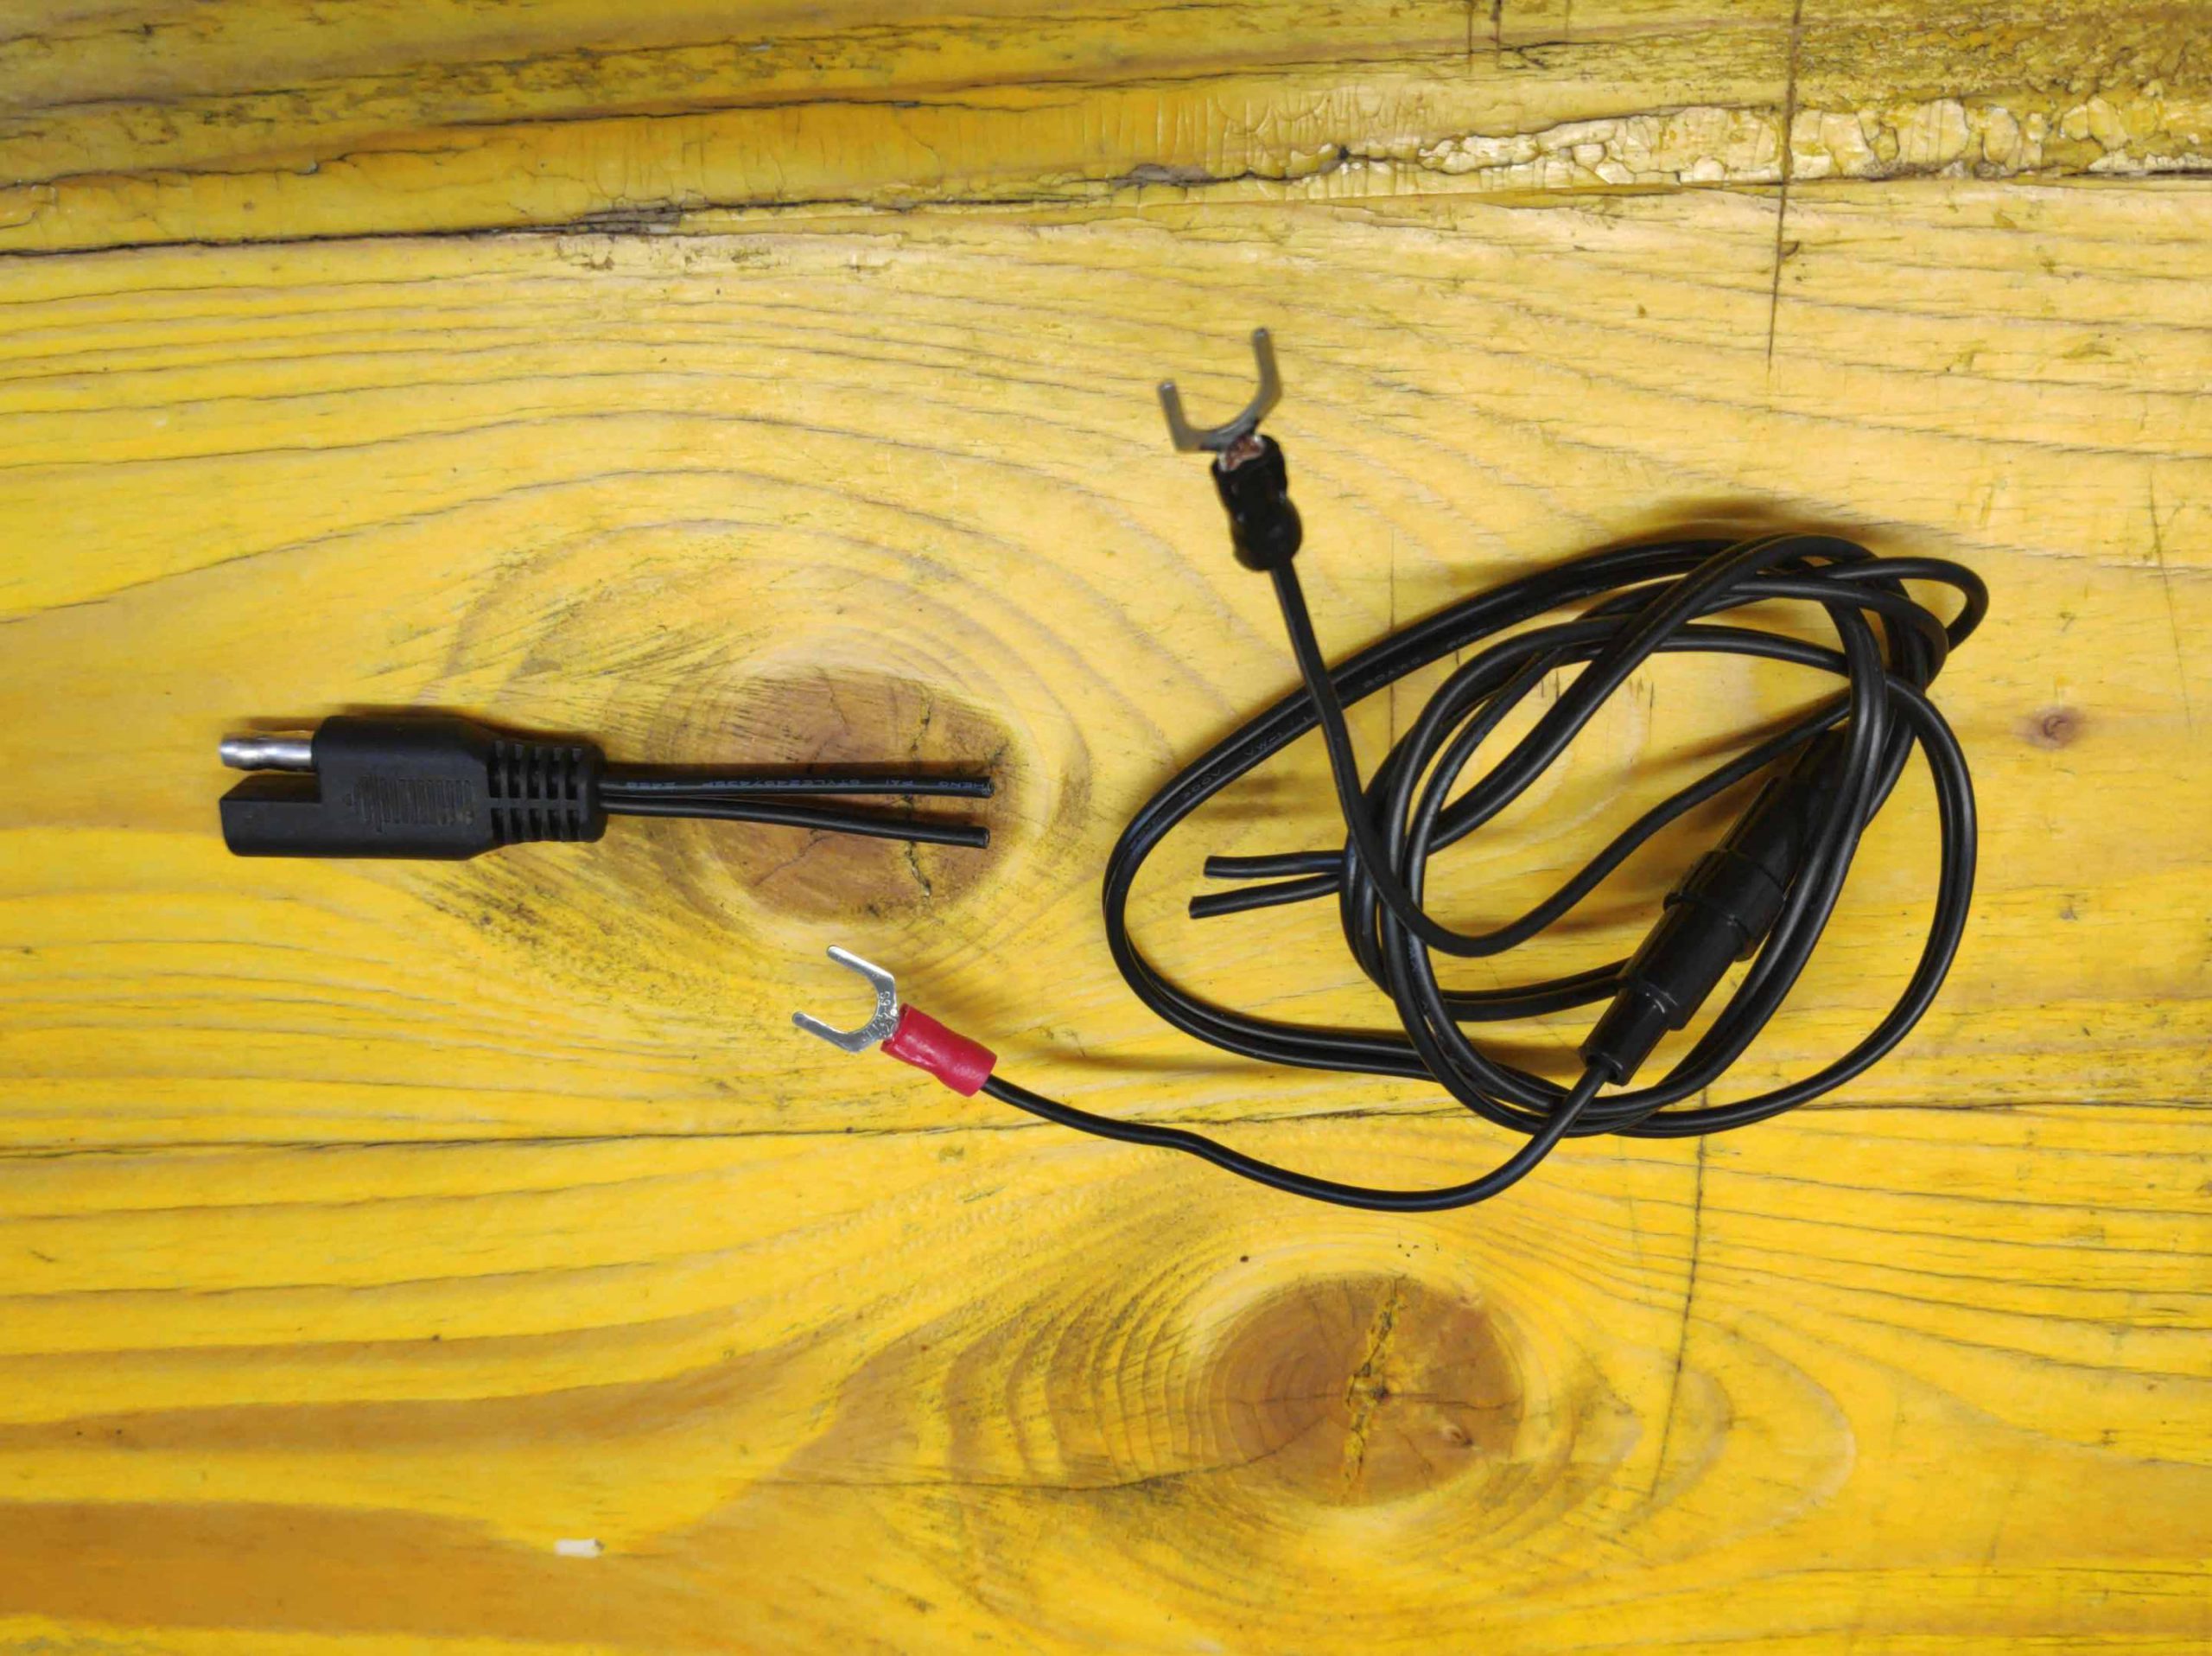
Because I like to charge some devices also when, the bikes engine is not running, I mounted a second SAE Plug with inline fusebox …
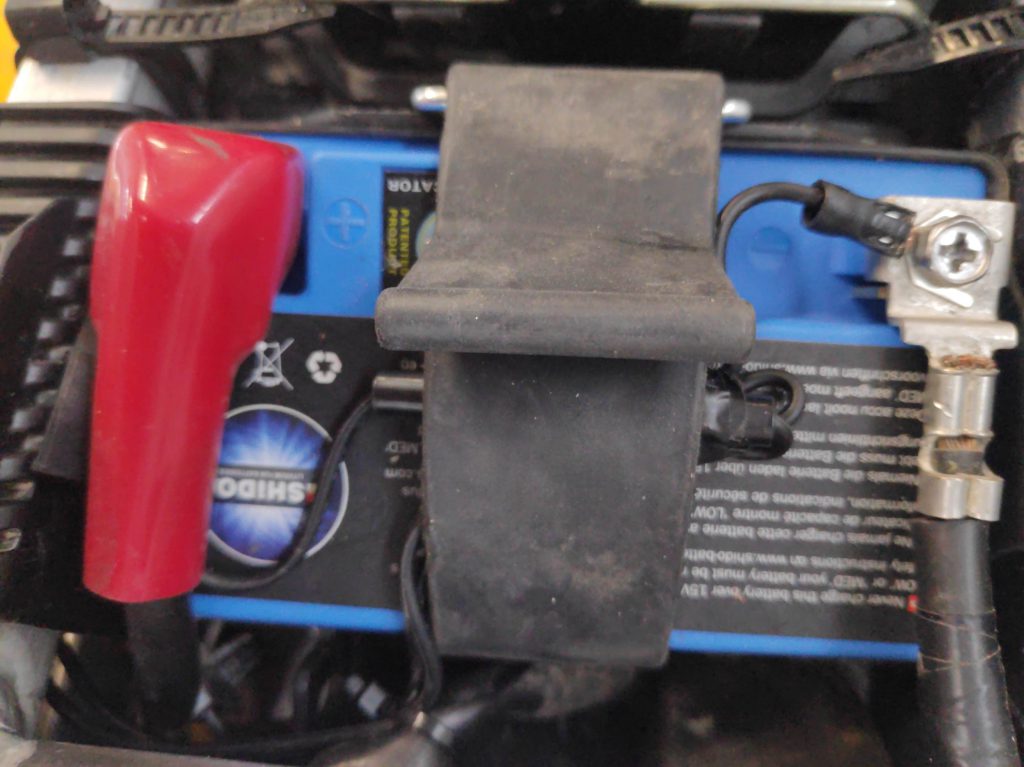
directly to the battery and stowed the outlet …
right behind the cylinder head, close to the main wire loom of the bike, where it is a bit protected.
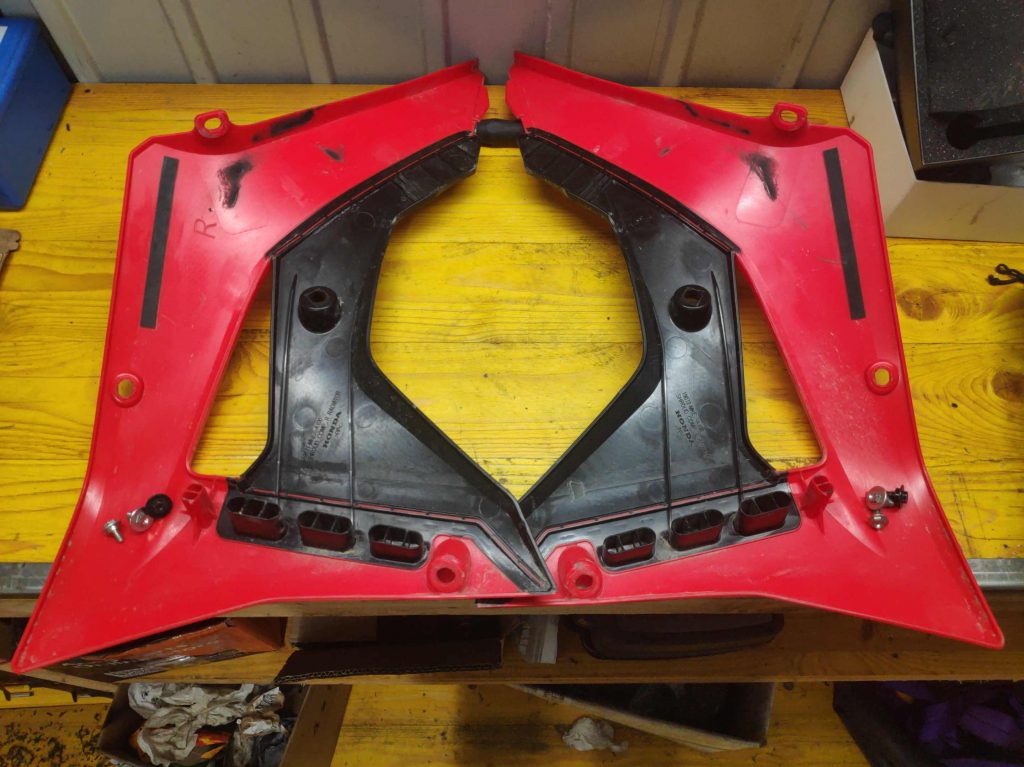
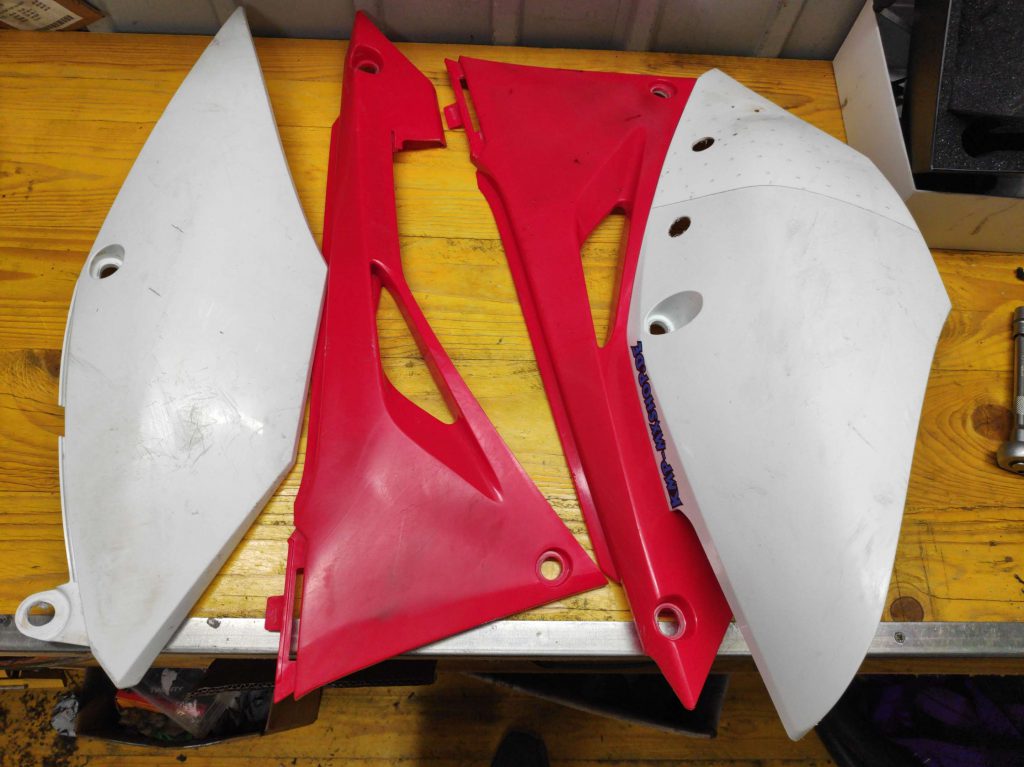
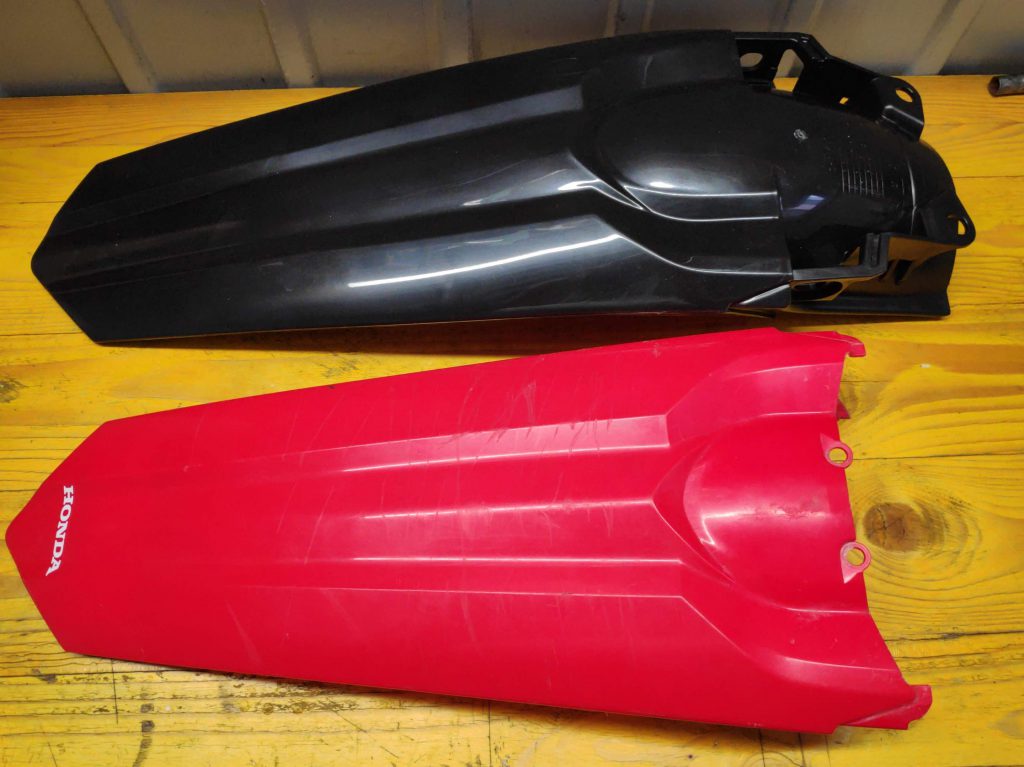
Fitting CRF450X Plastics on a CRF450L
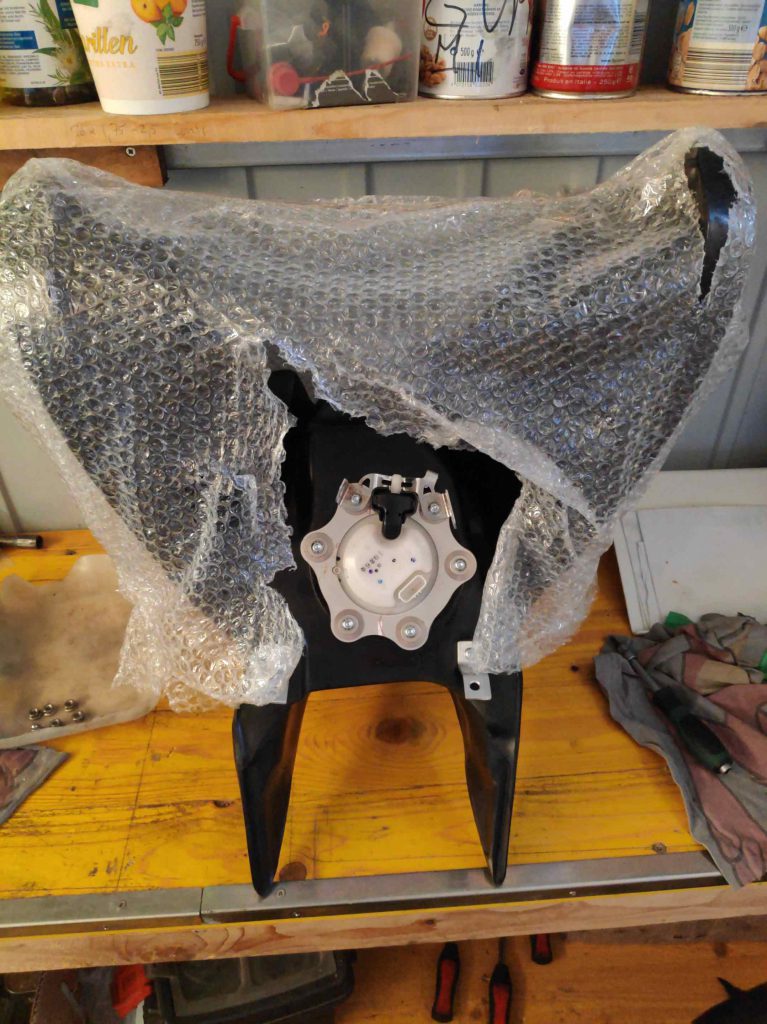
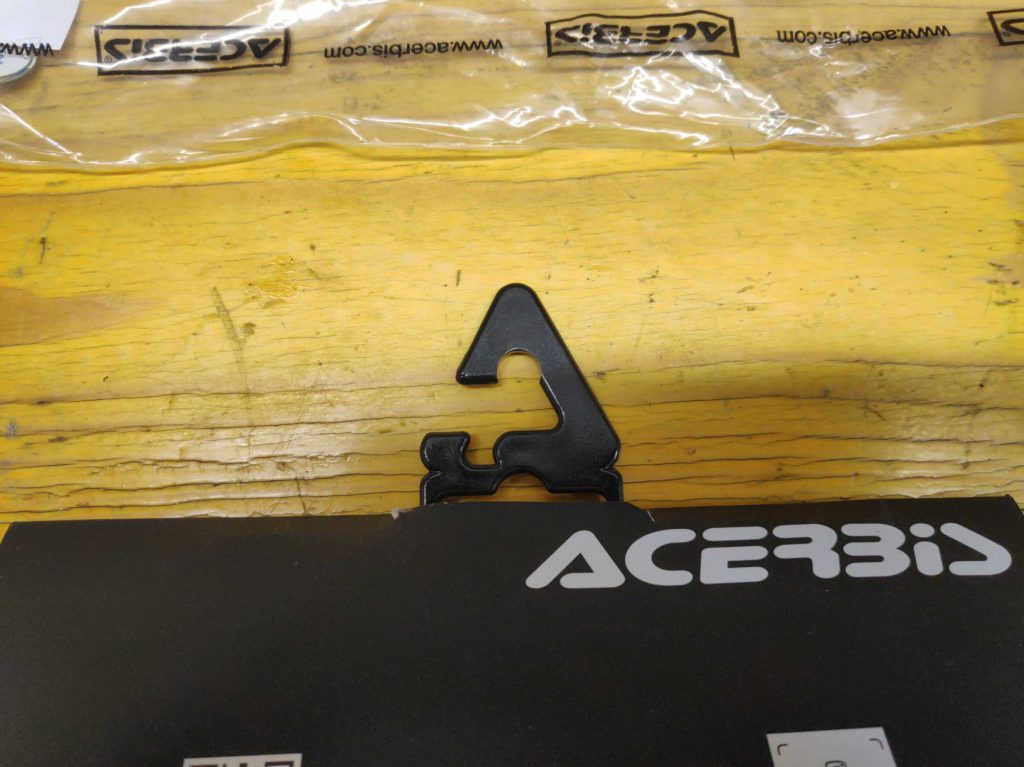
Beeing a fan of the color black, it was time to install the black plastics from Acerbis. Because there is no black plastic kit for the 450L, I ordered one for the CRF450X.
They will fit with more or less adjustment, cutting and heat-bending:
The tail end is completely different because of being longer. It has to be …

cut down.
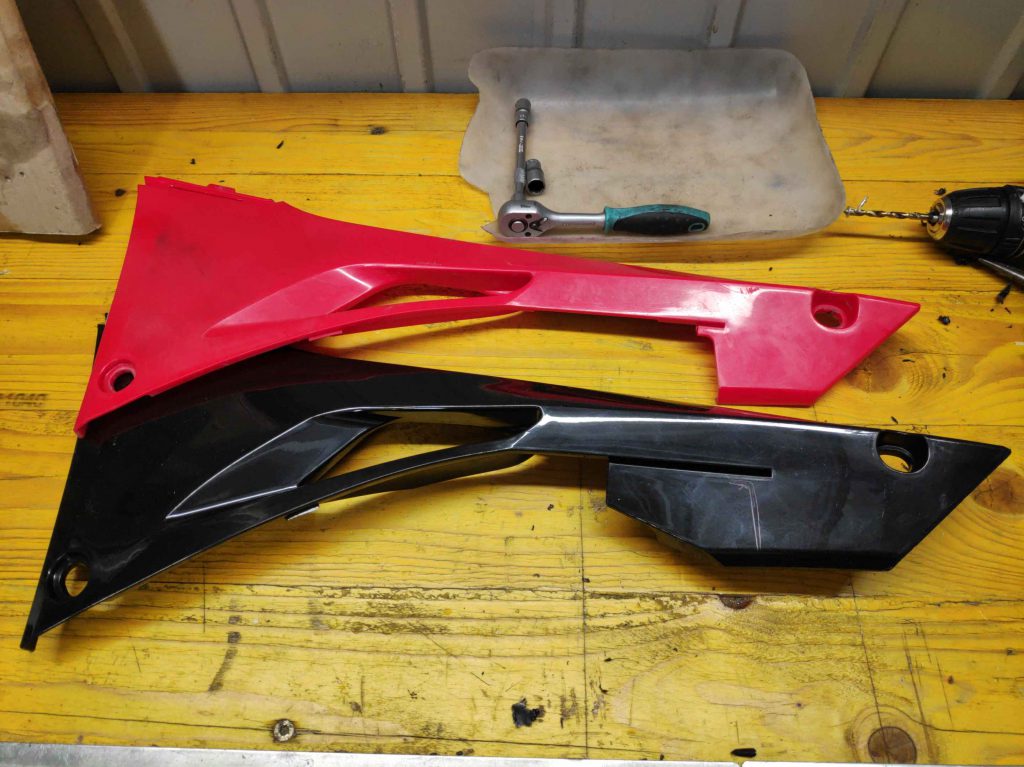
Same the middle side plastics:
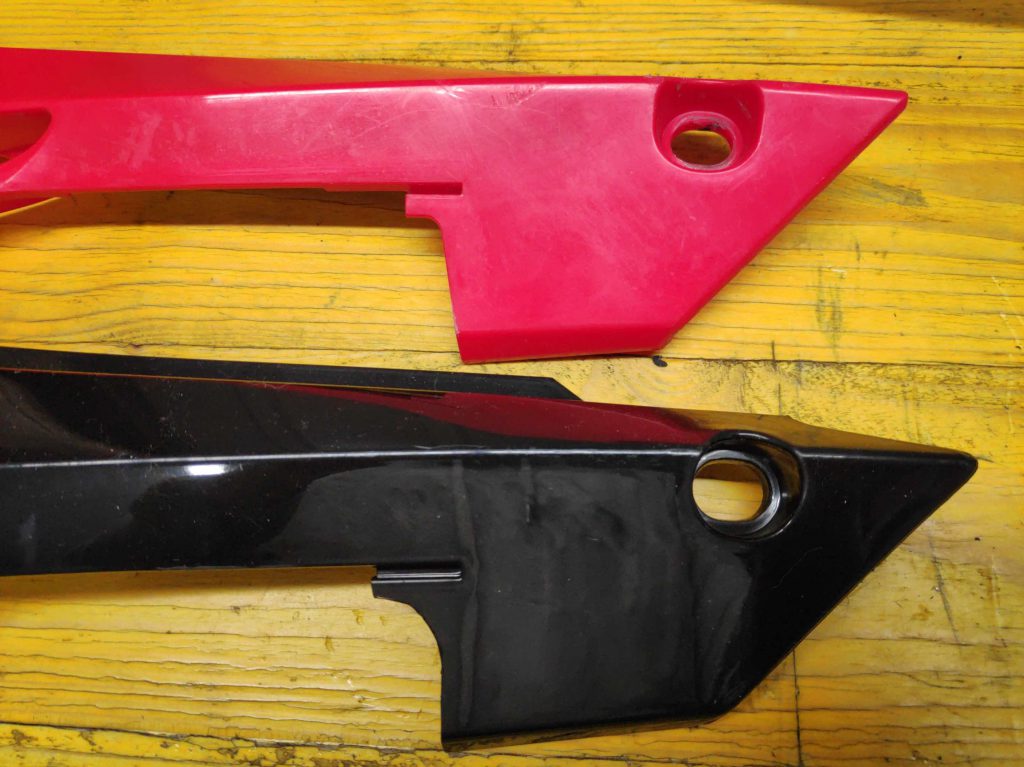
also some cutting work is needed
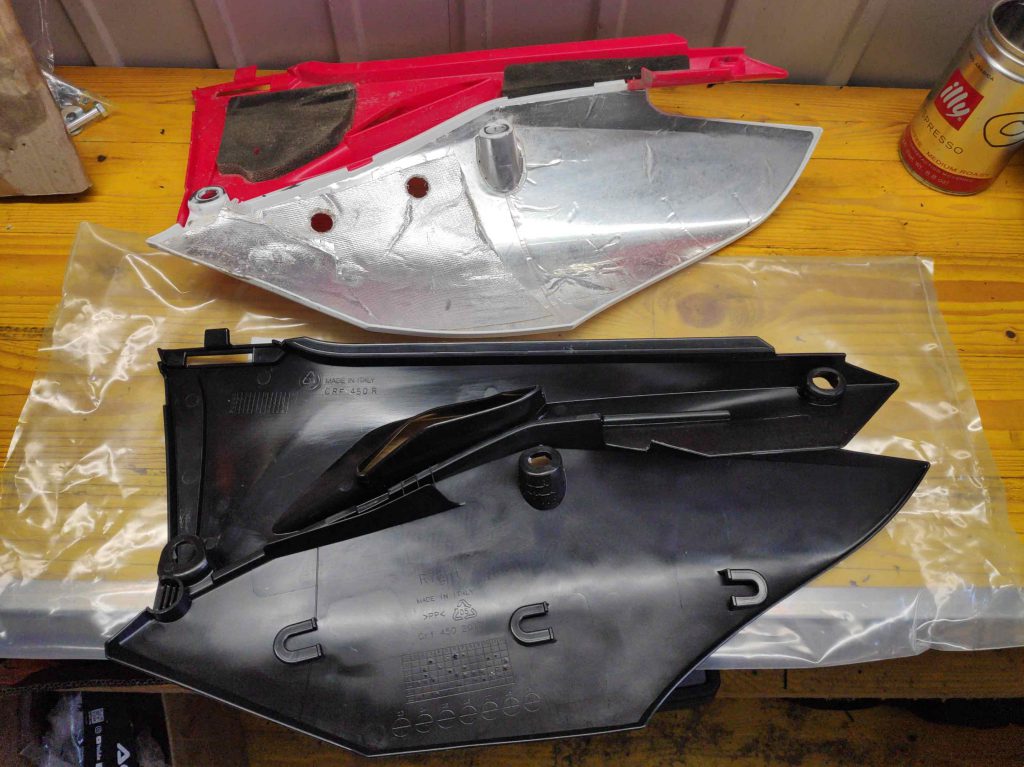
Biggest pain in the ass was surely getting the heat protection foil without to much damage separated from the original end-side-plastic. Also, it was necessary to cut the three U-shaped mounting points from the X Version off before the heat foil was attached.

Similar Problem with the left hand side end-side-plastic: It’s completely different.
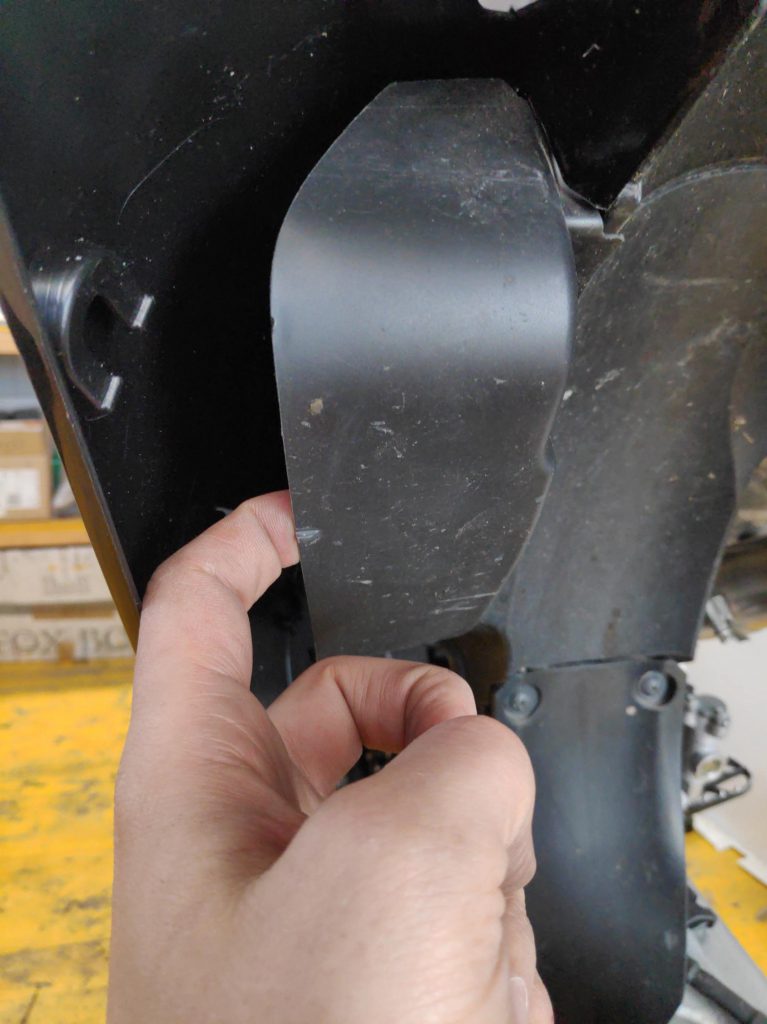
Biggest problem is, that there is a huge gap between plastic and the main fuse box housing of the bike. Leaving it this way, dirt/moisture would get easily thrown into the fuse box area of the CRF450L. It took me some time to find a proper solution:
I found a black plastic bottle in the rubbish, which had the perfect size. I took a right sized wooden plank …
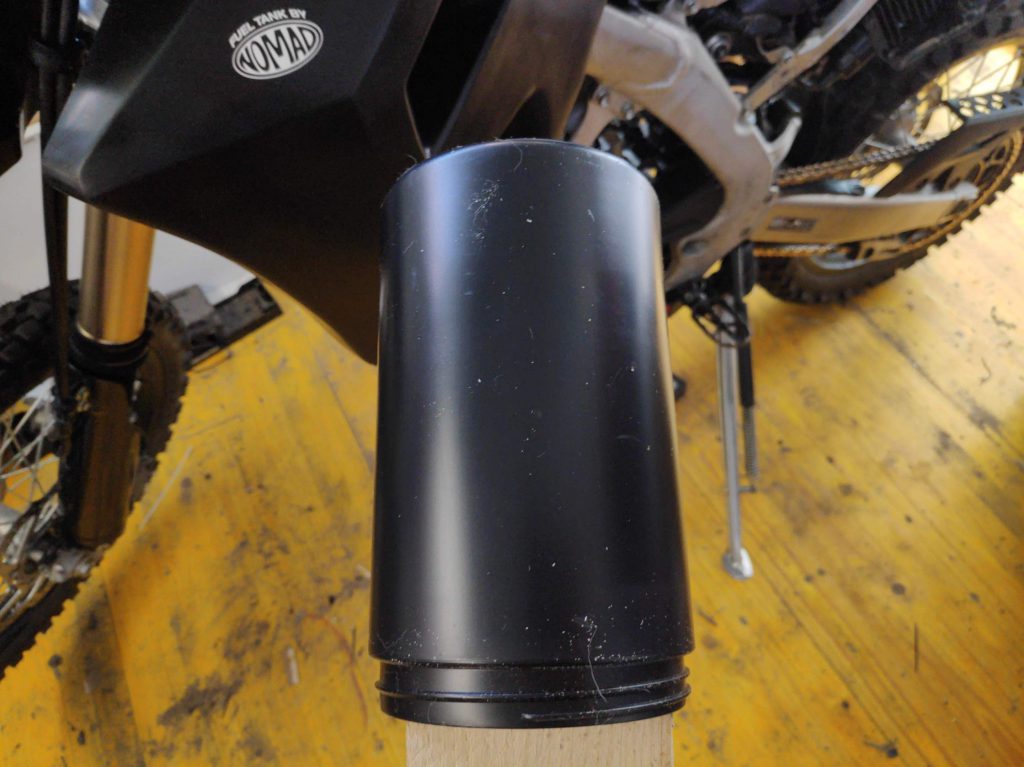
sticked the plastic bottle onto it and heated it with the heatgun. This way I was able to produce a propper …
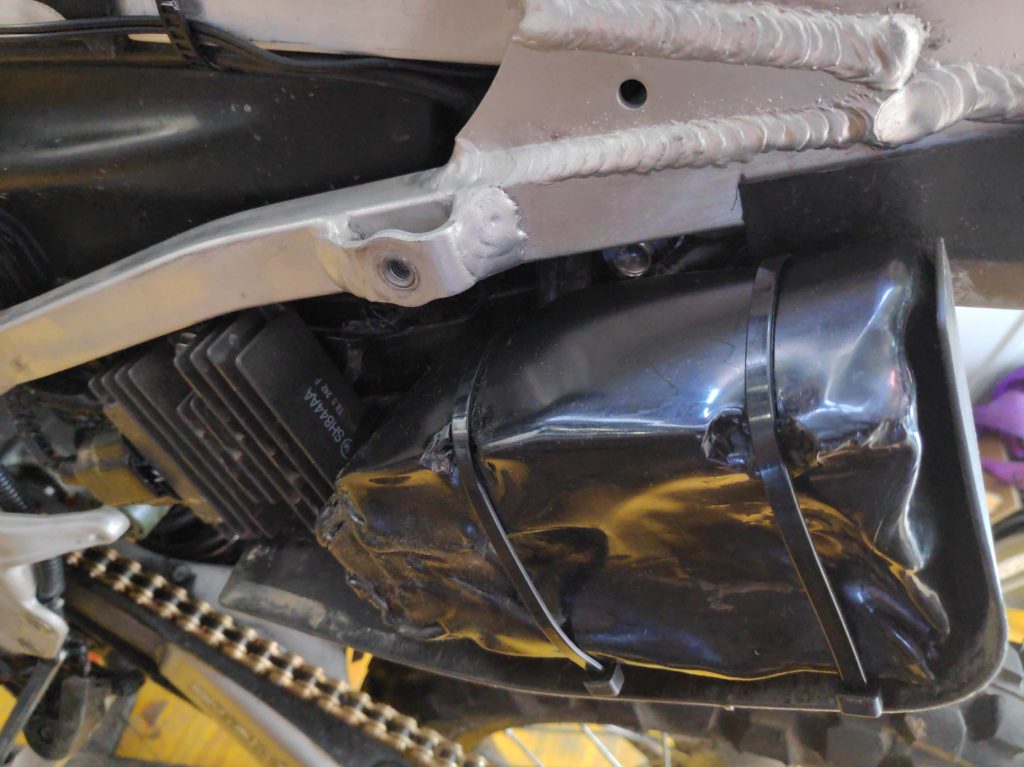
square shaped protection housing for the whole fusebox area. In deed its not nice looking, but this way, dirt will probably get still thrown in, but can’t clog the fuse box. Slowly, the shape of the future bike …
got visible.

The original muffler was replaced with a street legal aftermarket part from Arrow.
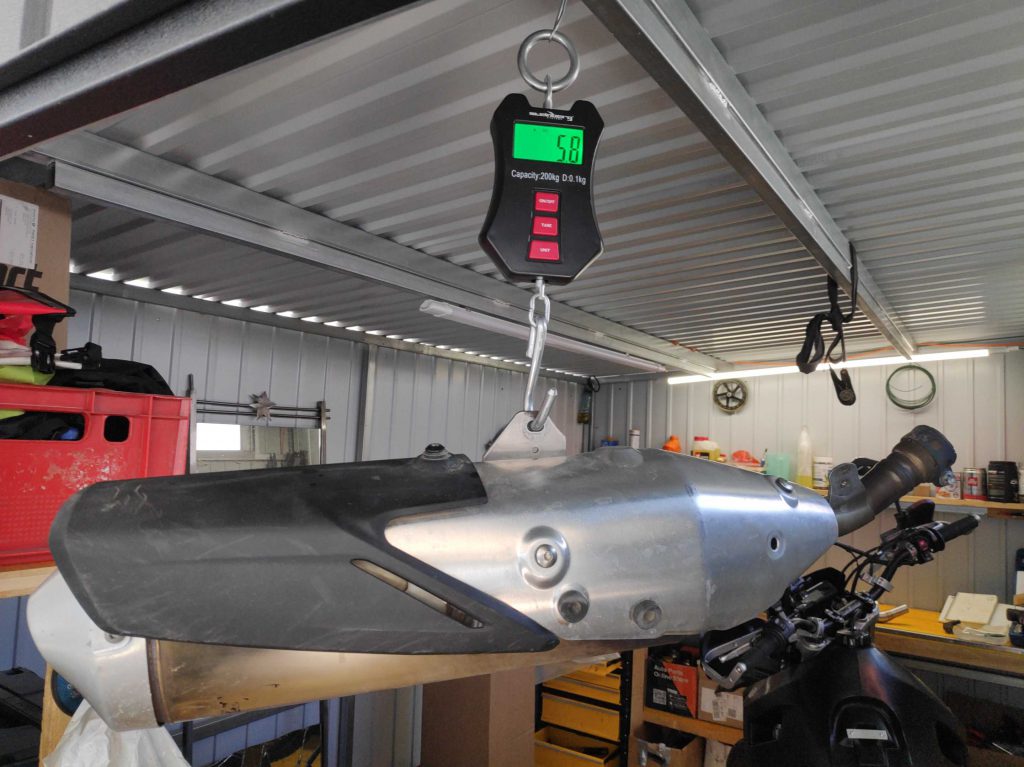
putting both on the scale, the difference …
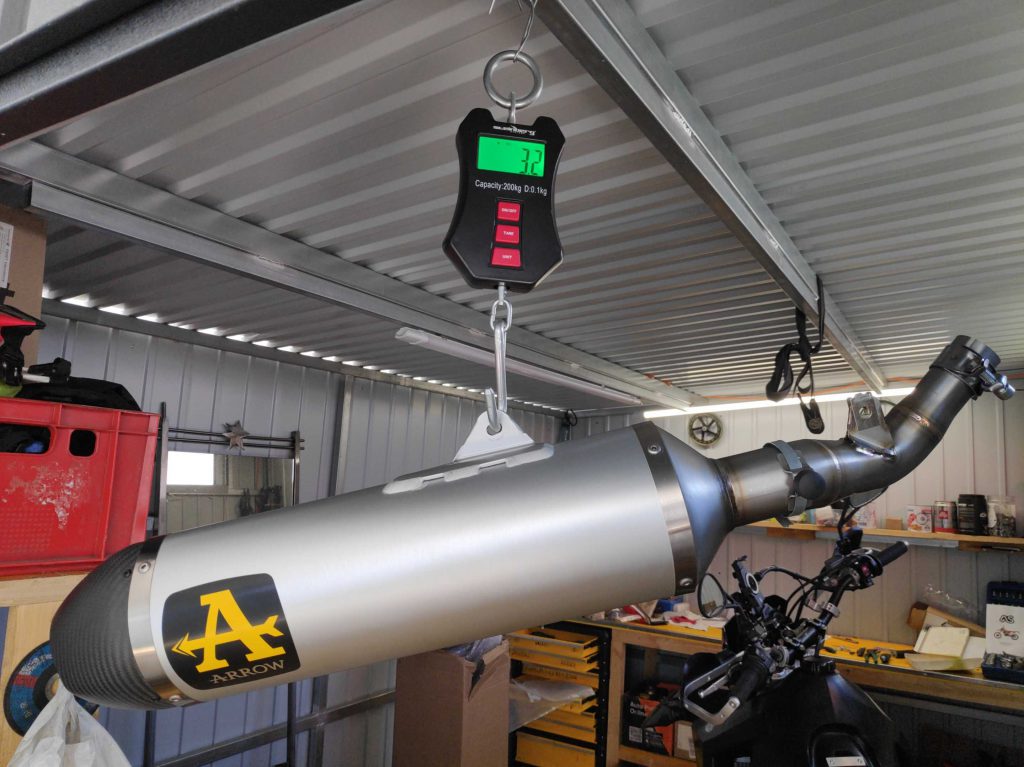
in weight is big: 2,6 kg.
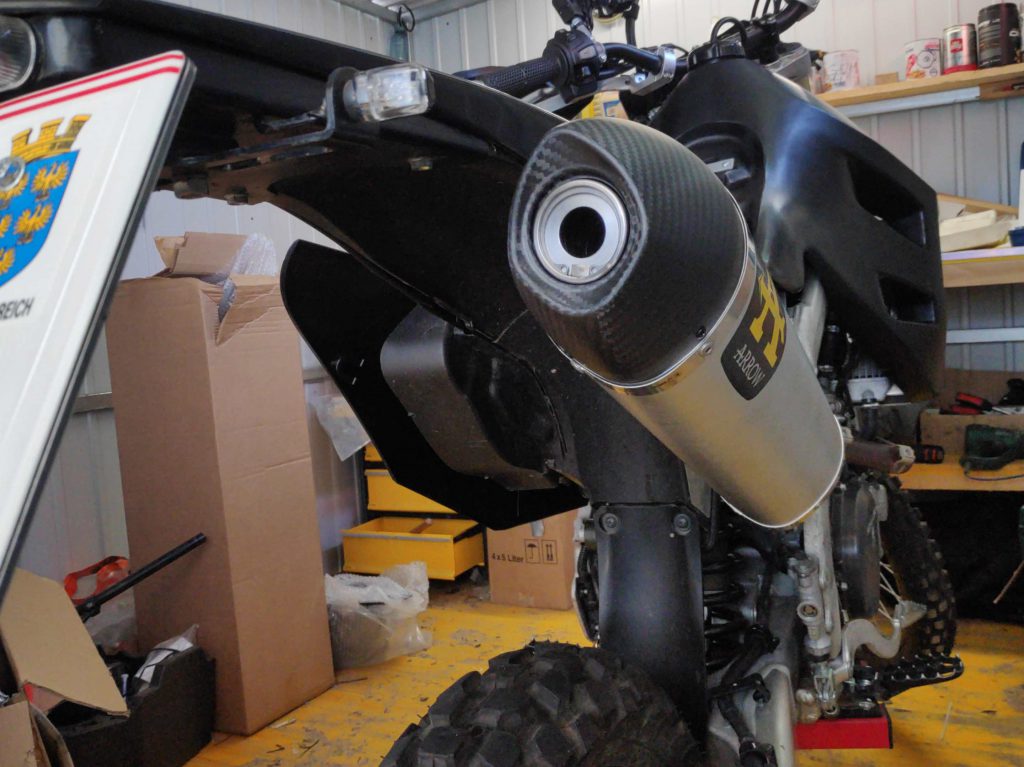
The muffler design is ok for me. I just had to bend the indicator bracket about an half inch upwards, for getting the winker far enough away of the hot exhaust fume area.
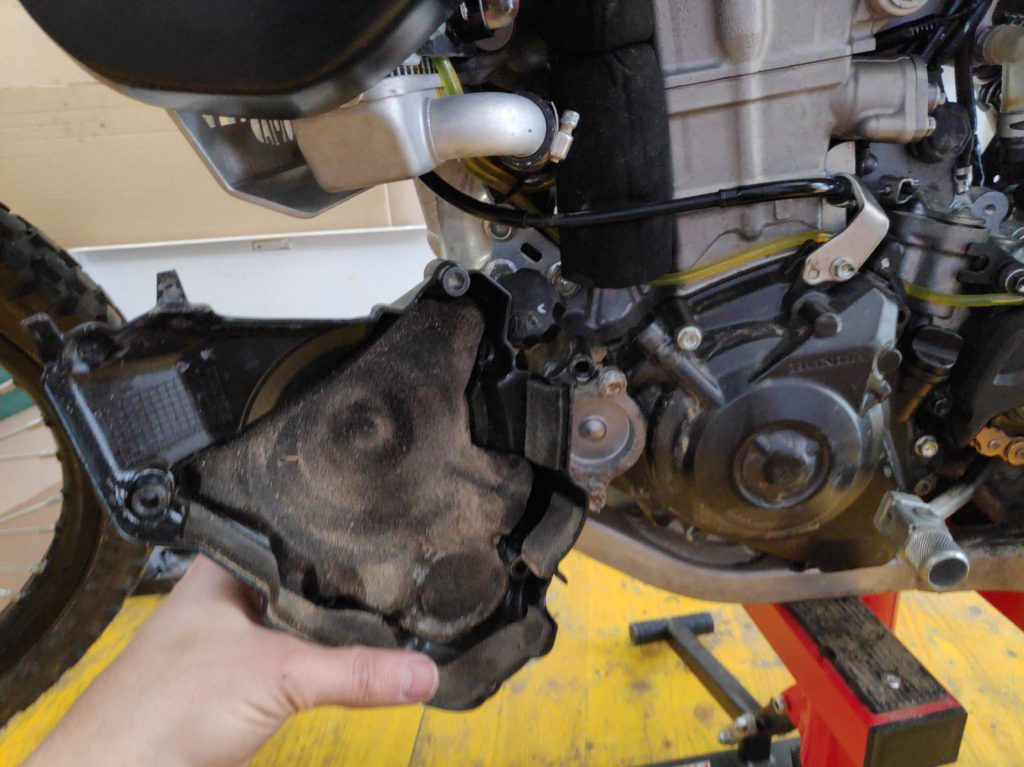
Now I got rid of the plastics around of the Mules engine. It’s annoying how many sound reduction parts are mounted to this bike’s engine.
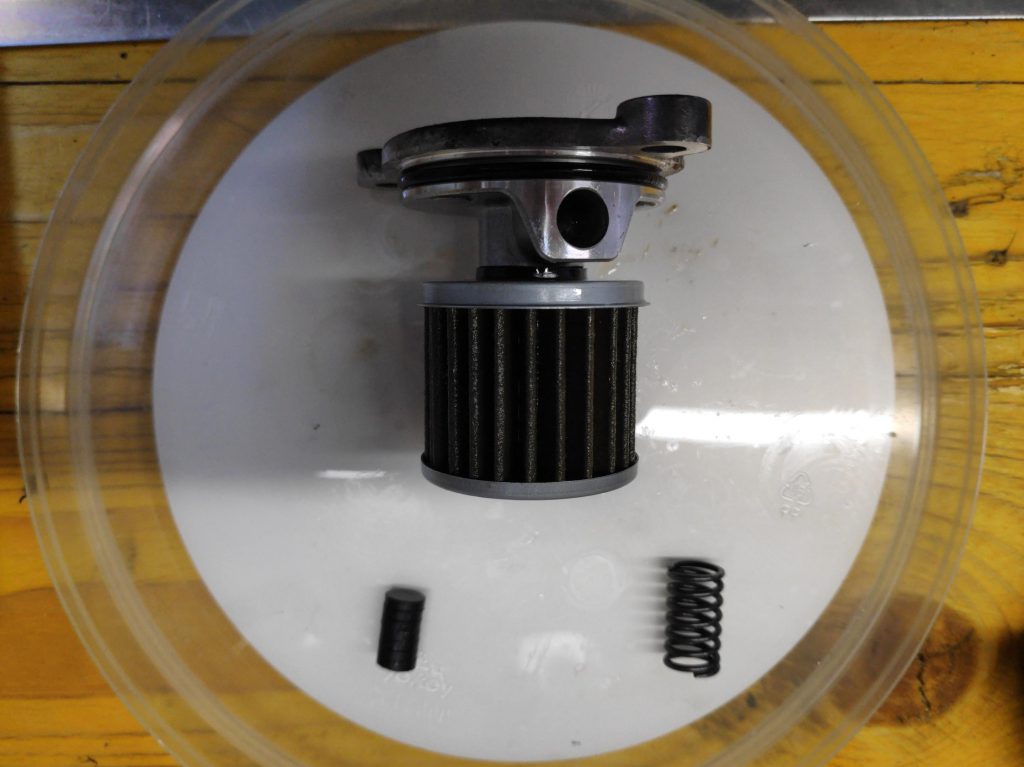
Now having access to the oil filter I installed ferrit magnets …
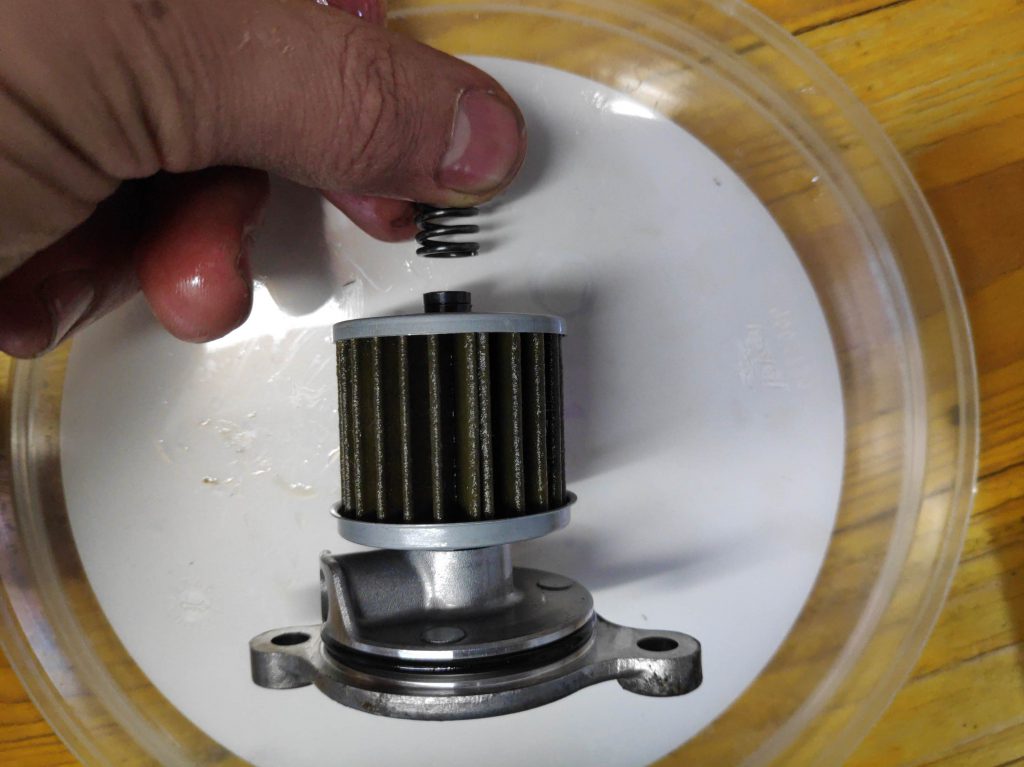
right into the spring of the oil filter. The staple of heat-resistant ferrite magnets is short enough for keeping the double function of the filter (oil filtering and oil pressure bypass valve in case of a clogged oil filter). With this little magnets, the whole filter skeleton gets magnetic and also very tiny magnetic friction-parts will get collect by magnetism. I also added a strong …
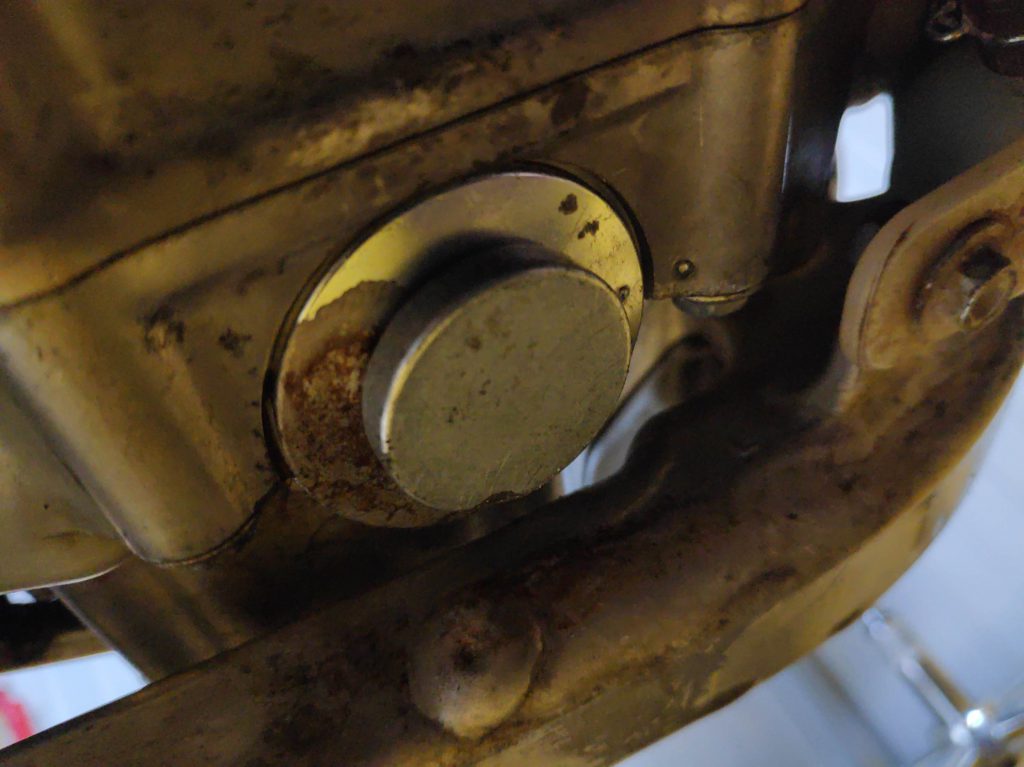
magnet to the oil drain plug (magnetic range 5 cm or 2 inches), which will keep fine magnetic particles mainly from the gearbox at the bottom of the oil reservoir, till the oil change will happen. For doing future oil changes without a torque handle, I made two dents with a center punch into the oil screw and the housing while the screw was tightened with the right torque. This way I have an orientation mark for tightening the oil drain screw without having a torque handle.
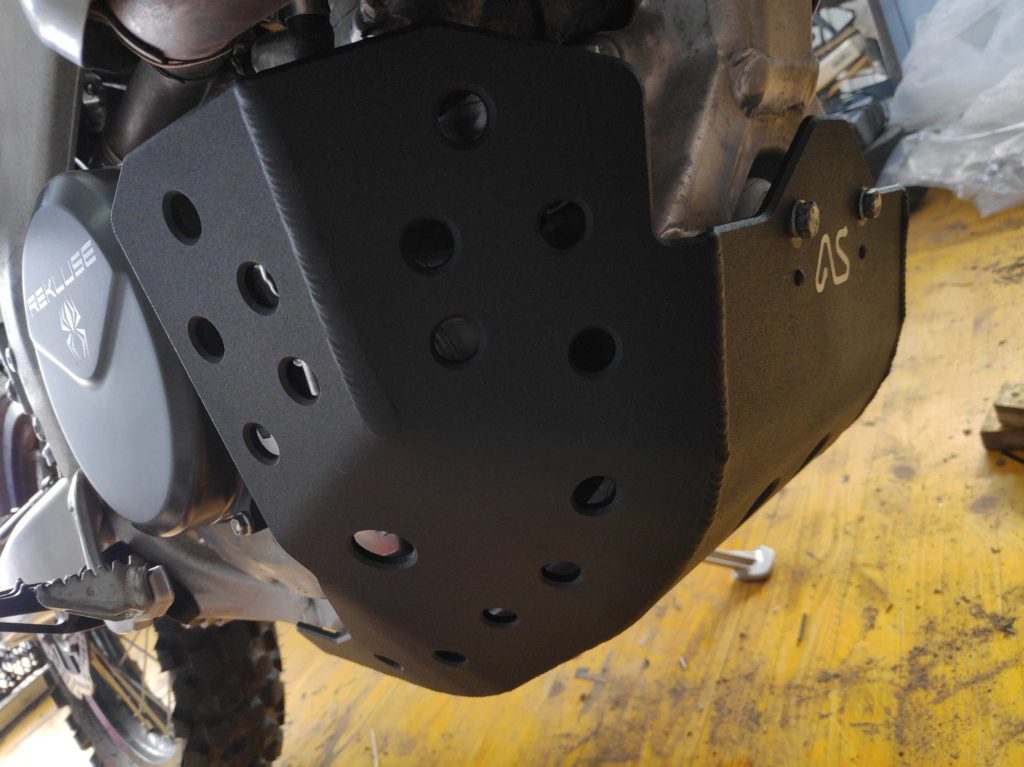
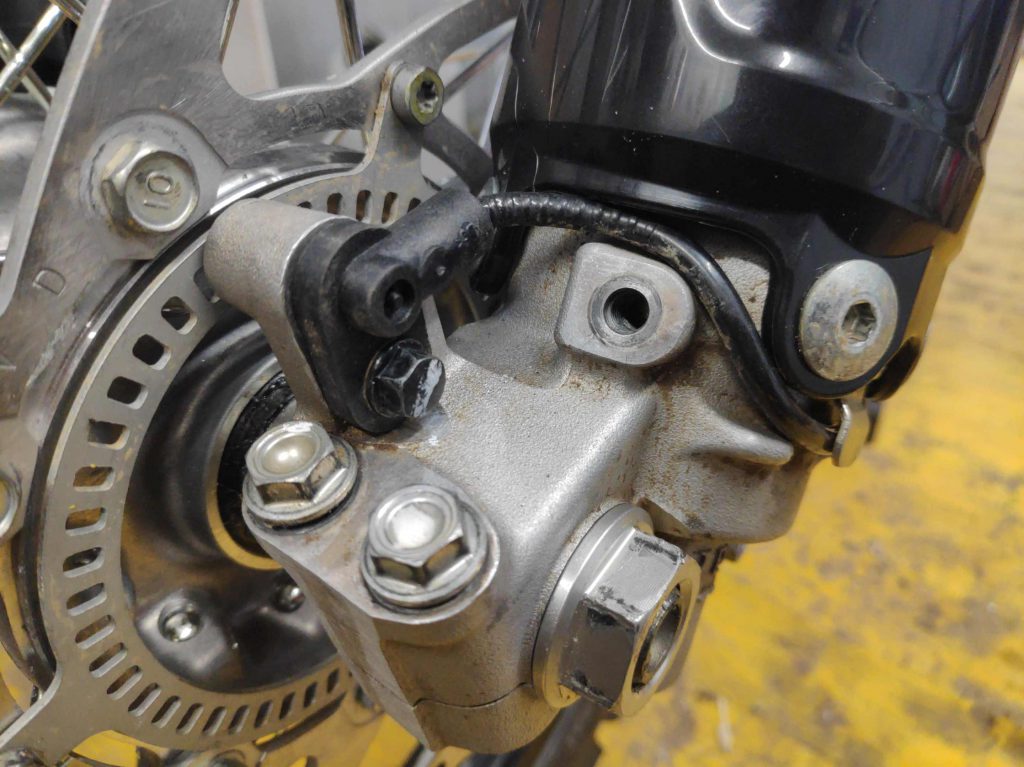
For protection I added a basplate from Adventure Spec. For additional brake pedal protection I added …
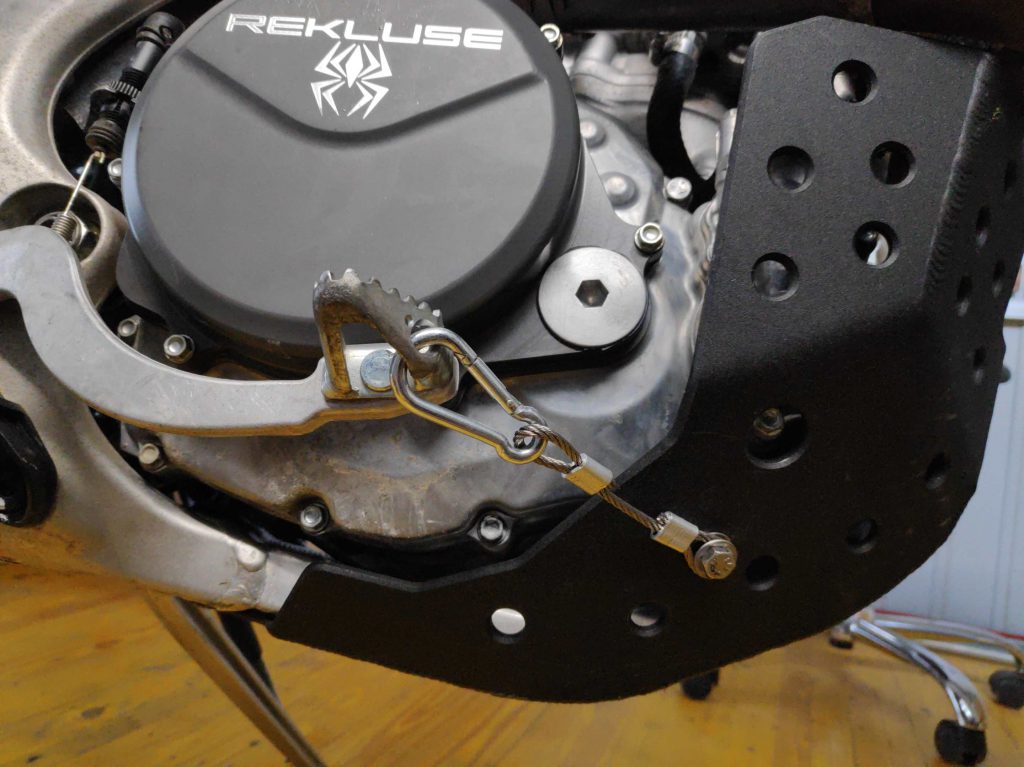
this cable wire cord. After that the support luggage rack …
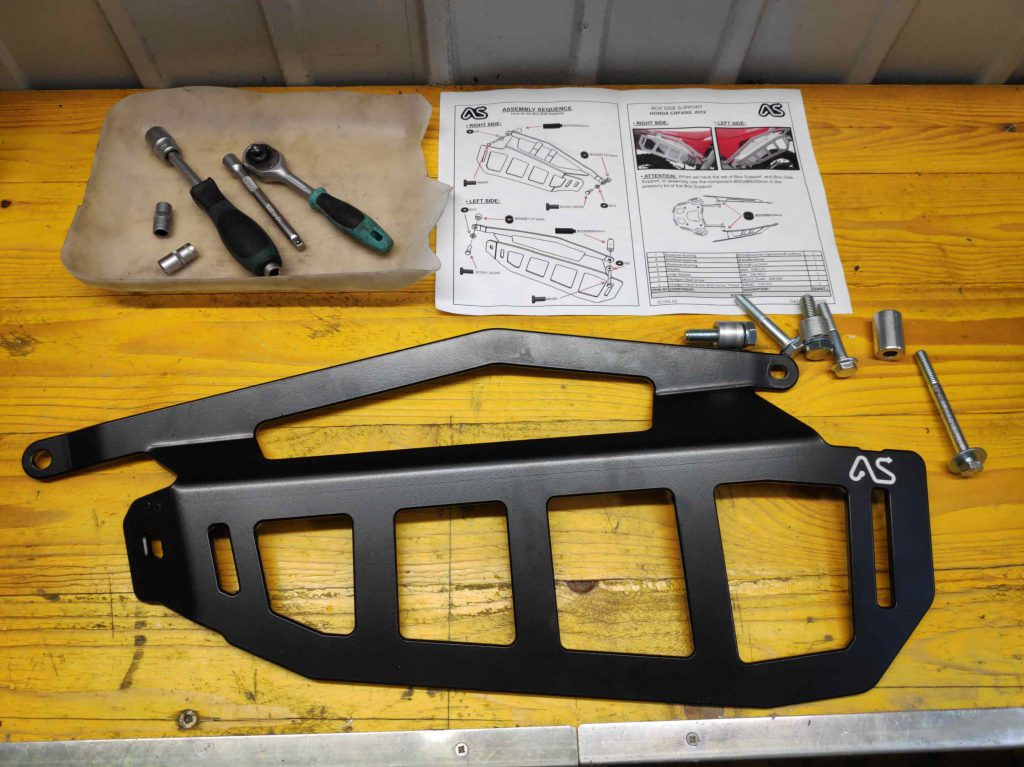
also from…
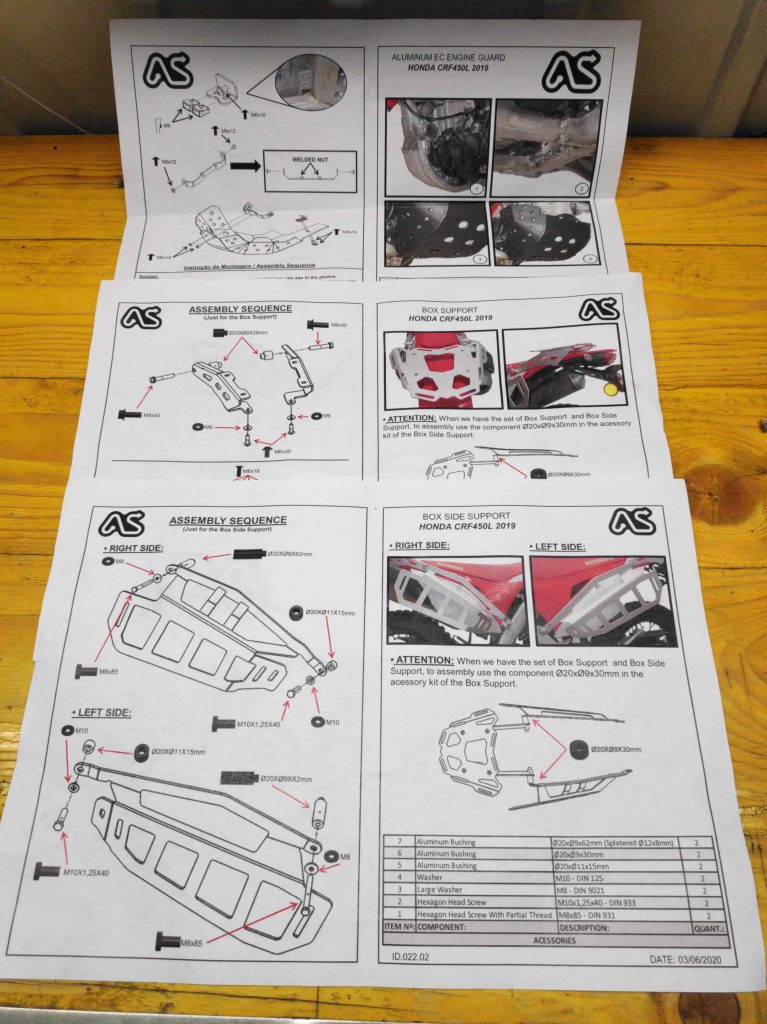
Adventure Spec was added. With a proper long range seat from …
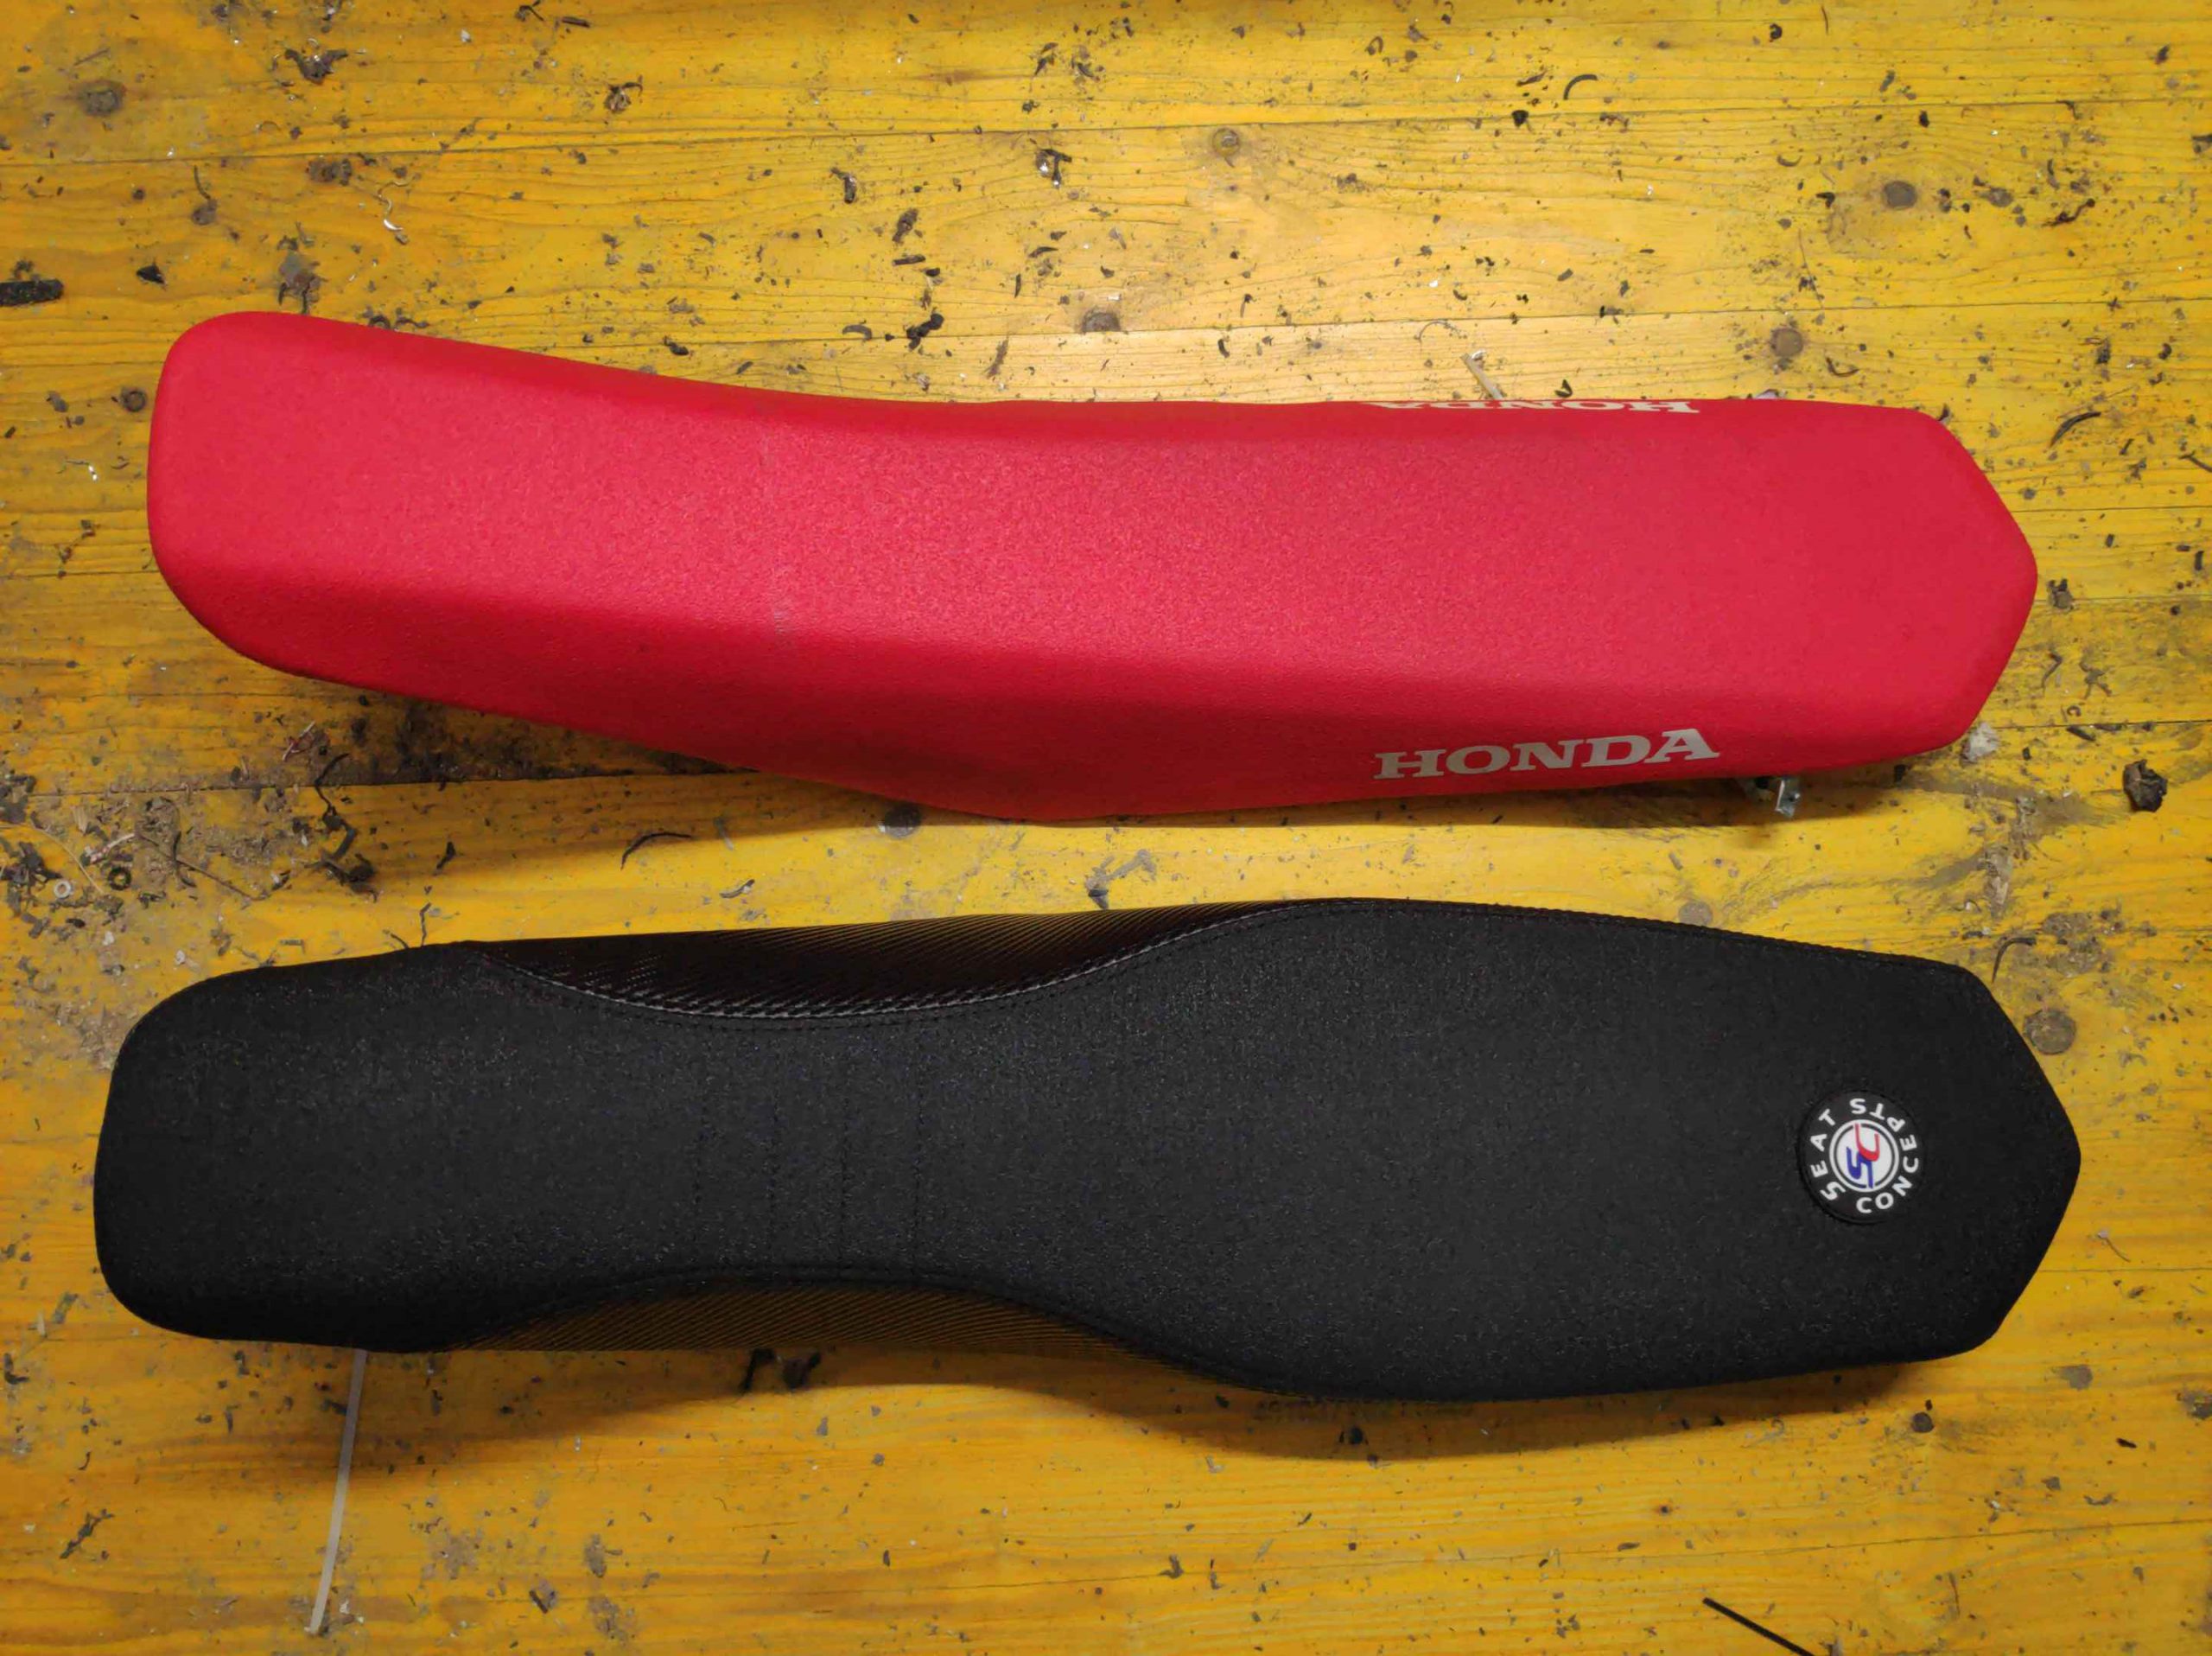
the company Seat Concepts, the new design of the Mules back end …

looked proper, like Honda made it that way out of the factory. A …
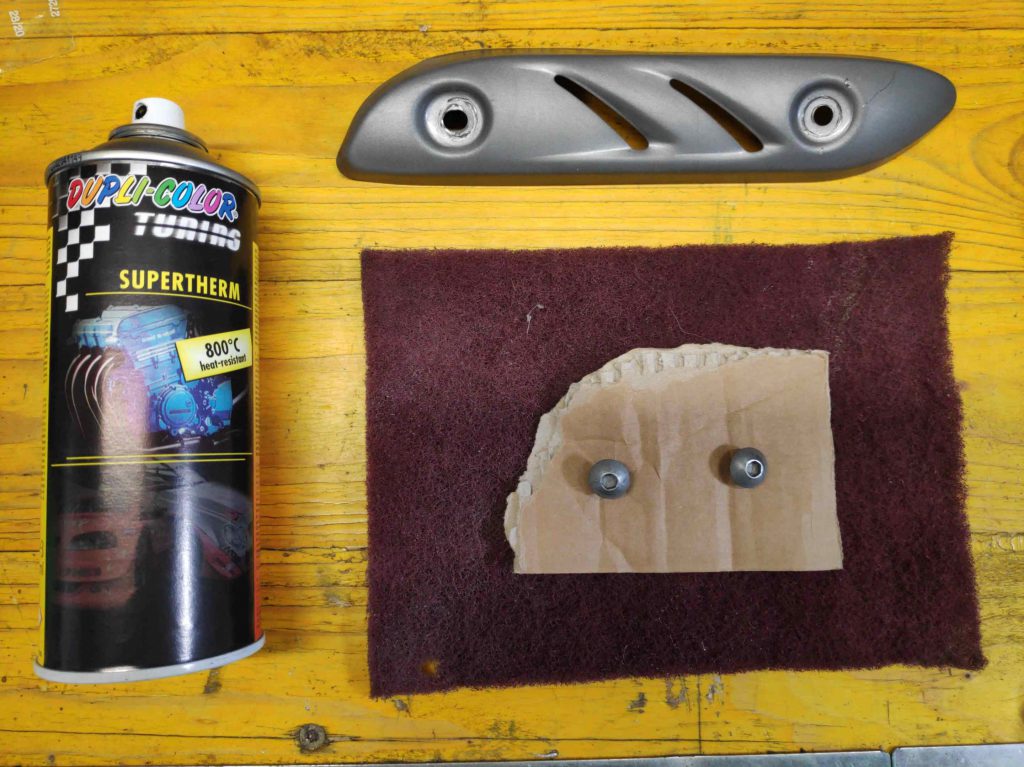
little paint job …
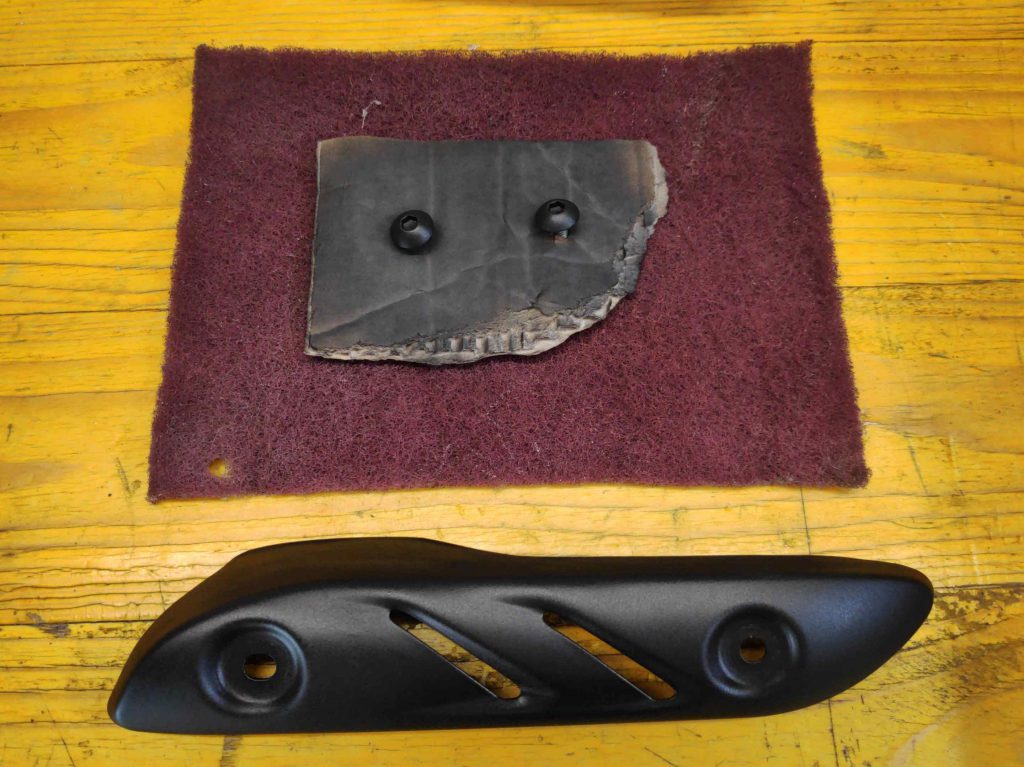
to the heat protection shield of the manifold and …

a few assorted, nicely fitting stickers gave the bike a …
decent finish. The first testrun went right to the next fuel station for filling up the barrel of a tank. Being back …
it was time for some fine tuning of the suspension. I put all to standard and was surprised how well the suspension (already strenghtened from the preownwer with progressive springs and stiffer rear shock) was working.
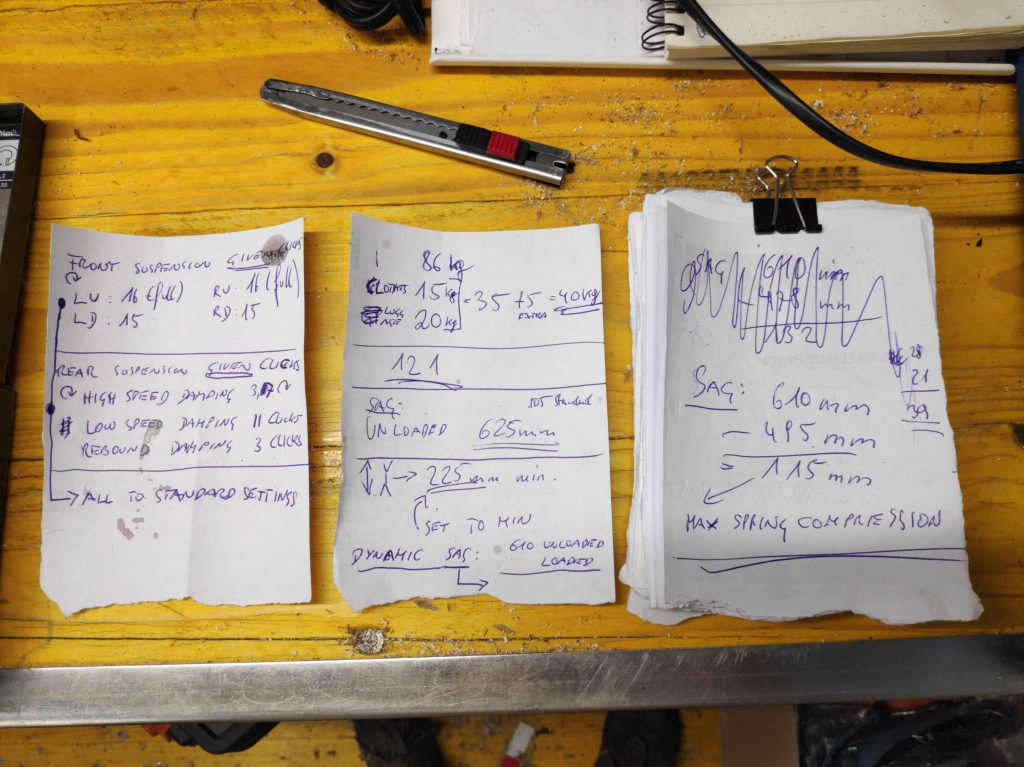
I just had to adjust the sag of the rear shock to the estimated total weight. The strengthened rear shock spring allowed at max compression setting a 115 mm sag. This equals Hondas “Rally-Sag-Setting” what means high stability. For a traveling Dual-Sport-Adventure-Bike this seems to me just perfect.
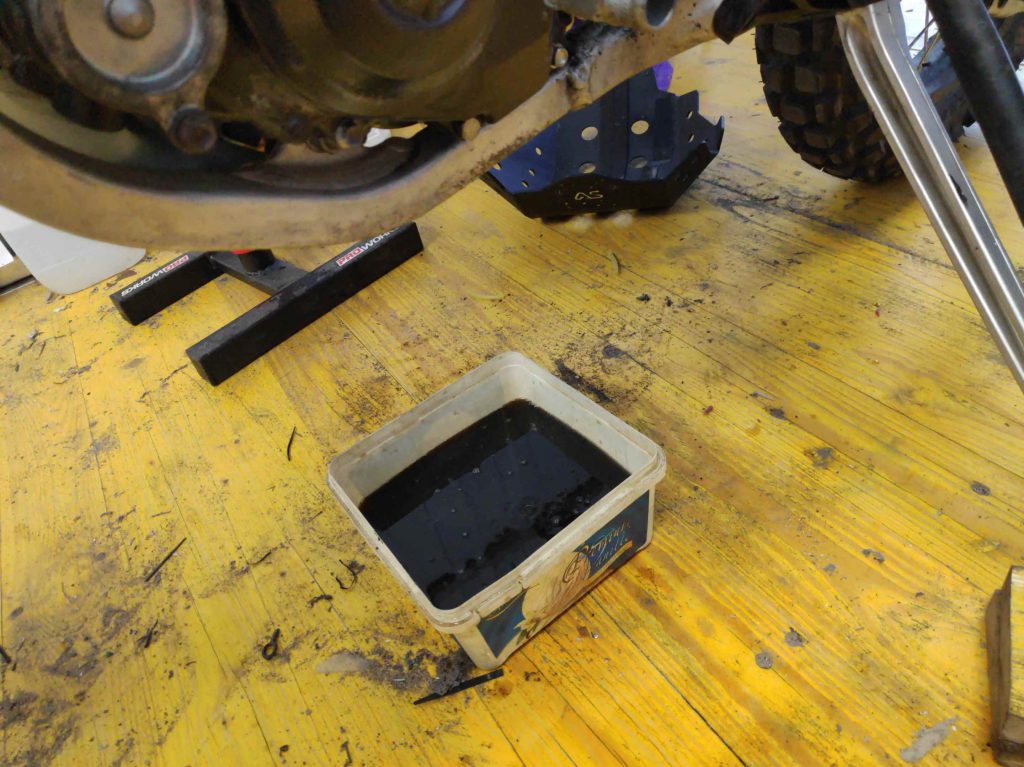
Because I didn`t know which oil was in the motorcycle, I decided making an oil change, what …
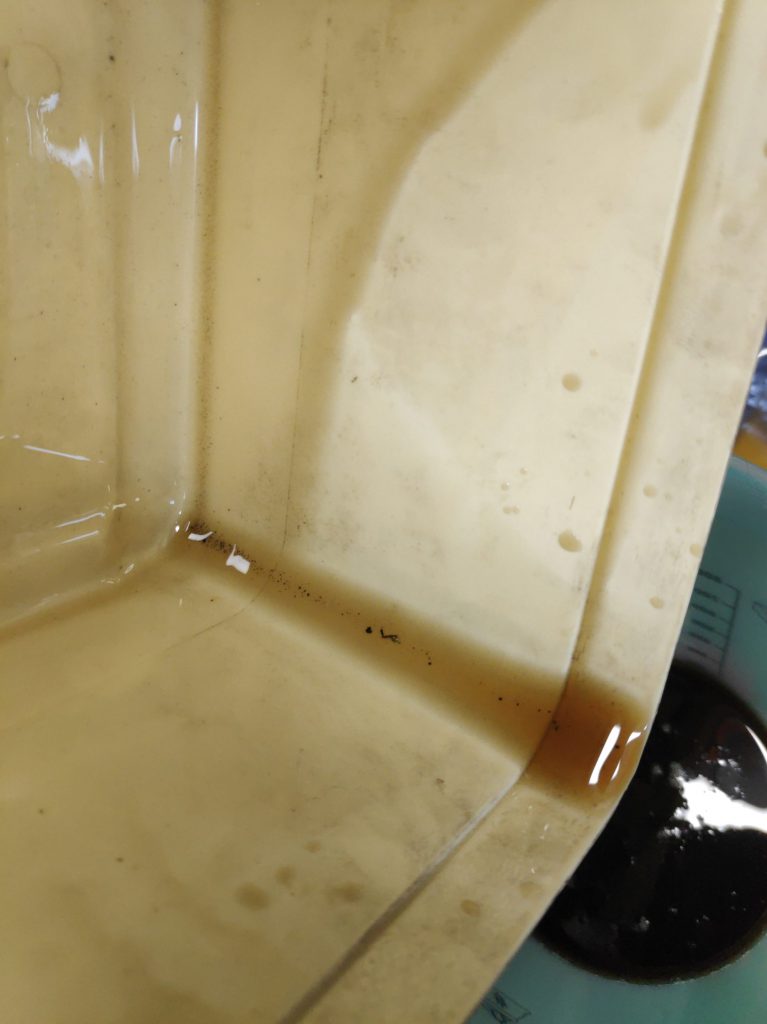
looked well. Nothing at the bottom of the box which was worth worrying about.
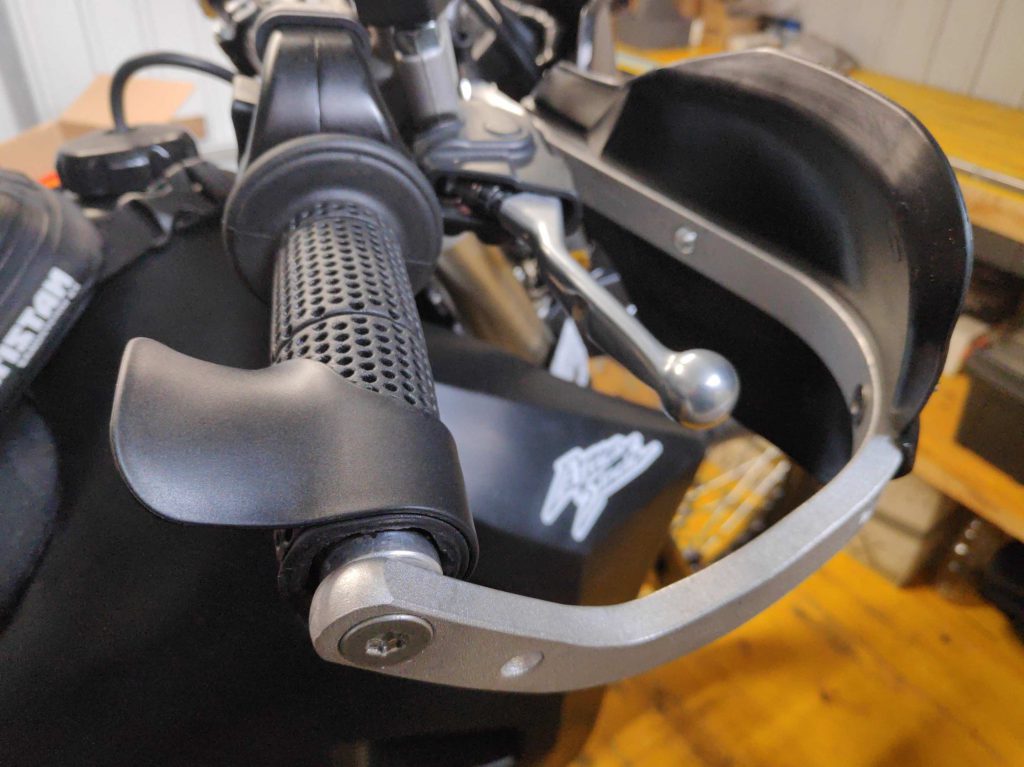
I also adjusted this throttle helper, which is a simple but effective piece of equipment for going on long journeys, preventing fatigue of the throttle hands wrist.
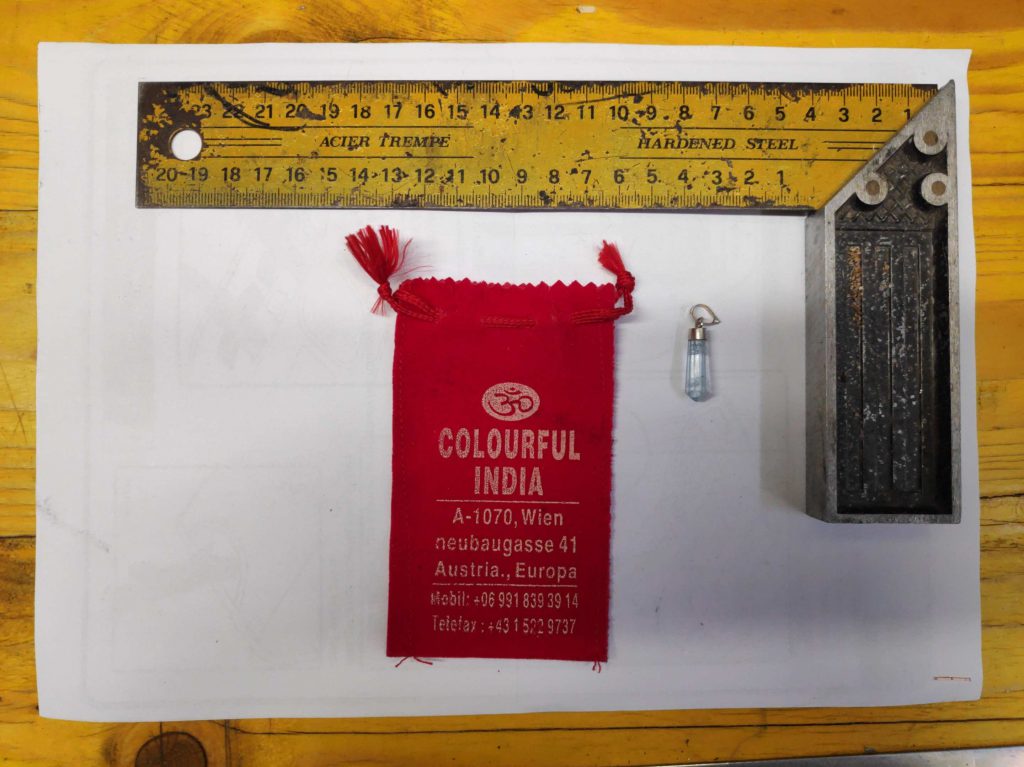
Some, lets say “cheeky” colleagues of mine, decided to buy me an esoteric gift which I have to take with me along my journeys.
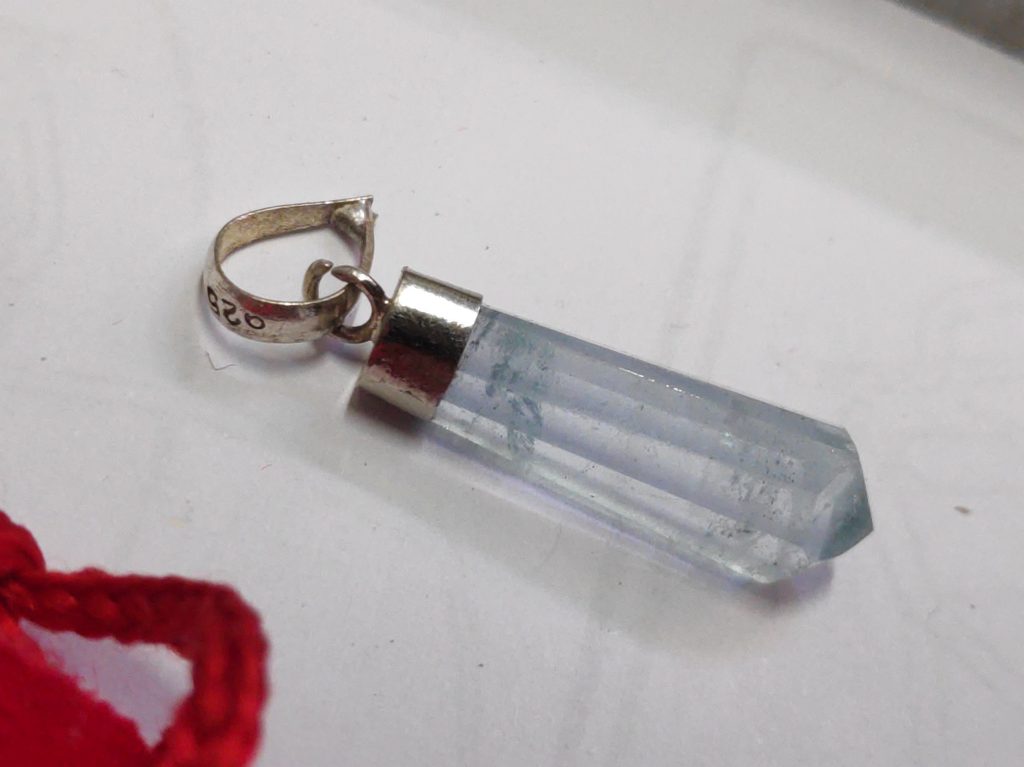
It’s tiny, so I gave it a try and hope it will do wonders for me and the bike . It was installed right …
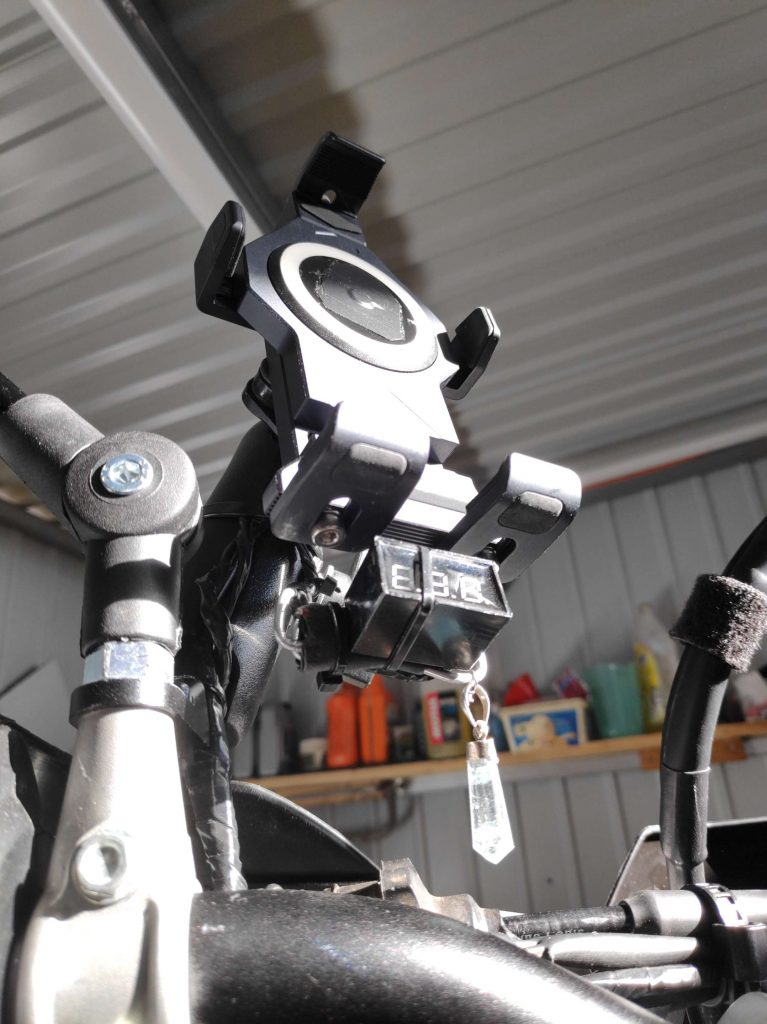
to the navigation unit / the voltage gauge where it can charge its power in the bright sunlight. *lol*
Before adding the luggage-bags it was time for putting the now fully equipped bike again on the scale, fuelled up to the max.
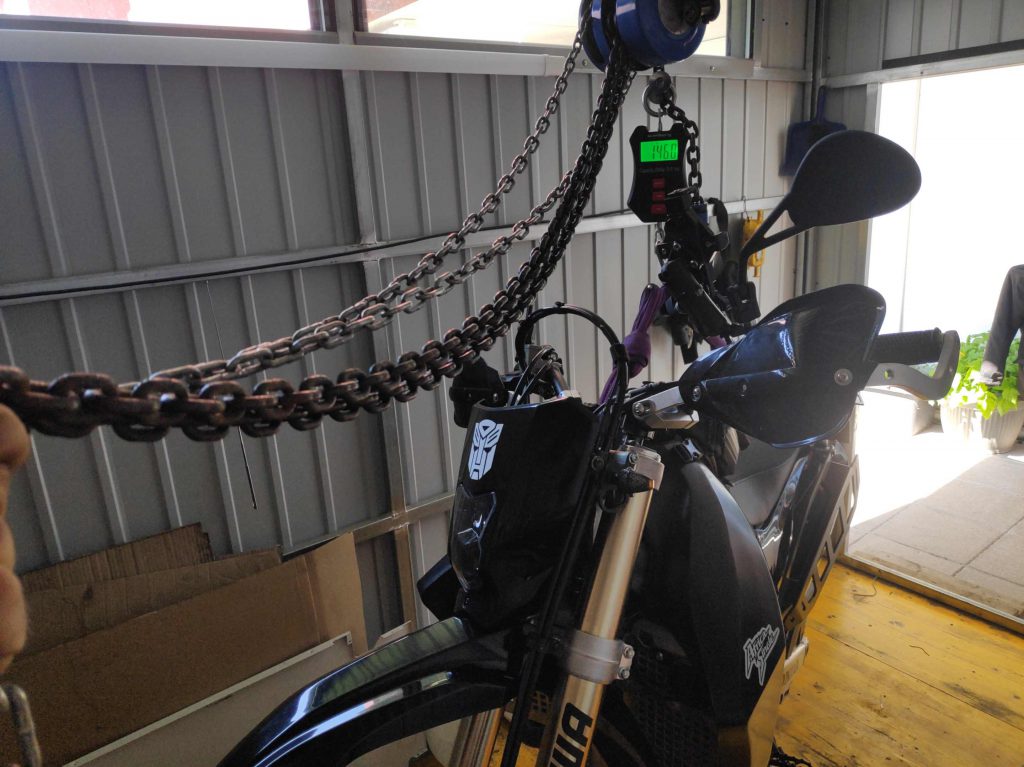
The scale says 146 kg or 321 lbs. That’s great. 4 kg / 9 lbs less than planned. With all the luggage added, the bike is around 175 kg or 385 lbs which was my goal to reach. This equals my former KTM 690ty fully equipped without luggage and will make a huge difference in the more technical riding terrain. –> Go light, go fast go far.
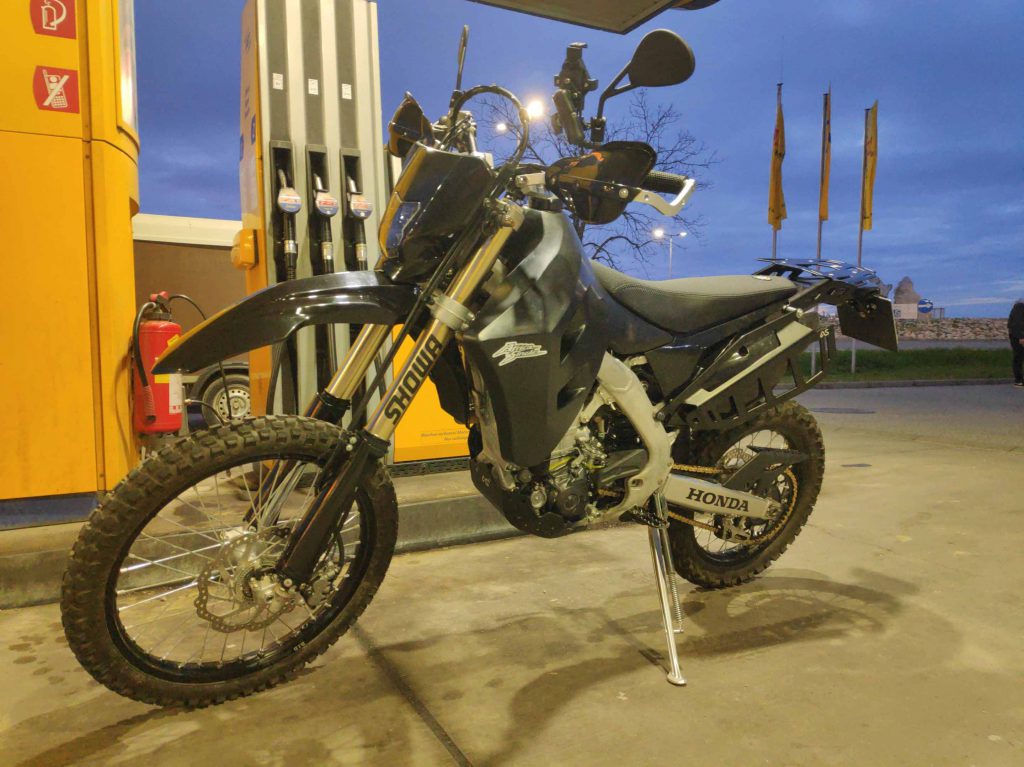
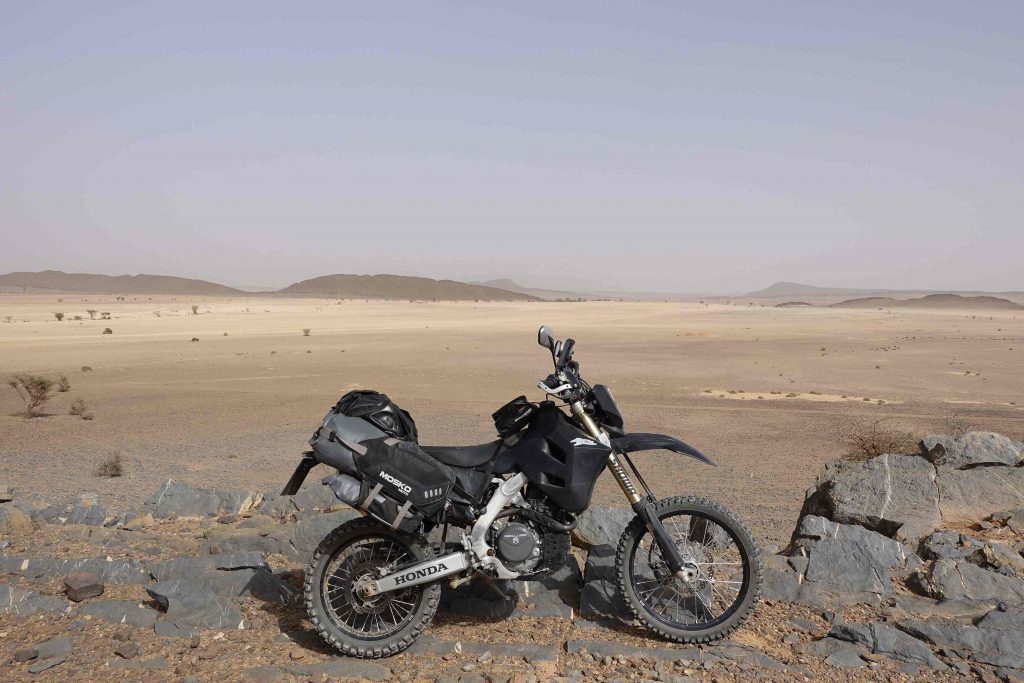
Here are some better impressions of my final Mule.
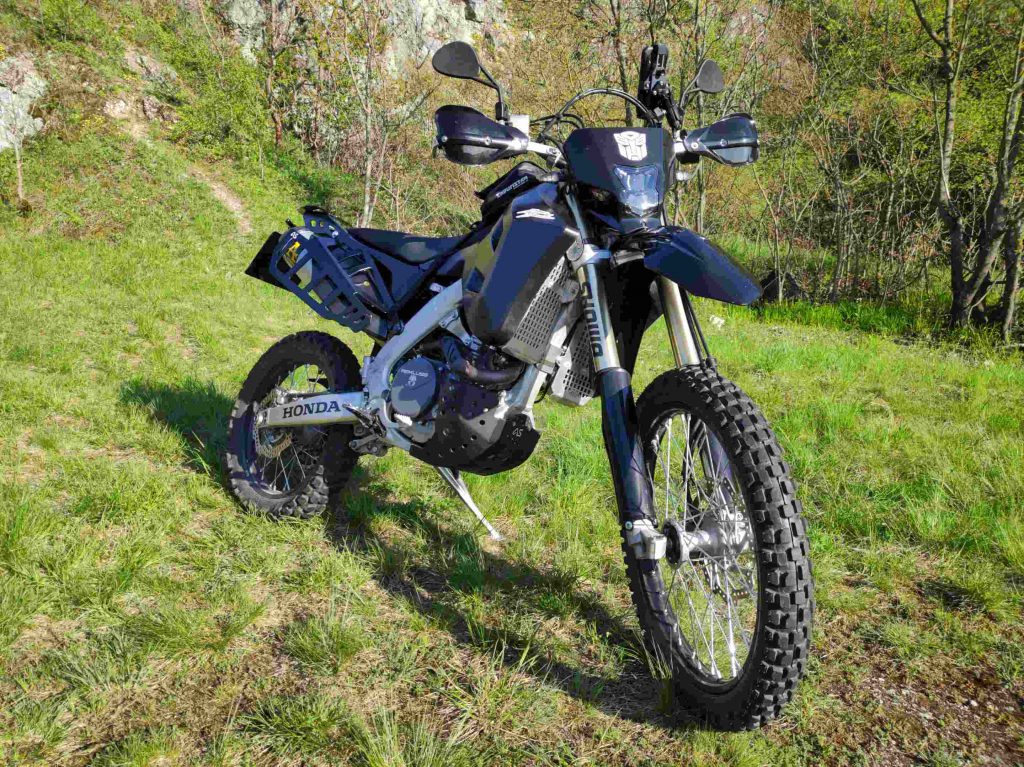
Black – my favorite color.
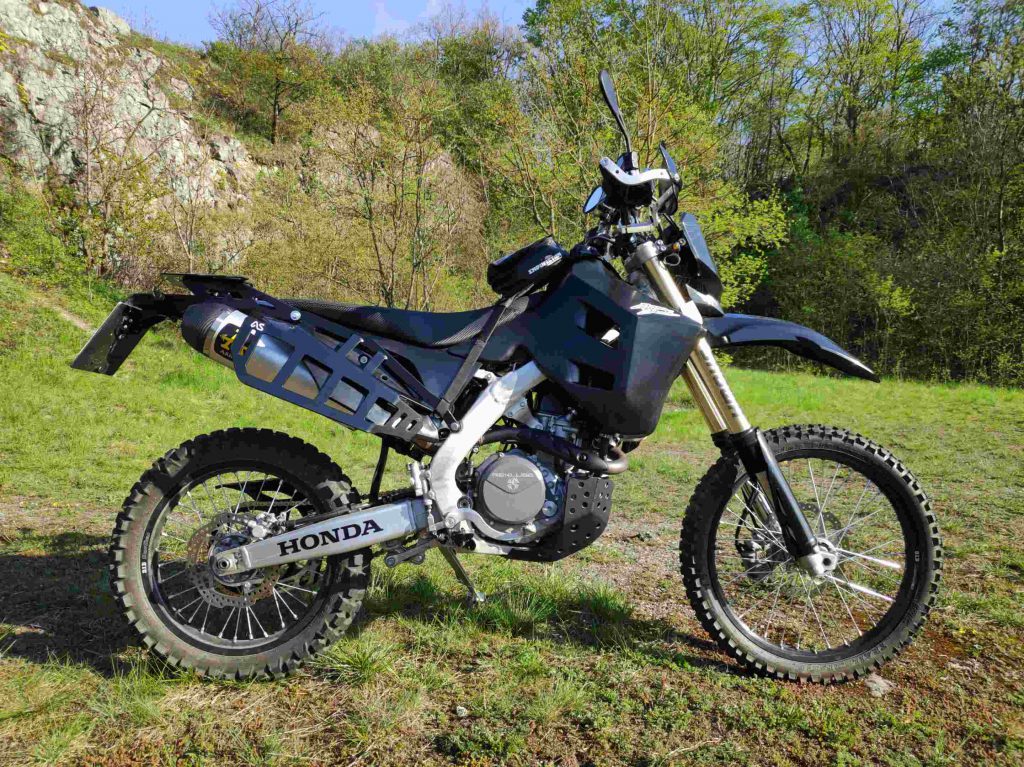
Honda CRF450L – My …
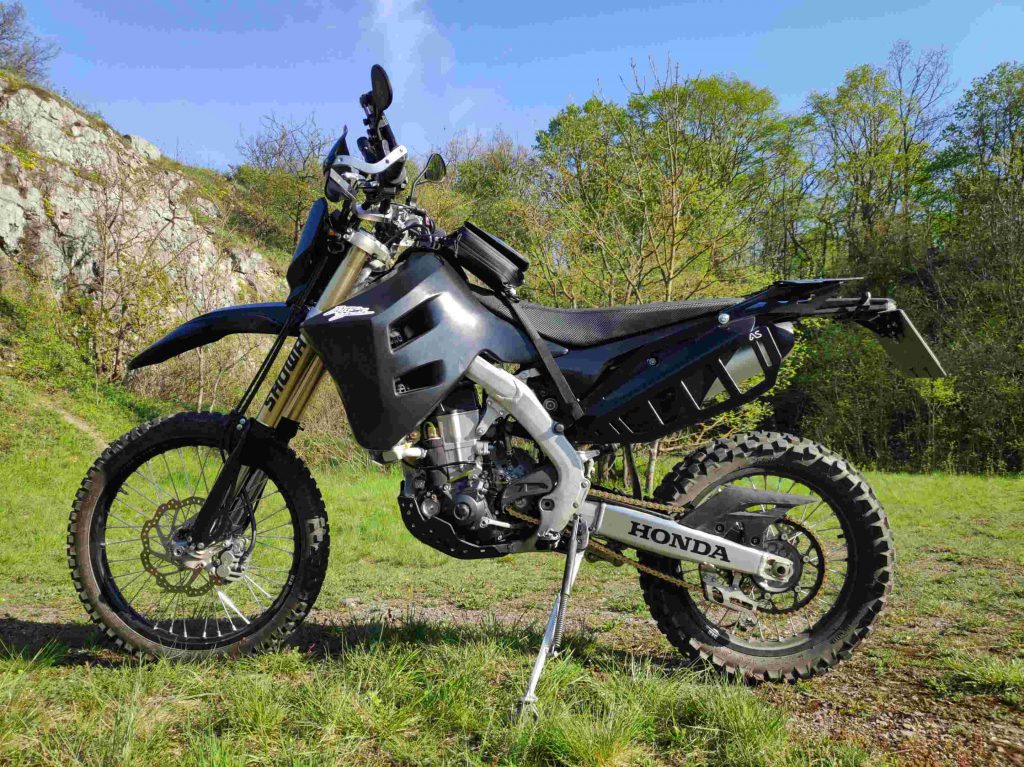
slimmest dual-sport-motorcycle so far.
Yeah, that’s it. I hope you liked this write-up about the modifications, which I think were worth the hassle for overcoming the hurdles of my incoming adventures.
For Information 1: To all of you which are interested in how I deal with the short maintenance intervalls: I’m currently evaluating at my own the service intervals for that bike on the road. Within the next months, I will publish my maintenance list for that bike, and you can see how it works out over the time and high mileage usage.
For Information 2: Short updates regarding my latest journey, you will find first on Instagram and Facebook. Later, weekly ride reports will be shared to via dualadventure.com or / and on my facebook group. For the links, just click the icons below.
Interested in my doings? Than feel free to join my social media channels for further updates! ➡